JK Dual Battery Setup: Complete Installation Guide
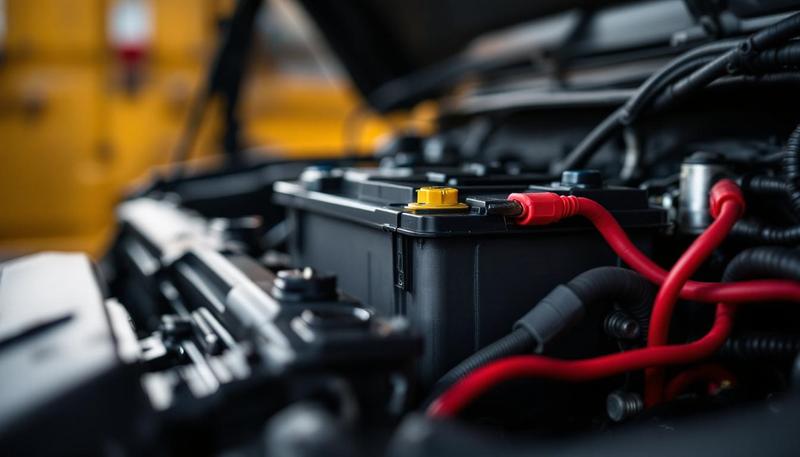
A dual battery system gives your JK the electrical reserve to run accessories without worrying about being stranded with a dead starting battery. Whether you’re overlanding for days, running a winch in remote areas, or camping off-grid, a properly installed dual battery setup provides peace of mind and capability that a single battery simply cannot match.
This guide walks you through the complete process: understanding whether you need dual batteries, choosing the right components, and installing them correctly. We’ll cover isolator types, battery options, mounting solutions, and wiring best practices. A dual battery system pairs perfectly with auxiliary switches to manage multiple high-draw accessories reliably.
Do You Actually Need Dual Batteries?
Before investing $500-1,500 in a dual battery system, honestly assess your needs.
You Likely Need Dual Batteries If:
- You run a 12V fridge/freezer for extended periods with the engine off
- You camp off-grid and need power for lighting, charging devices, and accessories overnight
- You wheel in remote areas where a dead battery means a very long walk
- You run a winch frequently and want guaranteed power regardless of accessory loads
- You have an amateur radio, inverter, or other high-draw accessories integrated with auxiliary switches
You Probably Don’t Need Dual Batteries If:
- You’re a weekend warrior who runs the engine while using accessories
- Your heaviest accessory load is a light bar you only use while driving
- You have easy access to a jump start if something goes wrong
- You’re on a tight budget (better to invest in a quality single AGM battery)
The Honest Truth About Dual Batteries
A dual battery system adds 50-80 pounds of weight, requires significant installation effort, and costs $500+ for a basic setup. A single quality AGM battery handles most JK builds just fine. The decision comes down to how you actually use your Jeep, not how you imagine using it.
How Dual Battery Systems Work
Understanding the system components helps you make informed choices.
System Overview
A dual battery system consists of:
- Primary (starting) battery: Powers vehicle starting and essential systems
- Auxiliary battery: Powers accessories and provides backup
- Isolator/separator: Controls charging and prevents both batteries from draining
- Wiring: Connects components with appropriate gauge wire
- Battery tray: Mounts the second battery securely
The Isolation Principle
The key to any dual battery system is keeping your starting battery protected. Without isolation, running your fridge all night could drain both batteries, leaving you stranded. The isolator ensures your starting battery remains charged even when accessories deplete the auxiliary battery.
Isolator Types Explained
The isolator is the brain of your dual battery system. Different types offer different features at different price points.
Solenoid-Based Isolators
The simplest isolation method uses a high-amperage solenoid (relay) to connect or disconnect the batteries.
| Type | Trigger Method | Price Range |
|---|---|---|
| Manual solenoid | Dash switch | $30-80 |
| Ignition-triggered solenoid | Ignition signal | $50-100 |
Pros: Simple, inexpensive, easy to troubleshoot Cons: No smart charging management, can drain both batteries if left engaged
Best for: Budget builds, simple setups, owners who understand the system
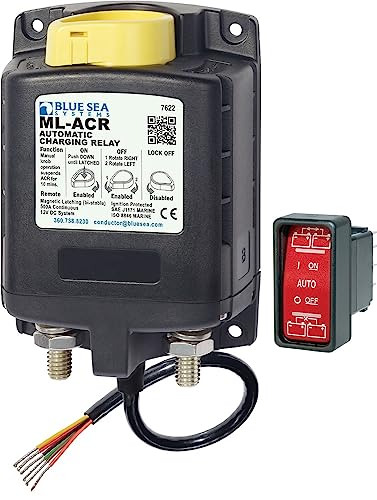
Voltage Sensitive Relays (VSR)
VSRs automatically connect the batteries when the starting battery reaches charging voltage (typically 13.3V) and disconnect when voltage drops (around 12.8V).
| Popular Models | Features | Price Range |
|---|---|---|
| Blue Sea ML-ACR | Automatic, manual override | $150-200 |
| PAC-200 | Simple automatic operation | $80-120 |
| Redarc SBI | Dual sensing, ignition override | $150-200 |
Pros: Automatic operation, prevents over-discharge, reasonable price Cons: Simple on/off charging, no optimization for battery type
Best for: Most JK dual battery builds, AGM batteries, moderate accessory loads
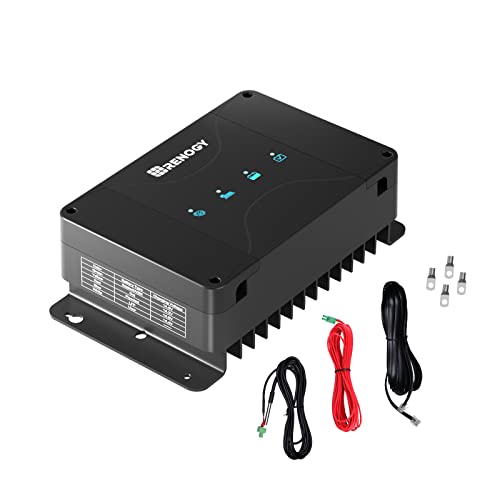
DC-DC Chargers
DC-DC chargers actively manage charging voltage and current, providing optimal charging for your specific battery type.
| Popular Models | Output | Features | Price Range |
|---|---|---|---|
| Redarc BCDC1225D | 25 amp | MPPT solar input, multi-stage charging | $350-400 |
| Renogy DCC50S | 50 amp | Solar input, Bluetooth monitoring | $250-300 |
| Victron Orion-Tr | 30 amp | Multi-stage, programmable | $200-250 |
Pros: Optimal charging for all battery types, supports lithium, solar input options Cons: More expensive, more complex installation
Best for: Lithium battery systems, heavy accessory users, overland builds with solar
Isolator Comparison Summary
| Type | Automatic | Smart Charging | Lithium Compatible | Price |
|---|---|---|---|---|
| Manual solenoid | No | No | No | $ |
| Ignition solenoid | Semi | No | No | $ |
| VSR | Yes | No | Some | $$ |
| DC-DC charger | Yes | Yes | Yes | $$$ |
Battery Selection for Dual Systems
Both batteries need to work together effectively. Here’s what to consider.
Battery Types for JK Dual Systems
| Type | Pros | Cons | Price Range |
|---|---|---|---|
| Flooded lead-acid | Cheap, available everywhere | Requires maintenance, shorter cycle life | $100-150 |
| AGM | Maintenance-free, vibration resistant, deep cycle capable | Heavier, more expensive | $200-350 |
| Lithium (LiFePO4) | Lightweight, excellent cycle life, deep discharge | Expensive, requires DC-DC charging, cold weather limitations | $600-1,200 |
Recommended Dual Battery Components
Our Battery Recommendations
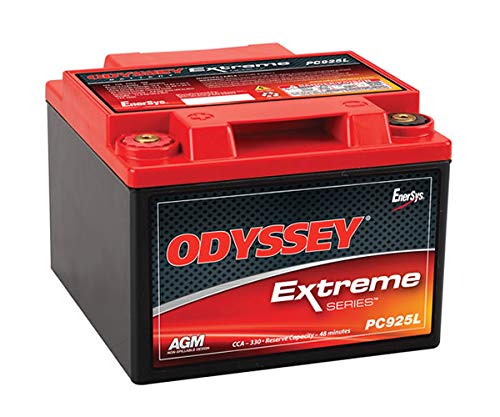
Best Overall: Odyssey PC1500 (Group 34)
The Odyssey PC1500 offers exceptional deep cycle capability while maintaining excellent starting power. Its thin-plate pure lead (TPPL) construction provides more power in a smaller package.
- 68Ah capacity
- 850 CCA
- True deep cycle capability (400+ cycles to 80% DOD)
- 3-4 year warranty
- Price: $300-350
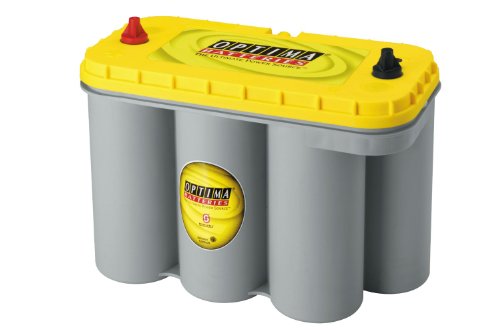
Best Value: Optima YellowTop (Group 34/78)
The YellowTop is the go-to dual-purpose AGM battery. It handles deep cycling reasonably well while providing reliable starting power.
- 55Ah capacity
- 750 CCA
- Dual-purpose design
- 2-3 year warranty
- Price: $250-300
Budget Option: XS Power D3400
XS Power batteries offer good performance at competitive prices. They’re popular in car audio applications but work well for overlanding.
- 65Ah capacity
- 1000 CCA
- Sealed AGM design
- 3-year warranty
- Price: $200-250
Lithium Option: Battle Born 100Ah
For weight savings and maximum capacity, lithium is the premium choice. Battle Born’s 100Ah battery provides more usable capacity than most AGM pairs.
- 100Ah usable capacity (can discharge to 100%)
- Built-in BMS (battery management system)
- 3000+ cycle life
- 10-year warranty
- Price: $900-1,000
- Note: Requires DC-DC charger for proper charging
Battery Matching Rules
- Same type: Don’t mix AGM with flooded or lithium
- Same brand/model: Different AGM batteries have different charging characteristics
- Same age: Adding a new battery to an old one creates imbalances
- Same capacity: Mismatched capacities lead to improper charging
JK Dual Battery Mounting Options
Where you put your second battery affects installation complexity and vehicle balance.
Under-Hood Installation
The most popular location removes the factory air box and replaces it with a battery tray and relocated air intake.
Pros:
- Short wiring runs
- Easy access for monitoring and maintenance
- Keeps weight forward for better handling
Cons:
- Requires air intake relocation
- High under-hood temperatures stress batteries
- Space is tight for larger batteries
Popular trays:
- Genesis Off Road dual battery tray ($200-300)
- Artec Industries battery tray ($150-250)
- Custom fabrication
Under Rear Seat Installation
Removing the rear seat base creates space for a battery and other accessories.
Pros:
- Protected from engine heat
- Accessible from inside the vehicle
- Doesn’t require under-hood modifications
Cons:
- Longer wiring runs (higher cost, more voltage drop)
- Loses rear seat functionality
- Requires venting for non-sealed batteries
Cargo Area Installation
Battery boxes in the cargo area work for builds that have already lost cargo space to other modifications.
Pros:
- Easy installation
- Flexible positioning
- Good access
Cons:
- Longest wiring runs
- Uses cargo space
- Must be secured to prevent shifting
Installation Location Comparison
| Location | Wiring Length | Heat Exposure | Ease of Install | Space Impact |
|---|---|---|---|---|
| Under hood | Short (3-4 ft) | High | Moderate | Requires air box relocation |
| Under rear seat | Medium (8-10 ft) | Low | Easy | Loses rear seat |
| Cargo area | Long (10-15 ft) | Low | Easy | Uses cargo space |
Complete Installation Guide
This section outlines the installation process for a typical under-hood dual battery setup with a VSR isolator.
Required Components
| Component | Purpose | Typical Cost |
|---|---|---|
| Second battery | Auxiliary power | $200-350 |
| Battery tray | Mounts second battery | $100-300 |
| Isolator (VSR or DC-DC) | Manages charging | $100-400 |
| 1/0 AWG cable | Main battery interconnect | $50-100 |
| 4 AWG cable | Isolator connections | $30-50 |
| ANL fuse holder + fuse | Overcurrent protection | $20-40 |
| Battery terminals | Ring terminals for connections | $20-30 |
| Cable ties, loom, hardware | Installation supplies | $20-40 |
Total budget: $540-1,310 depending on component choices
Wiring Diagram Overview
The diagram below shows how power flows through the system. Follow the numbered steps from left to right:
POSITIVE PATH (Red Wire — 1/0 AWG):
① STARTING BATTERY (+) → ② ANL Fuse (150A) → ③ Isolator/DC-DC Charger → ④ ANL Fuse (150A) → ⑤ AUX BATTERY (+)
NEGATIVE PATH (Black Wire — 1/0 AWG):
⑥ STARTING BATTERY (−) → Chassis Ground Point
⑦ AUX BATTERY (−) → Chassis Ground Point (same bolt or within 12 inches)
ACCESSORY PATH (from Aux Battery only):
⑤ AUX BATTERY (+) → ⑧ Inline Fuse → ⑨ Fuse Block → Fridge, Lights, Inverter, etc.
Key rules: Always install a fuse within 12 inches of each battery’s positive terminal. Use the same gauge wire for negative cables as positive cables. Clean all chassis ground points down to bare metal before bolting.
Installation Steps
Step 1: Plan Your Layout
Before purchasing anything, mock up your installation. Determine:
- Exact battery tray location
- Isolator mounting position
- Cable routing paths
- Firewall penetration points (if running to cargo area)
Step 2: Install the Battery Tray
For under-hood installations:
- Remove factory air box
- Install air intake relocation kit
- Mount battery tray according to manufacturer instructions
- Verify clearance for hood closure
Step 3: Mount the Isolator
Install your VSR or DC-DC charger in a protected location:
- Away from extreme heat sources
- Protected from water intrusion
- Accessible for troubleshooting
- Close to batteries to minimize cable runs
Step 4: Run Interconnect Cable
Connect the two battery positive terminals through the isolator:
- Install ANL fuse holder near starting battery (within 12 inches)
- Run 1/0 or 2/0 AWG cable from fuse holder to isolator input
- Run 1/0 or 2/0 AWG cable from isolator output to auxiliary battery
- Install second ANL fuse near auxiliary battery
Step 5: Ground Connections
Ground is just as important as positive:
- Ground auxiliary battery to chassis with same gauge as positive cables
- Ensure ground points are clean, bare metal
- Use star washers and apply dielectric grease
Step 6: Connect Isolator Sense Wires
Most isolators require sense wire connections:
- VSRs typically have battery voltage sense wires
- DC-DC chargers may require additional connections for ignition sense
Step 7: Install Auxiliary Fuse Block
Connect your accessories to the auxiliary battery through a fuse block:
- Mount fuse block in accessible location
- Run feed wire from auxiliary battery positive with inline fuse
- Connect accessory circuits to fuse block outputs
Step 8: Test the System
Before buttoning everything up:
- Check all connections are tight
- Verify correct polarity
- Start engine and confirm both batteries charge
- Test isolator disconnection when engine stops
- Load test with accessories to verify proper operation
Wiring Best Practices
Cable Sizing
| Cable Run | Recommended Gauge |
|---|---|
| Battery interconnect (under 4 feet) | 2/0 AWG |
| Battery interconnect (4-8 feet) | 1/0 AWG |
| Isolator to batteries | 2 AWG minimum |
| Aux fuse block feed | 4-8 AWG depending on total load |
Critical Ground Rules
Poor grounds cause more dual battery problems than any other issue.
- Use heavy gauge ground cables: Match your positive cable size
- Ground both batteries to chassis: Don’t rely on engine block grounds
- Clean mounting surfaces: Remove paint, primer, and rust
- Use star washers: They bite into metal for better contact
- Apply dielectric grease: Prevents corrosion
- Create redundant paths: Two smaller grounds are better than one large one
Fuse Protection
| Location | Fuse Type | Rating |
|---|---|---|
| Starting battery positive | ANL | 150-200 amp |
| Auxiliary battery positive | ANL | 150-200 amp |
| Aux fuse block feed | ANL or MIDI | Based on total load |
Install fuses within 12 inches of each battery positive terminal.
Accessory Integration
Your dual battery system powers accessories through the auxiliary battery, protecting your starting battery.
What to Connect to Auxiliary Battery
- 12V fridge/freezer
- Camp lighting and light bars
- Inverter
- Amateur radio or CB radio
- Accessory power outlets
- USB charging ports
- Onboard air compressor (optional)
What to Keep on Starting Battery
- Ignition system
- Fuel pump
- ECU
- Factory lighting
- Factory accessories
- Winch (unless you want auxiliary battery backup)
Winch Wiring Options
Option 1: Starting battery only Simple, but no backup if accessories drain your starting battery.
Option 2: Auxiliary battery only Protects starting battery, but no backup if auxiliary is depleted.
Option 3: Both batteries with manual switch Maximum flexibility - choose which battery (or both) powers the winch. This integrates well with auxiliary switches.
For complete winch wiring guidance, see our JK Winch Installation Guide.
Monitoring Your Dual Battery System
Knowing your battery status prevents surprises.
Battery Monitor Options
| Type | Features | Price |
|---|---|---|
| Simple voltmeter | Voltage display only | $20-40 |
| Dual voltmeter | Both batteries displayed | $30-60 |
| Smart monitor (Victron, Renogy) | Voltage, current, state of charge, Bluetooth | $150-250 |
What to Monitor
- Voltage: Below 12.4V indicates significant discharge
- State of charge: Percentage of capacity remaining
- Current draw: How fast you’re using power
- Charging current: Confirms alternator is replenishing batteries
Maintenance and Troubleshooting
Regular Maintenance
| Task | Frequency |
|---|---|
| Check terminal tightness | Every oil change |
| Inspect for corrosion | Monthly |
| Load test batteries | Annually |
| Clean terminals | As needed |
| Check isolator operation | Quarterly |
Common Problems and Solutions
| Problem | Likely Cause | Solution |
|---|---|---|
| Auxiliary battery not charging | Isolator not engaging | Check sense wires, verify alternator output |
| Both batteries draining | Isolator stuck engaged | Replace isolator, check for shorts |
| Slow cranking | Starting battery weak | Load test, replace if necessary |
| Voltage drop under load | Undersized cables or poor grounds | Upgrade cables, clean connections |
| Isolator clicking | Voltage threshold too sensitive | Adjust if possible, consider DC-DC charger |
Cost Summary
Budget Build (~$500-700)
- Optima YellowTop battery: $250
- Generic battery tray: $100
- PAC-200 or similar VSR: $100
- Wiring and fuses: $100
Mid-Range Build (~$800-1,200)
- Odyssey PC1500 battery: $350
- Genesis or Artec tray: $200
- Blue Sea ML-ACR: $175
- Quality wiring and fuses: $150
Premium Build (~$1,500-2,000)
- Battle Born lithium: $950
- Custom tray: $200
- Redarc BCDC1225D: $400
- Premium wiring and monitoring: $250
Related Articles
- JK Electrical Upgrades Guide - Complete electrical system overview
- Best JK Aux Switches - Organize and control multiple accessories powered by dual batteries
- Best Light Bars for JK - Power-hungry accessories that benefit from dual batteries
- Best JK CB Radio - Extended overlanding communication powered by auxiliary battery
- JK Onboard Air Compressor - High-draw accessory requiring dual battery support
- JK Winch Installation - High-current accessory wiring
- JK Buyers Guide - Evaluating electrical system condition
Get the Free JK Build Planner
Complete PDF with mod checklists, gear ratios, tire sizing charts, and budget worksheets. Everything you need to plan your JK build.
No spam. Unsubscribe anytime. By subscribing, you agree to our Privacy Policy.
Frequently Asked Questions
Do I really need a dual battery system in my JK?
Only if you're running accessories with the engine off (fridge, camp lights, inverter) or need guaranteed winch power in remote areas. Most weekend wheelers do fine with a quality single AGM battery upgrade. Dual batteries add weight, cost, and complexity - make sure you actually need the capability.
Where does the second battery go in a JK?
The most common location is under the hood where the factory air box sits, requiring an air intake relocation. Other options include behind the rear seat, in the cargo area, or under the rear cargo floor. Under-hood installations keep wiring short but require more modification.
What size batteries work for JK dual battery setups?
Most JK dual battery trays accommodate Group 34 or Group 35 batteries. Popular choices include the Odyssey PC1500 (Group 34), Optima YellowTop (Group 34/78), and XS Power D3400 (Group 34). Match both batteries in type and capacity for optimal performance.
Can I mix different battery types in a dual battery system?
You can, but it's not recommended. Mixing battery types (AGM with lead-acid, or different AGM brands) creates charging imbalances. The batteries have different charging profiles, leading to one battery being overcharged or undercharged. Use identical batteries for best results.
How long will a dual battery system run my fridge?
A typical 12V fridge draws 2-4 amps when running (cycles on/off). With a 100Ah auxiliary battery, expect 20-40 hours of runtime before reaching 50% discharge. Actual time varies based on ambient temperature, fridge settings, and how often you open it. Always keep your starting battery isolated to ensure you can start the engine.
Jeep JK Guide
We're JK owners who've been building, breaking, and fixing Wranglers for years. Everything here is tested on our own rigs - no sponsored fluff, just honest recommendations.
Learn more about us →Get the JK Build Planner
Free PDF with complete build checklists, gear ratios, and tire fitment guides.
By subscribing, you agree to our Privacy Policy.
Related Articles

Best LED Halo Headlights for Jeep Wrangler JK: Top 7 Picks
The best LED halo headlights for Jeep Wrangler JK balance brightness, DOT approval, and budget. Compare 7 top picks from $60-$600 with installation tips.
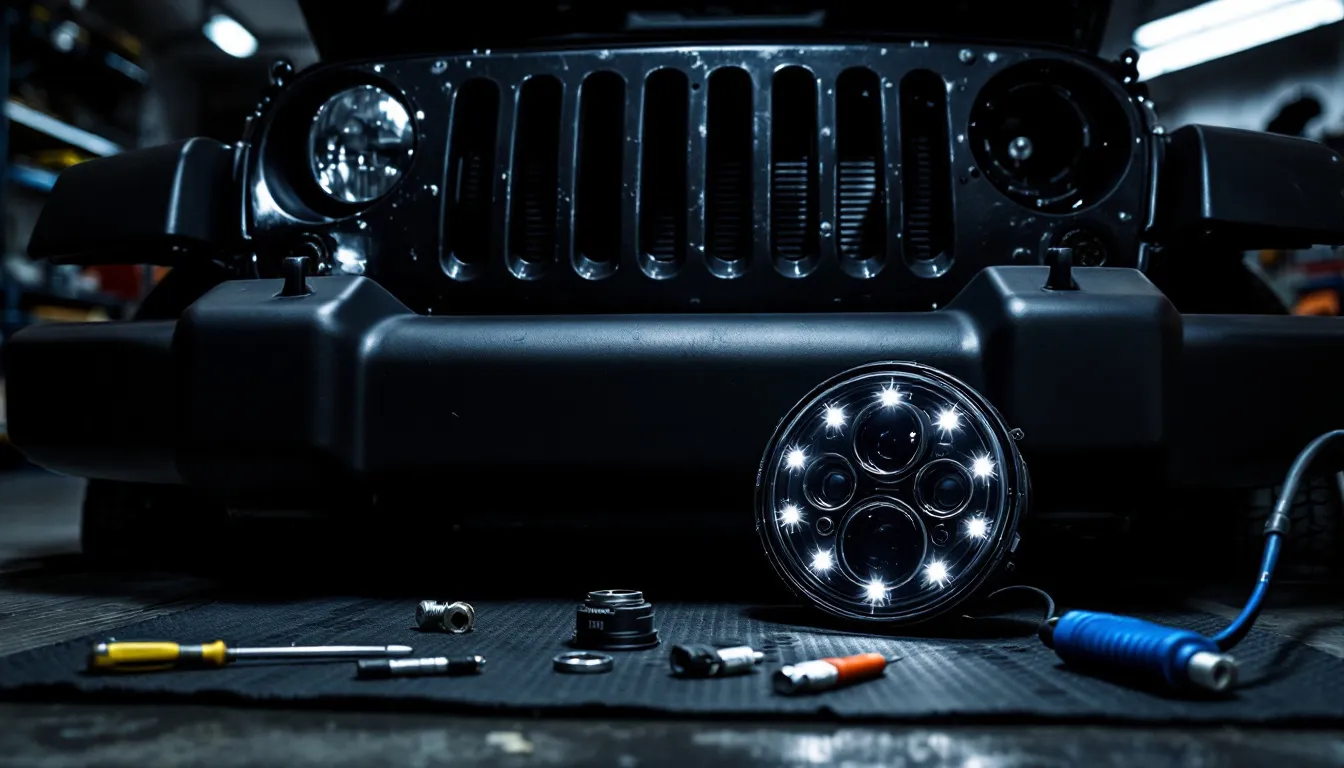
How to Install LED Headlights on Jeep Wrangler JK: Complete Step-by-Step Guide
Learn how to install LED headlights on your Jeep Wrangler JK with this step-by-step guide. DOT-approved options, aiming tips, and flicker fixes included.

Best LED Fog Lights for Jeep JK: Brightest Off-Road Vision