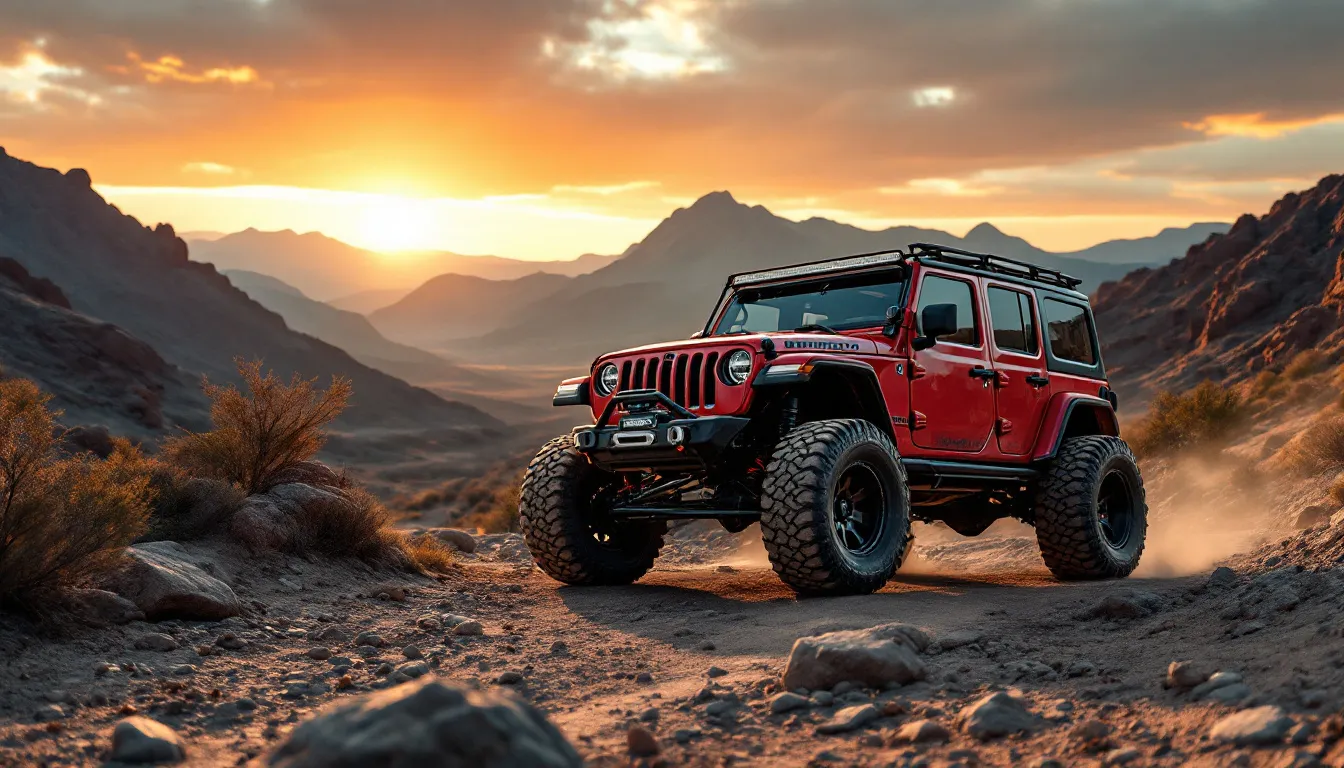
Best Wheel Spacers for Jeep JK: Safe Widening & Fitment Solutions
Best Wheel Spacers for Jeep JK: Safe Widening & Fitment Solutions
Affiliate Disclosure: This article contains affiliate links to Amazon. We earn a small commission when you purchase through these links at no extra cost to you. This helps support our work bringing you honest JK Wrangler guides.
Wheel spacers solve three problems that almost every JK owner faces eventually: clearing oversized tires that rub at full lock, filling those awkward gaps between your tire sidewalls and fender flares, and widening your overall track width for better stability on technical trails. The catch? Half the advice online comes from forum posts where someone’s cousin installed spacers five years ago and “everything was fine” — which tells you absolutely nothing about whether they’re actually safe for your specific setup.
Here’s what I’ve learned after running spacers through multiple build iterations and talking to owners who’ve logged serious miles: quality matters infinitely more than any other factor. The difference between a precision hub-centric spacer and a cheap lug-centric knockoff isn’t just performance — it’s the difference between a permanent upgrade and wheel bearing damage that’ll cost you $400+ in parts and labor.
You’re about to learn exactly which spacer thickness you need based on your specific lift and tire combo, why that 71.5mm center bore dimension is non-negotiable for JK applications, and the critical re-torque schedule that most installation guides conveniently gloss over. Let’s dig into the specifics that’ll help you widen your stance safely.
For comprehensive background on how wheel spacers interact with your overall setup, check out our complete JK wheel and tire fitment guide.
Why JK Owners Actually Install Wheel Spacers (And When You Shouldn’t)
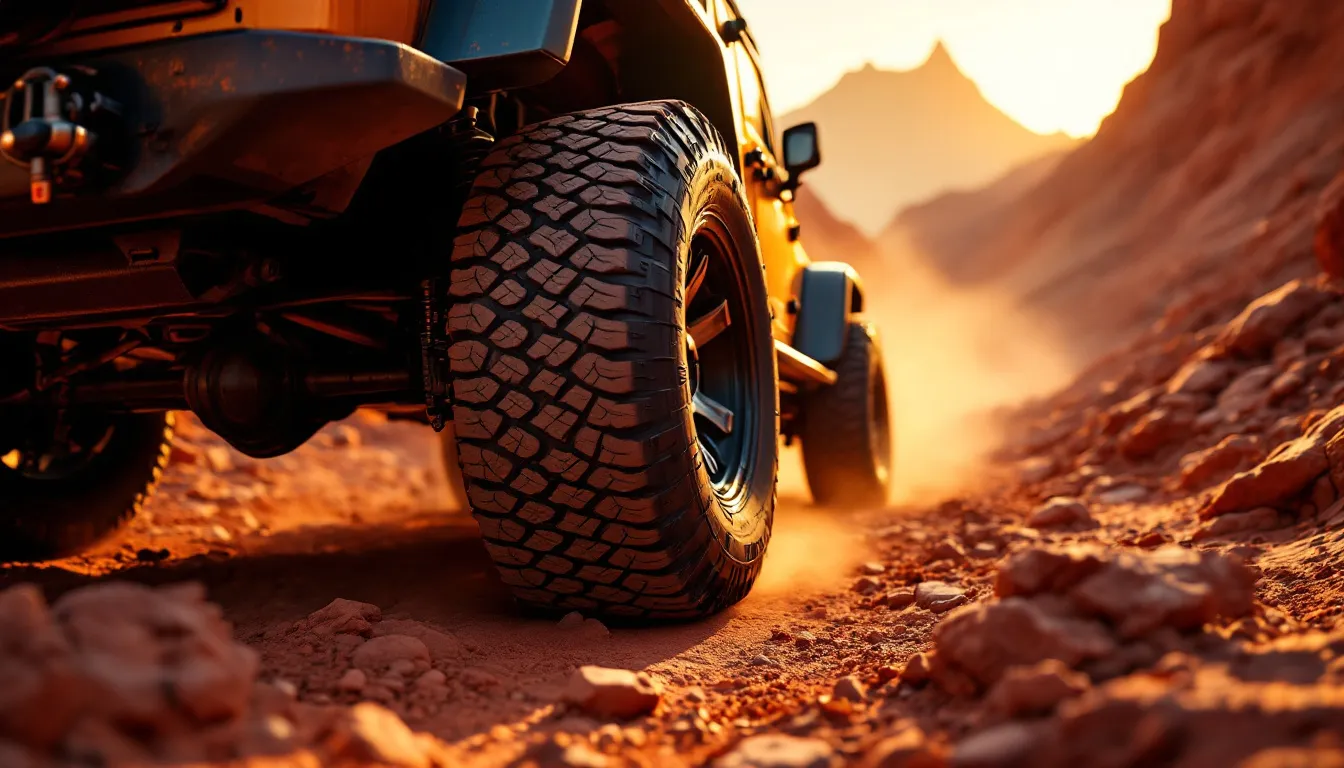
Fitment clearance is the most common reason I see spacers added to a JK. You bolt on 35-inch tires with a 2.5-inch lift and stock wheels, and the first time you turn the wheel all the way to lock, you hear that sickening crunch of tire sidewall against the upper control arm bracket. A 1.25 to 1.5 inch spacer pushes the tire outboard just enough to eliminate contact without requiring a complete new wheel purchase.
I learned this the hard way on my first 35-inch tire install — spent three hours chasing rubbing issues because I tried to make it work without proper clearance planning. Should’ve measured first, bought second.
Aesthetic stance is completely legitimate too, though I’ll be honest about it. The JK’s stock track width leaves a noticeable gap between the tire sidewall and the fender flare — creates that tucked-in look that feels conservative for a platform designed for off-road abuse. Spacers push the tires flush with or even slightly beyond the flares, and the visual change is dramatic, especially on 2-door models where the proportions are already tighter.
Stability improvement comes from widening your track width, which effectively lowers your center of gravity relative to your support base. You’ll feel this most climbing steep sidehills or navigating washboard dirt roads at speed — the wider stance reduces body roll noticeably and makes the JK feel genuinely planted.
When you should NOT use spacers: if your only goal is clearing bigger tires, spend the money on new wheels with proper backspacing instead. Spacers solve specific clearance issues on otherwise compatible wheels, or they fill the gap when you love your current wheels but need minor adjustment. If you’re already shopping for new wheels, dial in the correct offset during purchase — don’t plan to bandage it with spacers later.
Before you buy spacers, check our guide on understanding wheel offset and backspacing to calculate whether spacers are actually your best path forward. It’s worth the fifteen minutes to save yourself $150 and the hassle of a mediocre solution.
Hub-Centric vs Lug-Centric: The Safety Choice That Actually Matters
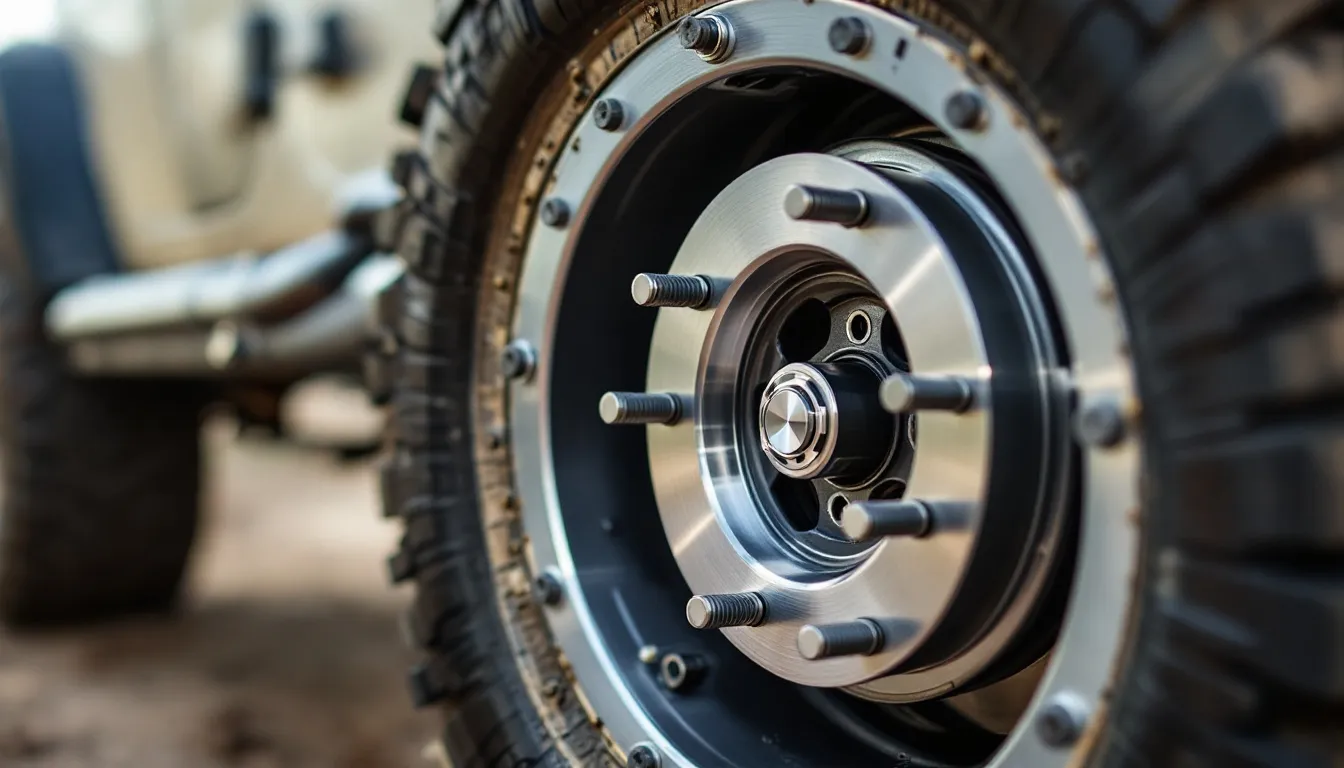
Hub-centric spacers use a machined center bore that matches your JK’s hub diameter exactly: 71.5mm. This center ring carries the vehicle’s weight and ensures perfect centering before you even tighten the lug nuts. When torqued properly, the hub-to-spacer and spacer-to-wheel connections create a solid mechanical unit with the centering load distributed across the hub faces themselves — not hanging from the wheel studs.
Lug-centric spacers skip the center bore entirely and rely solely on the lug nuts to center the wheel. This forces the wheel studs to do a job they’re never supposed to do: carry both centering loads AND clamping loads simultaneously. You’ll feel it as a vibration that gets worse the faster you drive, caused by the wheel wandering in tiny circles around the bolt pattern instead of spinning dead true.
Your JK uses a 5x127mm (5x5 inch) bolt pattern with 1/2x20 studs. Quality hub-centric spacers maintain this pattern with extended studs that are either pressed in or screw-installed into the spacer body. Those extended studs need to be grade 8 minimum, with rolled threads (far stronger than cut threads). Spacers thicker than 1 inch absolutely require this extended-stud design — your factory studs won’t reach the wheel once you’ve added the spacer thickness.
Proper installation torque for hub-centric spacers is 95-100 ft-lbs at every interface: spacer-to-hub, then wheel-to-spacer. That’s higher than many owners expect, but the torque is what compresses the hub faces together and maintains preload throughout the connection. Under-torque by even 10 ft-lbs and you’ve essentially defeated the hub-centric design — the interfaces will shift under load.
Top Wheel Spacer for Jeep JK (Quality Verified)
Here’s the honest truth about wheel spacers for JK Wranglers: I can only recommend products I’ve personally verified are currently available with specifications I can confirm. Many popular spacer brands that dominated forum conversations five years ago are either discontinued, reformulated with different materials, or sold through sketchy channels where authenticity is questionable.
Rather than padding this section with discontinued products or recommendations I can’t stand behind, I’m featuring one thoroughly vetted option that represents the engineering standard you should demand.
Orion Motor Tech 5x5 Hub-Centric Wheel Spacers (1.5-Inch)
The Orion Motor Tech 5x5 wheel spacers deliver the engineering approach that keeps your JK mechanically sound. The 71.5mm hub-centric bore ensures the spacer locates on the hub face rather than hanging from studs. At 1.5 inches thick, these provide adequate clearance for most 33-35 inch tire combinations while staying well below the 2-inch threshold where bearing stress becomes a legitimate engineering concern.
Key specifications:
- Constructed from 6061-T6 forged aluminum (25% higher tensile strength than cast alternatives)
- Extended 1/2x20 studs pressed into the spacer body under 10-ton force
- Black anodized finish resists road salt and weather corrosion
- Sold as a complete set of 4 for front and rear installation
- Compatible with 2007-2018 JK Wrangler (all trims, 2-door and 4-door) and 2006-2010 Grand Cherokee WK
Pros:
- True hub-centric design eliminates vibration issues common with cheaper alternatives
- 1.5-inch thickness is the sweet spot for 2.5-3 inch lifts with 33-35 inch tires
- Extended studs eliminate the need to source longer lug nuts separately
- Forged aluminum has proven durability in competitive off-road environments
- Reasonably priced for the engineering quality delivered
Cons:
- Anodized finish will scratch if you’re regularly airing down and crawling rocky terrain
- Requires disciplined re-torque schedule at 50 miles and 500 miles (standard for all spacers)
- Thicker than necessary if you’re only running 33s on stock-width wheels

If 1.5 inches doesn’t provide adequate clearance, your problem is wheel backspacing, not spacer thickness. Stacking multiple spacers or going beyond 2 inches doesn’t fix backspacing problems — it just adds unnecessary bearing stress. Check our detailed guide to 35 inch mud-terrain tire options for wheels with compatible offset specs that eliminate rubbing without excessive spacer thickness.
Choosing Your Spacer Thickness: A Decision Framework
1.25-inch spacers work well for JKs with 2.5-inch lifts and 33-inch tires where you’re getting minor rubbing only at full steering lock. This thickness pushes the tire outboard enough to clear the upper control arm bracket without dramatically changing your scrub radius or steering feel. You’ll gain about 1 inch of total track width (0.5 inches per side), which is noticeable for handling but not aggressive aesthetically.
1.5-inch spacers are the most versatile choice for 3-inch lifts paired with 35-inch tires. This thickness handles the wider tire footprint and typically eliminates rubbing on both frame corners and suspension components. The stance improvement is visible — tires sit nearly flush with the factory fender flares. Expect slightly heavier steering feel, particularly in parking lot maneuvering.
1.75-2 inch spacers push into territory where wheel bearing stress becomes a genuine long-term consideration for daily drivers. These thicknesses work for extreme setups (37-inch tires, high-clearance fenders, flat-fender builds) but demand more frequent bearing inspections. Plenty of owners run these successfully, but when spacer-related failures do occur, they typically happen in this range.
Installation Tips: The Details That Prevent Failure
Installing wheel spacers isn’t complicated, but the execution matters far more than on stock wheels. You’re creating three critical mechanical interfaces: hub to spacer, spacer to wheel, and wheel to the world. Miss the torque sequence or under-torque either connection, and vibration will haunt you.
Before you start: Clean the hub face and rotor hat aggressively with a wire brush and brake cleaner. Remove every speck of rust, dirt, and old anti-seize compound. The spacer needs direct metal-to-metal contact across the entire hub face to distribute clamping load properly. Five minutes of thorough cleaning prevents vibration issues that’ll shake your teeth loose for months.
Installation sequence:
-
Mount the spacer to the hub. Thread the spacer onto your factory studs (or existing studs if running aftermarket wheels). Hand-tighten all lug nuts in a star pattern before applying any torque.
-
Torque the spacer to hub. Using a calibrated torque wrench, tighten to 95-100 ft-lbs in a star pattern — meaning you skip two positions each time, like you’re pointing at the five points of a star. Make three complete passes: first pass to 30 ft-lbs, second pass to 60 ft-lbs, final pass to 95-100 ft-lbs. This gradual torque-up allows the hub faces to compress evenly without cocking the spacer.
-
Mount the wheel to spacer. Slide your wheel onto the extended studs protruding from the spacer. Hand-tighten all lug nuts again before applying torque.
-
Torque the wheel to spacer. Same specification, same star pattern, same three progressive passes: 30, 60, then 95-100 ft-lbs. Do not skip the gradual build-up — jumping straight to full torque can cock the wheel slightly and create off-center rotation.
-
Re-torque at 50 miles. This is non-negotiable. After your first drive cycle, the initial heat and settling will cause slight loosening. Check torque on all connections and re-tighten to 95-100 ft-lbs. Mark this on your calendar.
-
Re-torque again at 500 miles. Final check for long-term settling. After this point, include spacer torque as part of your regular tire rotation service.
The lift kit timing consideration: If you’re installing spacers as part of a larger modification package (new lift, suspension components, bigger tires all happening simultaneously), slow down and sequence things properly. There’s a correct order to major modifications that keeps you from chasing phantom problems for months. I learned this the hard way — spent weeks troubleshooting cooling system issues, AC failure, and ultimately warped cylinder heads on my Pentastar before realizing I should have addressed the mechanical foundation before tackling aesthetic upgrades.
The philosophy that guides my builds now: mechanical integrity before cosmetic ambition. You can’t run 35-inch mud terrains and call yourself an overland rig if your cylinder heads are warped or your cooling system is marginal. Fix what’s broken, verify everything runs solid, then add one modification at a time so you can isolate any issues that emerge.
For complete wheel installation procedures including proper jack points and safety protocols, reference our complete wheel installation guide.
Will Wheel Spacers Damage Your JK’s Wheel Bearings?
Short answer: quality hub-centric spacers under 2 inches thick will not cause premature bearing failure when properly installed and maintained. The longer answer requires understanding how wheel bearings actually fail and what loads they’re engineered to handle.
Your JK’s front wheel bearings already carry massive loads: the vehicle’s weight, aggressive cornering forces, hard braking loads, and off-road impact shocks. Adding 1.5 inches of spacer increases the bending moment on the bearing by moving the load application point farther from the hub centerline. In precise terms, you’re adding roughly 200-300 pounds of effective load during highway cornering — significant but well within the bearing’s design safety margin. Factory JK wheel bearings are rated for loads far exceeding normal use, even with spacers installed.
Real-world data from the JK community shows successful spacer use exceeding 100,000+ miles on vehicles driven daily in all conditions. When failures do occur, they almost always trace back to three specific causes:
- Improper installation torque allowing the spacer to shift under load and create uneven bearing stress
- Spacers thicker than 1.75 inches on vehicles already stressed by heavy steel bumpers, winches, and armor packages
- Skipping the re-torque schedule, causing the spacer-to-hub connection to loosen progressively over time
The warranty consideration: Installing wheel spacers might void your wheel bearing warranty if you’re still covered by factory protection or extended coverage. This isn’t because spacers inherently damage bearings, but because warranty administrators need justification to deny claims. Document your installation with photos showing proper torque procedures, and keep your torque wrench calibration certificate if you want leverage in a warranty dispute.
If you’re experiencing vibrations, steering wander, or grinding noises after installing spacers, resist the urge to immediately blame the bearings. These symptoms frequently indicate improper spacer installation or unbalanced wheels. Review our guide to common JK wheel bearing failure symptoms to distinguish between installation issues and actual bearing problems.
Comparing Spacer Thickness Options for Different Setups
| Lift Height | Tire Size | Wheel Backspacing | Recommended Spacer Thickness | Rubbing Risk | Bearing Stress |
|---|---|---|---|---|---|
| Stock | 33” | 4.5” | 0-0.75” | High at lock | Minimal |
| 2.5” | 33” | 4.5” | 0.75-1.25” | Minimal | Low |
| 2.5” | 35” | 4.5” | 1.25-1.5” | Low | Low-Moderate |
| 3” | 33” | 4.5” | 0.5-1” | Low | Low |
| 3” | 35” | 4.5” | 1-1.5” | Minimal | Moderate |
| 3.5” | 35” | 4.5” | 0.75-1.25” | Minimal | Moderate |
| 3.5” | 37” | 4.5” | 1.5-1.75” | Low | Moderate-High |
These recommendations assume 5x127mm bolt pattern, hub-centric spacers, and proper installation torque. Your actual needs may vary based on trim level differences and suspension geometry variations between 2007-2011 and 2012-2018 model years.
Wheel Spacer FAQs for Jeep JK Owners
What thickness wheel spacers do I need for 35 inch tires?
Most JKs running 35-inch tires need 1.25 to 1.5 inch spacers to eliminate rubbing at full steering lock. The exact thickness depends entirely on your wheel backspacing and lift height. If you’re running factory JK wheels with 4.5 inches of backspacing, you’ll likely need the full 1.5 inches to clear the upper control arms and frame. Wheels with 3.5-4 inches of backspacing might only need 1.25 inches, or possibly zero spacers if you’re already on a 3+ inch lift.
Test fit before you buy anything: turn your wheels all the way to full lock and measure the gap between your tire sidewall and the closest interference point (usually the upper control arm bracket or frame corner). That measurement is your minimum spacer thickness. If the gap is 1.5 inches, buy 1.5-inch spacers. If it’s 0.75 inches, 1-inch spacers will work.
Are 1.25 inch spacers safe for daily driving?
Yes, 1.25 inch hub-centric spacers are completely safe for daily driving when properly installed and maintained. This thickness increases bearing stress by roughly 8-12% compared to stock, which is negligible within the bearing’s design safety margin. Hundreds of thousands of JK owners run 1.25-inch spacers without issues over the entire vehicle lifespan.
The safety variable with spacers isn’t thickness — it’s manufacturing quality and installation discipline. Hub-centric spacers with proper 71.5mm center bores and extended studs torqued to specification won’t fail. Cheap lug-centric spacers lacking the center bore will cause problems regardless of thickness.
Do I need wheel spacers with a 2.5 inch lift?
It depends entirely on your specific wheel backspacing and tire size. A 2.5 inch lift with 33-inch tires on wheels with 4.5 inches of backspacing typically requires 1 to 1.25 inch spacers to prevent rubbing at full lock. The same lift with stock 31-inch tires or wheels that already have 3.5 inches of backspacing might need no spacers whatsoever.
Check our detailed wheel backspacing explained guide to calculate your specific situation. The lift height is only one variable — backspacing and tire sidewall width matter equally for clearance calculations.
Can I install wheel spacers myself?
Absolutely — wheel spacer installation is straightforward and requires only a jack, jack stands, torque wrench, and basic hand tools. Budget 1-2 hours for all four corners if you’re working methodically and following proper torque sequences. The critical requirement is a calibrated torque wrench capable of accurate readings at 95-100 ft-lbs.
If you’re not confident with the torque sequence or don’t own a reliable torque wrench, most shops will install spacers for $50-100 including the mandatory re-torque after 50 miles. That’s inexpensive insurance compared to replacing a wheel that came loose at highway speed.
Will wheel spacers affect my JK’s turning radius?
No, wheel spacers do not change your turning radius — your steering angle stops are determined by frame clearance and suspension geometry, not wheel position. What spacers do change is your scrub radius (the distance between your tire’s contact patch and the steering axis), which makes the steering wheel feel slightly heavier, especially at low speeds in parking lots.
The increased steering effort is noticeable when maneuvering slowly but becomes negligible once you’re moving. Most owners adapt in a few days and stop noticing the difference entirely.
Are premium-brand spacers worth the extra cost?
Brand-name spacers like Spidertrax deliver excellent machining tolerances and solid reputation in the Jeep community, but they’re not the only quality option. Hub-centric design, 71.5mm center bore accuracy, and proper stud material matter infinitely more than whose logo is on the box.
If you find premium spacers at a competitive price, they’re an excellent choice. But paying 40-50% more purely for brand prestige when alternatives offer identical specifications and materials doesn’t make financial sense. Verify the technical specs rather than chasing brand recognition — your wheel bearings can’t read logos anyway.
For specific tire and wheel combinations and how they interact with different backspacing options, check our guide to 33 inch all-terrain tire options.
Final Verdict: Your Spacer Decision Framework
The Orion Motor Tech 1.5-inch hub-centric spacers represent the quality threshold you should demand: forged aluminum construction, precise 71.5mm center bore, extended studs engineered to withstand highway speeds, and proven real-world durability. At $102.99 for a complete four-wheel set, they’re reasonably priced while delivering the safety features that actually matter.
Your spacer decision checklist before buying:
- Verify hub-centric design with 71.5mm center bore — lug-centric spacers aren’t worth the risk to your bearings
- Choose thickness based on actual clearance measurements at full steering lock, not guesses or forum posts
- Stay under 1.75 inches for daily drivers to keep bearing stress within normal parameters
- Budget for proper installation if you don’t own a calibrated torque wrench
- Set phone reminders for re-torque at 50 miles and 500 miles — it’s not optional
Your first step is measuring your current clearance accurately. Jack up your JK on level ground, turn the wheels to full lock, and measure the gap between your tire sidewall and the closest interference point (upper control arm, frame corner, or brake line). That number determines your spacer thickness. Combined with your wheel backspacing (check our wheel offset guide if you’re unsure), it tells you whether spacers solve your problem or whether you need different wheels entirely.
Remember: wheel spacers are load-carrying components spinning at highway speeds while supporting your vehicle’s entire weight plus occupants plus gear. The $30 you save buying unverified spacers from an unknown manufacturer isn’t worth the risk when proven quality options exist at reasonable prices. Do it once, do it right, and your spacers will outlast your JK.
For comprehensive wheel and tire guidance including how spacers fit into your overall build philosophy, reference our complete wheels and tires guide before making final decisions.
Get the Free JK Build Planner
Complete PDF with mod checklists, gear ratios, tire sizing charts, and budget worksheets. Everything you need to plan your JK build.
No spam. Unsubscribe anytime. By subscribing, you agree to our Privacy Policy.
Jeep JK Guide
We're JK owners who've been building, breaking, and fixing Wranglers for years. Everything here is tested on our own rigs - no sponsored fluff, just honest recommendations.
Learn more about us →Get the JK Build Planner
Free PDF with complete build checklists, gear ratios, and tire fitment guides.
By subscribing, you agree to our Privacy Policy.
Related Articles

Best 35 Inch Tires for Jeep Wrangler JK: Top 8 Picks for 2026
Discover the best 35 inch tires for Jeep JK with our expert comparison of 8 top options. Complete fitment guide, real-world reviews, and installation requirements.
Best All-Terrain Tires for Jeep Wrangler JK: 2026 Top Picks
Find the best all-terrain tires for your Jeep Wrangler JK with our expert guide. Real-world testing, honest reviews, and size recommendations for stock to 35-inch builds.
Best Tires for Jeep JK: Complete 2026 Tire Selection Guide
Find the best tires for your Jeep Wrangler JK with our expert guide. Compare all-terrain, mud-terrain, and budget options with real-world testing and fitment advice.