Complete JK Lift Kit Guide: Everything You Need to Know
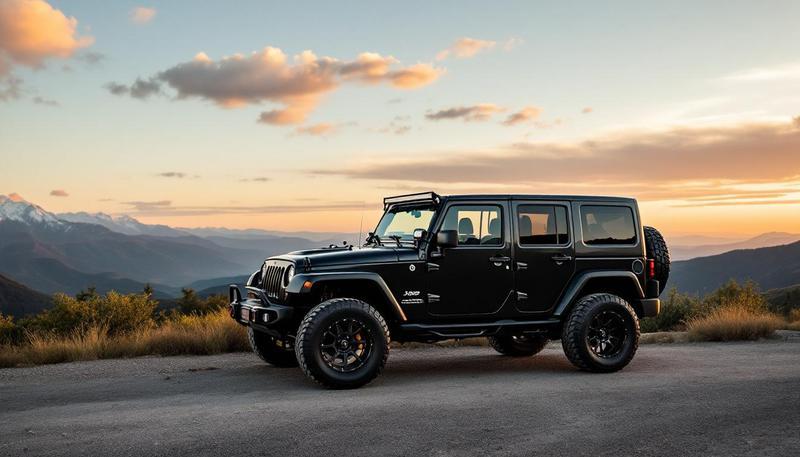
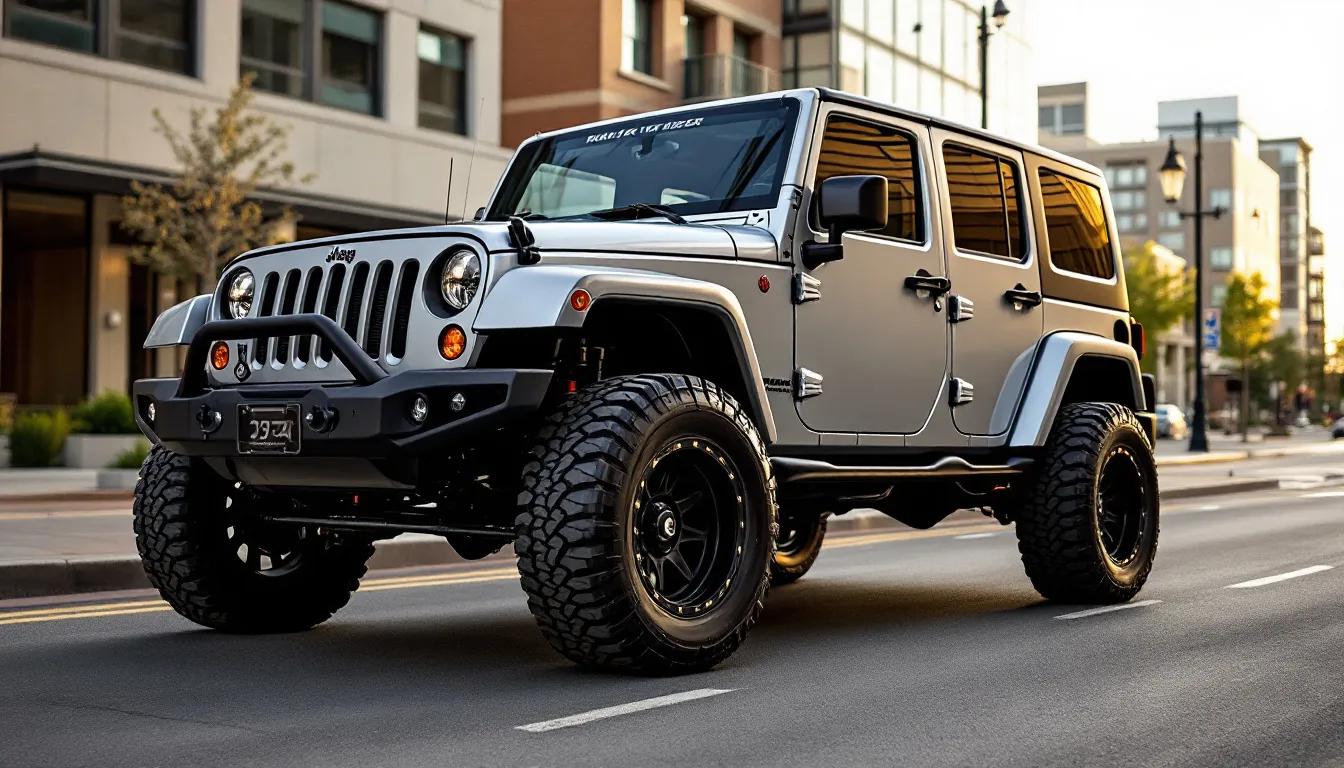
Lifting your Jeep Wrangler JK is probably the first modification you’re thinking about, and for good reason. A proper lift transforms your JK from a capable stock vehicle into a serious off-road machine. But with hundreds of options ranging from $300 to $5,000+, choosing the right setup can feel overwhelming.
This guide breaks down everything you need to know about JK lifts. We’ll cover the different types, help you choose the right height for your goals, explain every component involved, and help you avoid the costly mistakes we see JK owners make every day.
Why Lift Your JK?
Before diving into the technical details, let’s talk about why you’d lift your Wrangler in the first place. There are three main reasons:
Tire Clearance: The most common reason. Larger tires provide better off-road traction, ground clearance, and let’s be honest, they look great. But stock JKs can only fit 33” tires without rubbing. Want to run 35s or 37s? You’ll need lift.
Increased Ground Clearance: A lift raises your axles, frame, and body higher off the ground. This means you can clear larger obstacles without dragging your undercarriage.
Improved Approach and Departure Angles: Higher front and rear ends mean steeper obstacles become possible without scraping your bumpers.
Of course, there’s a fourth reason that plenty of owners won’t admit to: lifted Jeeps just look better. Nothing wrong with that.
Types of JK Lifts Explained
Not all lifts are created equal. Understanding the differences will save you money and frustration.
Spacer Lifts (Body Lifts and Coil Spacers)
What they are: Spacer lifts use polyurethane or aluminum blocks to raise your Jeep without replacing suspension components. Body lifts go between the body and frame. Coil spacers sit on top of your stock springs.
Pros:
- Cheapest option ($100-400)
- Easiest to install
- Retains factory ride quality (mostly)
Cons:
- Limited to about 2” of lift
- Doesn’t increase suspension travel
- Can cause premature spring wear
- Body lifts create visible gaps
Best for: Budget builds running 33” tires, owners who want a mild lift without major modifications.
Coil Spring Lifts (Short-Arm)
What they are: These kits replace your stock coil springs with taller aftermarket springs. “Short-arm” means you keep your factory control arm mounting points.
Pros:
- Better ride quality than spacers
- Proper suspension travel
- Wide range of heights (2-4”+)
- Most popular choice for good reason
Cons:
- More expensive ($400-2,000)
- May require additional components at higher lifts
- Can affect driveline angles above 3.5”
Best for: Most JK owners. This is the sweet spot for running 35” tires with good on-road manners and off-road capability.
Long-Arm Lifts
What they are: Long-arm kits relocate your control arm mounting points and use longer arms. This corrects suspension geometry issues that occur with taller lifts.
Pros:
- Best ride quality at 4”+ lifts
- Maximum articulation
- Proper driveline angles
- No death wobble when done right
Cons:
- Expensive ($2,500-5,000+)
- Complex installation
- Requires frame modification
- Generally professional install recommended
Best for: Serious off-roaders running 37”+ tires, competition rigs, or anyone who wants the absolute best suspension performance.
Choosing the Right Lift Height
This is where most people get it wrong. They pick a lift height based on looks, then wonder why they have problems. Start with your tire size goals instead.
Lift Height vs. Tire Size Guide
| Tire Size | Minimum Lift | Optimal Lift | Notes |
|---|---|---|---|
| 33” | Stock - 1.5” | 2 - 2.5” | Stock JK can fit with minor rubbing |
| 35” | 2.5” | 3 - 3.5” | Some trimming needed at 2.5” |
| 37” | 3.5” | 4 - 4.5” | High-line fenders recommended |
| 40”+ | 4.5”+ | 6”+ | Full cage/long-arm territory |
Important: More lift isn’t always better. Each inch of lift:
- Raises your center of gravity (more body roll, tip risk)
- Steepens your driveshaft angles (vibrations, wear)
- Increases stress on steering components
- Affects your on-road handling
If you’re running 35s, don’t install a 4.5” lift just because it looks cool. You’ll spend more money, have a worse ride, and potentially create problems you didn’t need.
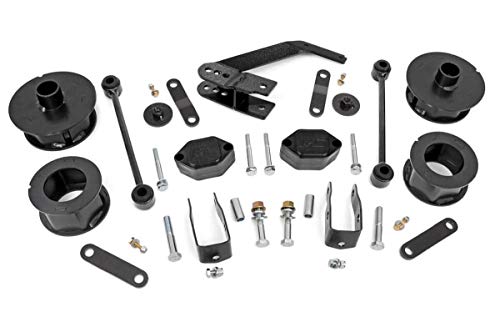
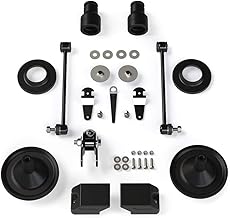
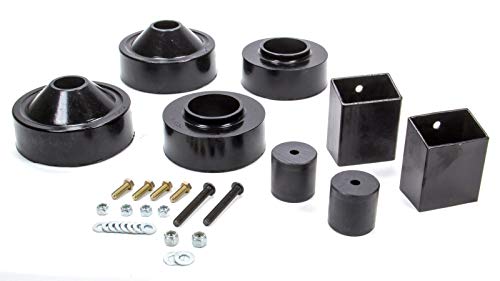
Recommended Lift Kit Products
Essential Suspension Components Explained
A complete lift involves more than just springs. Here’s what each component does and when you need to upgrade it.
Coil Springs
Springs are the foundation of your lift. They support your Jeep’s weight and determine ride height.
What to look for:
- Progressive or dual-rate springs for best ride quality
- Proper spring rate for your vehicle’s weight (bumpers, winch, etc.)
- Reputable brands (Metalcloak, Teraflex, Rock Krawler, Synergy)
Common mistake: Buying springs without considering your accessories. Heavy steel bumpers and a winch can compress standard springs, leaving you lower than expected.
Shocks
Shocks control spring movement and prevent bouncing. Stock JK shocks work okay up to about 2”, but beyond that, you need longer shocks.
Types:
- Twin-tube: Basic, affordable, adequate for most
- Monotube: Better heat dissipation, improved performance
- Reservoir shocks: Best performance, higher cost (Fox, King, etc.)
What to look for: Match shock travel to your lift height and intended use. More travel = more articulation off-road. See our complete shock buying guide for detailed comparisons of all top brands.
Control Arms
Control arms locate your axles and maintain proper geometry. The JK has four upper and four lower control arms (two per corner).
When to upgrade:
- Above 2.5” lift: Adjustable lower control arms help correct pinion angle
- Above 3.5” lift: Consider full set of adjustable arms
- Long-arm kits: Completely redesigned arms with relocated mounts
Fixed vs. Adjustable: Adjustable arms let you dial in your geometry perfectly. They’re worth the extra cost if you’re lifting more than 2”.
Track Bar
The track bar (also called Panhard bar) keeps your axle centered under your Jeep. When you lift, the angle changes, which can push your axle off-center.
Why it matters: An off-center axle causes the steering wheel to sit crooked and can contribute to death wobble.
Solutions:
- Track bar drop bracket (cheap fix, works up to 2.5”)
- Adjustable track bar (better solution, required above 3”)
- Both front and rear need addressing
Sway Bar Links and Disconnects
Lifting increases the distance between your axle and frame, stretching your sway bar links. Extended links restore proper geometry.
Quick disconnects: Allow you to disconnect your sway bar on the trail for maximum articulation, then reconnect for highway driving.
Brake Lines
Stock brake lines are only long enough for stock suspension travel. With a lift, they can stretch dangerously or limit your suspension droop.
Rule of thumb: If you’re lifting more than 2.5”, get extended brake lines. They’re cheap insurance.
Driveshaft Considerations
The JK’s rear driveshaft can handle moderate lifts, but the front is more sensitive. At higher lifts, you may experience vibrations or binding.
When to upgrade:
- 3”+ lift: Front CV driveshaft often needed
- 4”+ lift: Heavy-duty rear driveshaft recommended
- Long-arm kits: Usually require new driveshafts
Common Mistakes to Avoid
After years of helping JK owners with their builds, these are the mistakes we see over and over:
1. Buying the Cheapest Kit
Budget kits exist for a reason, but going too cheap often costs more in the long run. You’ll end up replacing components, chasing death wobble, or starting over with a quality kit.
Our advice: Buy once, cry once. A $1,200 kit is almost always a better value than a $400 kit you’ll eventually replace.
2. Ignoring Geometry Correction
Lifting without correcting your track bar, control arms, and driveshaft angles is asking for problems. Death wobble, vibrations, and poor handling are almost guaranteed. Learn more about what causes these issues in our death wobble prevention guide.
3. Lifting Too High for Your Tires
We’ve seen JKs with 4.5” lifts on 33” tires. It looks goofy, rides poorly, and creates unnecessary stress on components. Match your lift to your tire size.
4. Forgetting the Hidden Costs
That $800 lift kit will need:
- Alignment ($100-150)
- Extended brake lines ($80-150)
- Possibly an adjustable track bar ($150-300)
- Maybe new shocks ($400-1,200)
Budget for the full picture, not just the kit price.
5. Skipping the Alignment
Always get an alignment after installing a lift. Incorrect alignment wears tires fast and makes your JK handle poorly. This is non-negotiable.
Cost Breakdown by Build Level
Here’s what you should realistically budget for different lift setups:
Budget Build: Running 33s
| Component | Cost Range |
|---|---|
| 2.5” Spacer or Basic Spring Lift | $300 - 500 |
| Installation (DIY or shop) | $0 - 400 |
| Alignment | $100 - 150 |
| Total | $400 - 1,050 |
Mid-Range Build: Running 35s
| Component | Cost Range |
|---|---|
| 3” Quality Spring Lift | $800 - 1,500 |
| Adjustable Track Bar | $150 - 300 |
| Extended Brake Lines | $80 - 150 |
| Quality Shocks | $400 - 800 |
| Installation | $0 - 600 |
| Alignment | $100 - 150 |
| Total | $1,530 - 3,500 |
Premium Build: Running 37s
| Component | Cost Range |
|---|---|
| 4”+ Long-Arm Kit | $2,500 - 4,500 |
| Premium Shocks (Fox, King) | $1,000 - 2,000 |
| CV Driveshaft | $500 - 800 |
| Extended Brake Lines | $80 - 150 |
| Professional Installation | $800 - 1,500 |
| Alignment | $100 - 150 |
| Total | $4,980 - 9,100 |
Note: These costs don’t include tires, wheels, or regearing, which add significantly to the total build cost.
DIY vs. Professional Installation
Can you install a lift kit yourself? It depends on the kit and your skill level.
Good DIY Candidates:
- Spacer lifts
- Basic 2-2.5” spring lifts
- Shock replacements
You’ll need: Basic hand tools, a floor jack, jack stands, torque wrench, and a weekend.
Consider Professional Help For:
- Lifts above 3.5”
- Long-arm kits (require welding/cutting)
- If you’ve never worked on suspension before
- If you don’t have proper tools or space
Shop rates: Expect $400-800 for basic lift installation, $800-1,500+ for long-arm kits.
Either Way:
- Torque check all bolts after 500 miles
- Get a proper alignment immediately
- Inspect everything after your first off-road trip
What Comes Next?
Once your lift is installed, you’ll likely want to tackle related upgrades:
Immediate priorities:
- Choosing the right shocks for your lift
- Understanding and preventing death wobble
- Best 3.5-4 inch lift kits for 35-inch tires
Down the road:
- Regearing cost guide for different tire sizes
- JK steering stabilizer options
- Best all-terrain and mud-terrain tire options
The Bottom Line
Lifting your JK is one of the most rewarding modifications you can make. It unlocks larger tires, better off-road capability, and yes, a much more aggressive look.
But do it right the first time. Start with your tire size goals, choose the appropriate lift height, invest in quality components, and don’t skip the supporting modifications like track bars and control arms.
A well-planned lift setup will give you years of reliable service on and off the trail. A rushed, cheap lift will give you headaches, vibrations, and potentially dangerous handling issues.
Take your time, do your research, and feel free to reach out if you have questions about your specific build.
Related Articles
- Best JK Lift Kits by Budget - Our specific product recommendations
- JK Death Wobble: Causes and Fixes - Essential reading before and after lifting
- Rubicon vs Sport vs Sahara - Which trim is best for building?
- JK Steering Upgrades Guide (coming soon)
- JK Regearing Guide (coming soon)
Frequently Asked Questions
How much lift do I need for 35 inch tires?
For 35 inch tires, you’ll need at least 2.5 inches of lift with some fender trimming. The inner fender liners and pinch seam will need attention. For a clean fit with no rubbing at full articulation, 3-3.5 inches is ideal. This allows clearance even when your suspension is fully compressed or at maximum droop.
What’s the difference between a spacer lift and a spring lift?
Spacer lifts use polyurethane or aluminum blocks placed on top of your stock springs to add height. They’re cheaper ($100-400) but don’t increase suspension travel and can accelerate spring wear. Spring lifts replace your coils entirely with taller aftermarket springs, providing better ride quality, proper suspension travel, and more height options. Spring lifts cost more but are the better long-term solution.
Will I need to regear after lifting my JK?
Lifting alone doesn’t require regearing - tire size does. Your transmission and transfer case have to spin larger, heavier tires. Stock JKs come with 3.21 or 3.73 gears. For 35s, 4.10 gears work but feel sluggish. For optimal performance with 35s, or if you’re running 37s, regearing to 4.56 or 4.88 is recommended. This restores acceleration, towing capability, and fuel economy. Check our detailed regearing cost guide to understand what to budget.
How long does it take to install a lift kit?
For a basic 2-2.5” spring lift, plan on 8-12 hours for a first-timer with basic mechanical skills. Experienced DIYers can do it in 4-6 hours. Long-arm kits typically require 16-24 hours and often span multiple days due to complexity and the need for welding. Professional shops usually quote 4-8 hours for standard lifts, 8-16 hours for long-arm installations.
Can I lift my JK in stages?
Yes, but it’s usually not cost-effective. Installing a 2” lift now and upgrading to 3.5” later means buying springs twice, doing the labor twice, and paying for two alignments. If you know you want 35” tires eventually, it’s smarter to install a 3-3.5” lift from the start and run your current tires until you’re ready to upgrade. Plan your end goal and work toward it directly.
Will lifting my JK void my warranty?
It depends on your dealer and the specific issue. Under the Magnuson-Moss Warranty Act, dealers cannot void your entire warranty just because you installed a lift. However, they can deny warranty claims for components directly affected by the modification. A good relationship with your dealer and quality parts from reputable manufacturers helps. Some dealers are Jeep-friendly and understand modifications are part of the culture.
Get the Free JK Build Planner
Complete PDF with mod checklists, gear ratios, tire sizing charts, and budget worksheets. Everything you need to plan your JK build.
No spam. Unsubscribe anytime. By subscribing, you agree to our Privacy Policy.
Frequently Asked Questions
How much lift do I need for 35 inch tires?
For 35 inch tires, you'll need at least 2.5 inches of lift with some fender trimming. For a clean fit with no rubbing, 3-3.5 inches is ideal. This allows for full articulation without tire contact.
What's the difference between a spacer lift and a spring lift?
Spacer lifts use polyurethane blocks on top of stock springs - cheaper but can affect ride quality. Spring lifts replace your coils entirely with taller ones, providing better ride quality and proper suspension travel.
Will I need to regear after lifting my JK?
Lifting alone doesn't require regearing - tire size does. If you're running 35s or larger, regearing to 4.56 or 4.88 is recommended to restore power and fuel economy lost from the larger rotating mass.
What is the best lift height for a daily driven JK?
A 2.5-inch lift is the sweet spot for daily-driven JKs — it fits 33-35 inch tires, maintains reasonable fuel economy, doesn't require extensive drivetrain modifications, and preserves a comfortable on-road ride. Lifts of 3.5+ inches require additional components (track bar, control arms, driveshaft) that add cost and complexity.
Do I need to regear my JK after a lift?
Regearing depends on tire size, not lift height. If you're running 33-inch tires, stock gearing (3.21 or 3.73) works adequately. With 35-inch tires, 4.56 gears are recommended. With 37-inch tires, 4.88 or 5.13 gears are necessary to restore power and fuel economy. The Rubicon's 4.10 stock gears handle 35s better than non-Rubicon ratios.
Jeep JK Guide
We're JK owners who've been building, breaking, and fixing Wranglers for years. Everything here is tested on our own rigs - no sponsored fluff, just honest recommendations.
Learn more about us →Get the JK Build Planner
Free PDF with complete build checklists, gear ratios, and tire fitment guides.
By subscribing, you agree to our Privacy Policy.
Related Articles

How to Regear Jeep JK: Complete DIY Guide to Changing Gear Ratios
Best Front Sway Bar Links for Jeep JK: Quick-Disconnect & Heavy-Duty Options
Find the right front sway bar links for your Jeep JK. Compare quick-disconnect vs fixed links, learn compatibility by model year and lift height, and improve both trail articulation and daily driving.
Best Lift Kit for Daily Driving Jeep JK: Comfortable Street Options
Find the best lift kit for daily driving your Jeep JK with our expert guide covering ride quality, fuel economy, and street-friendly lift options.