How to Install a Body Lift Kit on Jeep Jk
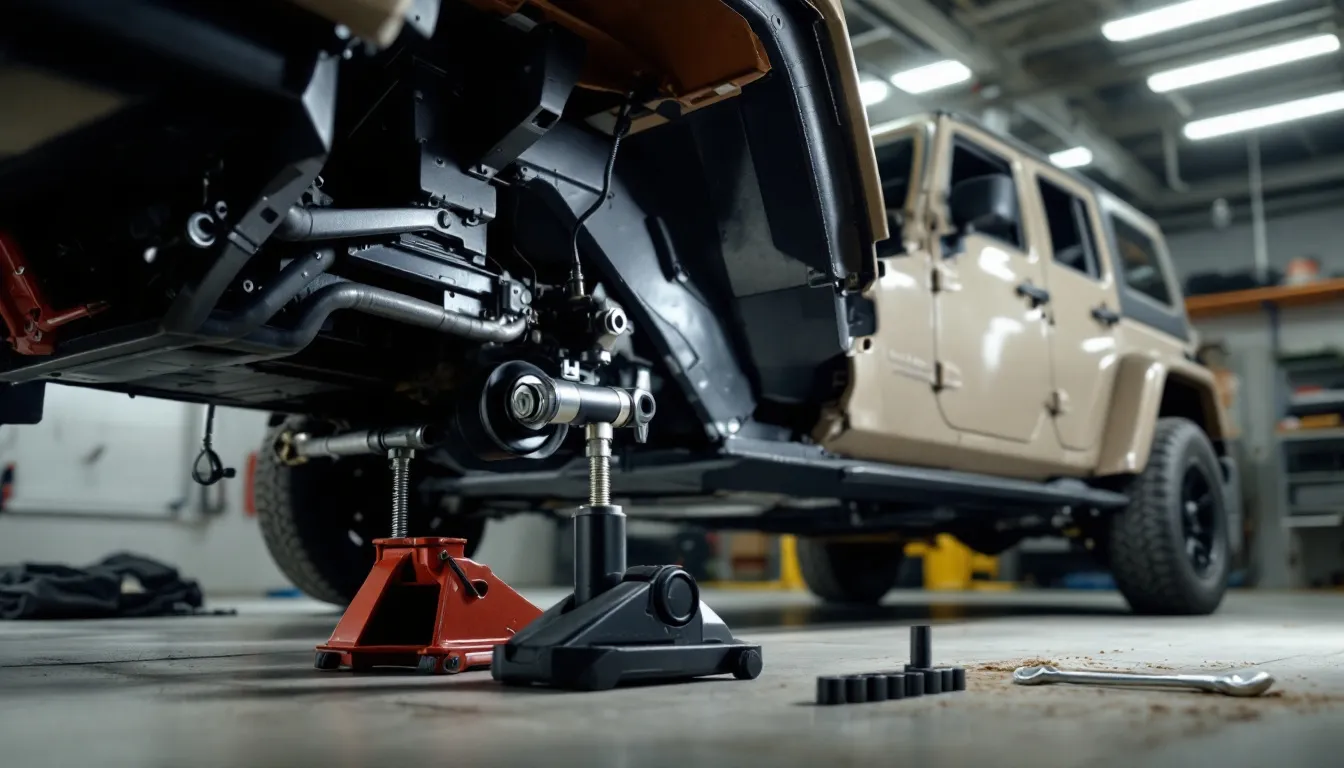
How to Install a Body Lift Kit on Your Jeep JK
A body lift kit is fundamentally a set of spacers — rubber or polyurethane pucks that sit between your Jeep’s body and frame, raising the body without touching suspension geometry. On a 2007–2018 Jeep JK, it’s one of the most straightforward weekend projects you can tackle.
The basic process is straightforward: loosen the factory body mount bolts, stack in the new spacers, reinstall the hardware with longer bolts, and then check brake lines, steering shaft, and shifter linkage for clearance. Most owners complete it in a weekend with standard hand tools and zero special equipment. The real variable isn’t complexity — it’s how badly the original bolts have seized over 10+ years.
Before you buy anything, spend an afternoon researching which lift height actually serves your build goals. Three months of research into suspension options, tire clearance math, and what others have done with similar builds is exactly the kind of homework that prevents expensive mistakes down the line. Know your target tire size first, then let that dictate your lift height decision.
This guide walks through everything: kit selection for your specific JK year and door count, the full installation sequence with torque specs, the practical differences between 2-door and 4-door JKUs, and a post-install checklist covering brake lines, steering, and linkage. If you’re still deciding between a body lift and a suspension lift, our lift kit vs leveling kit comparison covers the tradeoffs clearly.
Body Lift vs Suspension Lift: What Actually Happens
Here’s where most first-time builders get confused: a body lift raises only the body, not the axles. A suspension lift replaces springs, shocks, or control arms — it lifts the entire frame and axles together, genuinely increasing ground clearance under the belly and differentials. A body lift creates space between the body and frame, which lets you fit larger tires without hitting the fenders. That’s it.
The practical difference shapes everything about your build. A body lift costs $300–500, installs in a day, and needs no alignment afterward. It creates maybe 1 to 3 inches of fender clearance for bigger tires. A suspension lift costs $1,500–4,000+, takes two to three days, requires an alignment, and actually lifts your axles higher — improving approach angles, departure angles, and off-road articulation.
The maximum recommended body lift on a Jeep JK is 3 inches. Beyond that, the visual gap between body and frame becomes impossible to ignore, brake line and wiring strain becomes real, and nearly every component — steering shaft, shifter linkage, radiator hoses — needs extension hardware.
If your goal is fitting 33-inch or 35-inch tires on a budget with minimal fuss, a body lift is smart. If you want genuine trail performance, breakover angles, or real suspension travel, you need a suspension lift. A lot of serious builders do both — maybe a 1.5-inch suspension lift paired with a 1-inch body lift — to stack the benefits and spread the load.
For the absolute lowest-cost entry into the lifted game, a 1-inch front spring spacer leveling kit runs $35.99 and levels the front-to-rear stance without a full lift commitment. Browse our JK lift kit vs leveling kit guide if you’re trying to decide between options. Planning for best 37-inch tires for Jeep JK? You’ll need at least a combined 2.5-inch lift.
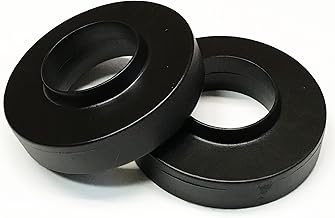
1" Front Spring Spacer Leveling Kit, Compatible with Jeep Wrangler JK 2007-2018
Check Price on Amazon →Tools and Materials You’ll Need
You don’t need a lift rack, pneumatic tools, or anything exotic. Every tool needed fits in a standard socket set and a breaker bar. Here’s what actually matters.
Before you touch a single bolt, soak every body mount with penetrating oil the night before. This is the single most important prep step, and it’s the difference between a smooth Saturday and a frustrating afternoon of stripped threads. Older JKs — especially 2007–2012 models with original hardware — often have corroded factory bolts that will resist every attempt to remove them cleanly. The forums and community knowledge circles are unanimous on this point: penetrating oil overnight saves more time than any other single decision.
Essential tools:
- Breaker bar and metric/SAE socket set
- Torque wrench (0–150 ft-lbs)
- Floor jack and jack stands rated for your JK’s weight
- Pry bar
- Ratchet extensions (6-inch and 12-inch minimum)
- Needle-nose pliers
- Trim panel removal tool
- Work light or headlamp
Materials to have on hand:
- Body lift kit matched to your specific JK year and door count
- Penetrating oil (applied the night before)
- Anti-seize compound for reassembly
- Thread-locking compound where the kit specifies it
- Extra body mount bolts — have spares because one will strip
Critical fitment note: The 2-door JK has 8 body mount locations. The 4-door JKU has 10. Buy the wrong kit and you’ll be short on hardware. Double-check your door count and model year before ordering.
Choosing the Right Body Lift Kit for Your JK
When shopping, non-negotiables are: JK-specific fitment (2007–2018 only), the correct door configuration, quality polyurethane spacers (cheap rubber breaks down), and all necessary hardware included in the box. Kits that make you source your own bolts are just friction you don’t need.
My own build plan is headed toward a 2.5-inch lift as the foundation — 35-inch tires, steel bumpers, Raptor coating, overland-ready. That 2.5-inch mark is where the market clusters for good reason: it’s the sweet spot for fitting 35s without extended bump stops, major steering corrections, or a second mortgage on alignment work. It’s the height that balances tire clearance, aesthetics, and real-world usability.
Three kits stand out for 2026 builds:
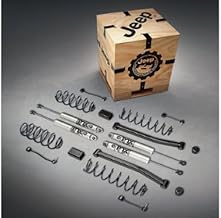
Genuine 2" Lift Kit
Check Price on Amazon →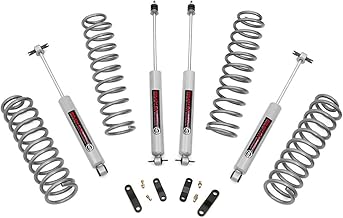
2.5" Lift Kit for 2007-2018 Jeep Wrangler JK Unlimited (67930)
Check Price on Amazon →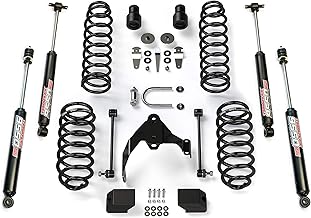
2.5" Lift Kit with All (4) 2.5" Shocks (1251000)
Check Price on Amazon →For most JKU owners, the $299.95 Rough Country 2.5-inch kit is the smart pick — it covers the 4-door JKU, includes every bolt and spacer you need, and comes from a brand that’s spent years fine-tuning JK compatibility. If you’re building something more complete and want shocks included in one package, the $967.98 version with all four shocks eliminates a separate shop visit later.
For the full breakdown of all available lifts, check our best lift kits for Jeep JK roundup.
Body Lift Kit Comparison: Specs Side by Side
Comparing kits is easier when the numbers sit in front of you. Here’s what the three main contenders look like — but verify the 2-door vs JKU fitment before checkout, because one wrong purchase wastes money and time.
| Kit Name | Lift Height | JK Compatibility | Includes Shocks | Price | Best For |
|---|---|---|---|---|---|
| Rough Country 2.5” (67930) | 2.5 inches | JKU 4-Door, 2007–2018 | No | $299.95 | Budget builds targeting 35s on a JKU |
| 2.5” Lift with (4) 2.5” Shocks (1251000) | 2.5 inches | JK 4-Door, 2007–2018 | Yes — all 4 shocks | $967.98 | Complete lift-plus-shock combo in one kit |
| Genuine 2” Lift Kit | 2 inches | JK, 2007–2018 | Varies | $1,595.22 | Premium OEM quality and fitment |
Fitment reality check: A kit marked “2-door JK” has 8 spacers. A “4-door JKU” kit has 10. Installing the wrong one leaves you with dangling body mounts and zero support in critical spots. Check the door count before you buy.
Get new guides by email
One email when we publish something worth reading. Unsubscribe anytime.
How to Install a Body Lift Kit on Your Jeep JK: Step-by-Step
Plan for one to two full days if you’re installing this solo for the first time. The work isn’t complicated, but patience with rusted hardware and careful torque work during reassembly is what separates a solid install from a problematic one. Kits like the Rough Country 2.5-inch come with detailed instructions — use those as your primary reference for final torque specs, since different manufacturers sometimes vary slightly.
⚠️ Safety first: Never work under a vehicle supported only by a jack. Use jack stands rated for your JK’s full weight.
Step 1: Disconnect the battery. You’ll be near wiring harnesses and electrical connectors. An accidental short is a bad way to start a project.
Step 2: Soak all body mount bolts with penetrating oil the night before. There are 8 on the 2-door JK and 10 on the JKU. This is not optional if your JK is past 2010. Skipping this step is the fastest route to stripped bolts.
Step 3: Raise and support the vehicle properly. Place jack stands under the frame rails — not the body. You want the frame stable while the body lifts off the factory mounts.
Step 4: Loosen all body mount bolts in a cross-pattern. Work front to back, alternating left and right. Don’t remove them yet — just break them loose. This prevents binding.
Step 5: Remove the factory hardware completely. Once loose, extract the original bolts, washers, and rubber isolators. Inspect each mount location for serious rust or damage. If a mount looks compromised, replace it.
Step 6: Install the spacers in sequence. The kit’s polyurethane spacers stack directly onto each body mount location. On a JKU, the rear mounts near the tailgate are tight to access — use a 12-inch ratchet extension and a headlamp. Go slow here.
Step 7: Thread in the longer hardware. The kit includes bolts long enough to pass through the spacer, body mount, and into the frame. Hand-tighten everything in a cross-pattern before final torque.
Step 8: Torque to spec in a cross-pattern. Check your specific kit’s instruction sheet for final torque values — they typically fall in the 35–50 ft-lbs range, but your kit is the authority. Work front-to-back, alternating sides.
Step 9: Install extended brake line brackets. With the body raised, factory brake line mounts will be under tension. Most quality kits include new brackets — install them now to avoid strain on the lines.
Step 10: Check the steering shaft. On a 2-inch or greater lift, the steering shaft may need an extension kit or spacer. Check what’s included in your kit and look at year-specific routing in your manual.
Step 11: Extend the shifter linkage. Manual-transmission JKs need the shifter boot extended to clear the raised body. Automatic JKUs typically need only the boot adjustment. Your kit should include hardware for this.
Step 12: Walk the whole vehicle and inspect. Look at every brake line, coolant hose, and wiring harness for tension or contact with sharp edges. Route wiring away from the frame edge.
Step 13: Reconnect the battery and test everything. Start the engine, check all gauges, and do a short drive around the block before calling it done.
Step 14: Re-torque at 50 miles. Spacers settle under load. After your first real drive, get back under the JK with the torque wrench and re-torque every body mount. This takes 15 minutes and prevents loose mounts later.
For what to upgrade next, our guides on how to regear your JK after a lift and best steering stabilizers to fix death wobble cover the logical follow-up work.
What to Upgrade After Your Body Lift Is Torqued
Once the body lift is installed and you’ve done the 50-mile re-torque, a few follow-up upgrades transform the JK from “lifted” into “actually dialed in.” The lift is the foundation — what you add on top determines whether the Jeep handles on the street and performs on the trail.
If 35-inch tires are in your future, regearing your axles is not optional — it’s essential. Larger tires tank your effective gear ratio. Fuel economy drops, the engine struggles on the highway, and off-road performance suffers because the drivetrain is working harder. Our complete JK regearing guide walks through exactly what you need. Also check best gear ratio for 33-inch tires if you’re going with 33s instead.
The JKS front sway bar quick-disconnect ($154.41) makes real sense once you’re lifted and running bigger tires. When the body is raised and you’re stacking 35s, disconnecting the sway bar for trail work unlocks genuinely better articulation. The JKS system turns a 15-minute wrestling match into a 30-second job. Small quality-of-life upgrade that compounds over time.
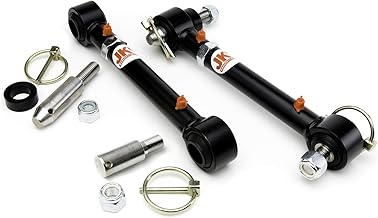
JKS 2034 Front Swaybar Quicker Disconnect System for Jeep JK
Check Price on Amazon →If you want to fine-tune your stance before going all-in on a suspension rebuild, the 1-inch spring spacer leveling kit pairs well with a body lift on older JKs that still sit slightly nose-down. And for sway bar link options at the front, our best front sway bar links guide covers every option from budget to premium.
Frequently Asked Questions
These are the questions that get asked before a kit is ordered — and the ones you’ll hear again in community forums after installation.
How long does it really take to install a body lift kit?
Budget a full weekend — somewhere between 6 and 10 hours of actual work time. The big variable is how bad the original bolts are seized. A 2007–2012 JK with original hardware and surface corrosion can add three or four hours compared to a newer, cleaner 2015–2018 model. Penetrating oil applied overnight cuts that time down significantly. Having a helper makes the rear mounts on a JKU less awkward, too.
Will a body lift void my JK’s warranty?
For JKs still under active manufacturer warranty (increasingly rare given the 2018 model year cutoff), a body lift can affect coverage on certain components. The Magnuson-Moss Warranty Act means a dealer cannot void your entire warranty just because of a modification — but they can deny a specific claim if they prove the modification caused the failure. For most people buying a JK in 2026, warranty is not a practical consideration anymore.
What’s the maximum body lift height on a Jeep JK?
Three inches is the practical ceiling. Beyond that, the visual gap between body and frame becomes obvious and ugly, brake lines and wiring sit under real tension, and nearly every accessory — steering shaft, shifter, coolant lines — needs extension hardware. Most smart builds stop at 2 to 2.5 inches for a clean, trouble-free install. See our full JK Buyers Guide for how lift height fits into a complete build plan.
Do I need an alignment after installing a body lift?
No. A body lift alone does not change your suspension geometry, caster angle, or toe alignment. An alignment is not required. However, if you’re simultaneously installing a suspension lift or new control arms, an alignment is absolutely necessary. Verify what components your specific kit includes before assuming you can skip the alignment shop.
Can I combine a body lift with a suspension lift on a JK?
Absolutely — and a lot of serious builds do exactly this. A 1.5-inch suspension lift stacked with a 1-inch body lift, for example, can achieve real 35-inch tire clearance while spreading the stress across more components than a single 3-inch suspension lift alone. The tradeoff is added complexity: you’re managing two separate install processes and two sets of component adjustments. Check our trim comparison guide if trim differences matter to your build, since the Rubicon’s disconnecting sway bar and different spring rates affect how these lifts interact.
Final Thoughts
A body lift makes sense when you want larger tires, a budget-conscious timeline, and minimal mechanical complexity. It’s the wrong choice if your goal is improved axle clearance, better articulation, or serious trail performance — that’s what suspension lifts are designed for.
For a build headed toward 35-inch tires, steel bumpers, overland gear, and protective coating, a 2.5-inch body lift is a logical first move. That’s the direction my own build plan is tracking — and the lift decision is genuinely where every JK build should start. Get the lift height right before you buy, rather than after, and everything that follows — tire selection, regearing, bumper choices — slots into place more cleanly.
One final reminder: re-torque all body mount hardware at the 50-mile mark. Spacers settle under real-world load, and a loose mount showing up at 500 miles is a much bigger headache than 10 minutes with a torque wrench right after your first drive.
From here, tire selection and regearing are your logical next steps. Start with best lift kits for Jeep JK if you’re still comparing options, move to how to regear your JK once the lift is bolted down, and best wheels for Jeep JK when you’re ready to replace the factory steelies.
Free: JK Fluids at a Glance
Every fluid, spec and capacity for the 2007-2018 Wrangler JK on one page, plus a cut-out glovebox card. Checked against the owner's manuals. From the JK Service Kit.
Email me the download and new guides when they are published. Unsubscribe anytime. Privacy Policy.
Allan
I'm Allan. I own a 2014 Jeep Wrangler JKU and I research the hell out of every mod before I touch it. When I've fitted something to my own Jeep, I say so. Everything else is researched from manufacturer specs and other owners' reports. No sponsored fluff.
Learn more about me →Free: JK Fluids at a Glance
Every fluid, spec and capacity for the 2007-2018 JK on one page, plus a glovebox card.
Email me the download and new guides when they are published. Unsubscribe anytime. Privacy Policy.
Related Articles
Jeep JK Regear vs Locker: Which Upgrade Comes First?
Ask ten JK owners which comes first — a regear or a locker — and you'll get the same answer from nine of them: regear first, locker second.

Jeep JK Towing Capacity: What Can Your Wrangler Actually Pull?
Your Jeep JK can tow more than you might think — but probably less than you want to. The factory ratings are straightforward: 2,000 lbs for the 2-door...
How to Choose Tire Size for Jeep Jk Lift Kit Compatibility
Lift kit and tire size compatibility is straightforward in concept but trips up a lot of JK owners in practice: the amount of suspension height you add...