HID vs LED Headlight Conversion Jeep JK Wiring: The Complete Guide
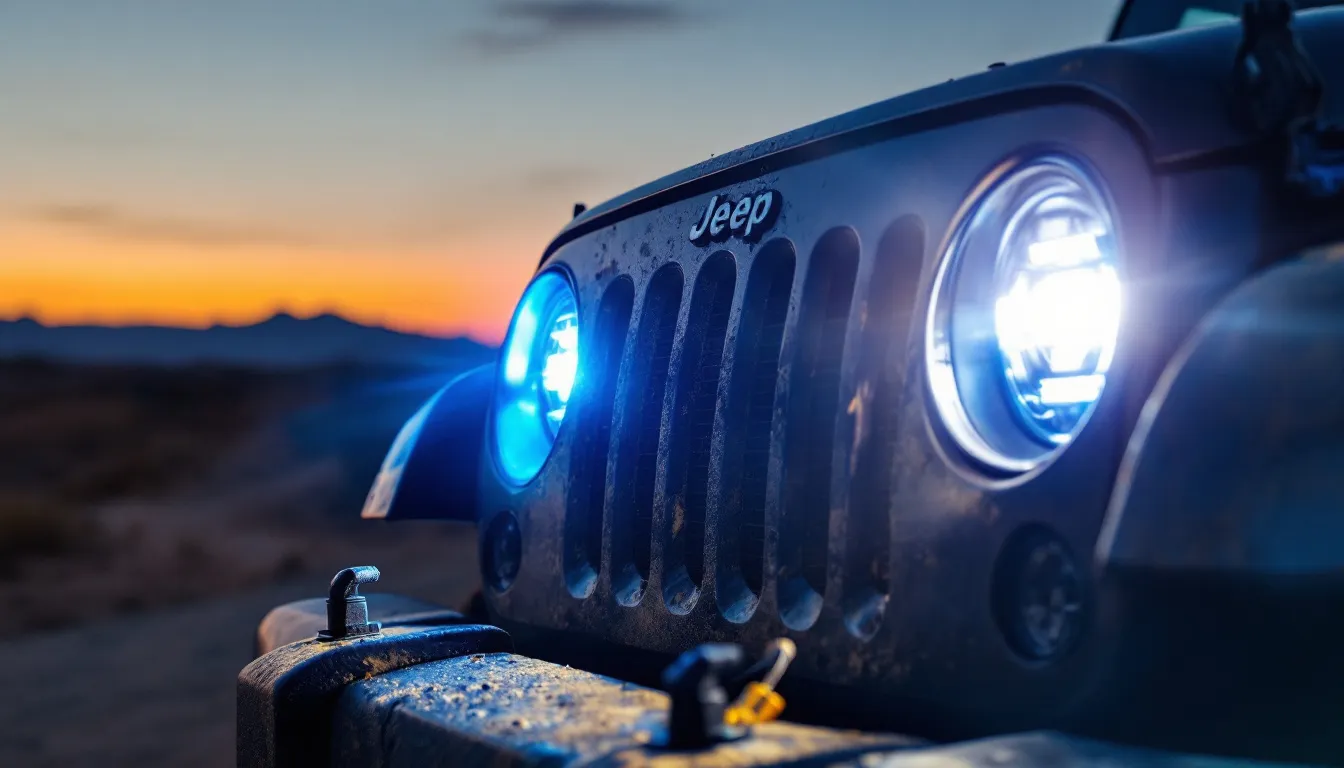
HID vs LED Headlight Conversion Jeep JK Wiring: The Complete Guide
When you’re staring at your JK’s aging halogen headlights on a dark trail, you realize pretty quickly why this is one of the most popular upgrades in the community. The question isn’t whether to upgrade—it’s which technology makes sense for your build and how to wire it without melting connectors or triggering CANBUS errors that’ll have your check-engine light on for weeks.
Here’s the straight answer: LED conversions are the better choice for most JK owners. They’re simpler to wire, more reliable long-term, and they don’t carry the ballast failure risk that comes with HID systems. But if you understand the wiring differences between HID and LED, you can make an informed decision instead of guessing.
For the 2007–2018 Jeep JK and JKU, the stock headlight socket is the H13 (9008) connector. Both HID and LED conversions have to work with or around that H13 socket—either through a direct plug-and-play LED housing or an HID kit with external ballasts and a relay harness. The wiring path differs significantly between them, and that’s where most problems start. If you’re planning other electrical work on your JK, our guide on wiring auxiliary switches on the Jeep JK covers the broader principles you’ll need.
HID vs LED Headlights: What Actually Differs for Your Jeep JK
The core difference between HID and LED headlights comes down to how each one actually generates light—and that difference ripples through everything about installation, reliability, and how they play with your JK’s electrical system.
HID (Xenon) passes a high-voltage electrical current through an arc of xenon gas inside a sealed glass capsule. To make that happen, an external ballast has to regulate the ignition pulse—we’re talking 20,000+ volts at startup, dropping to around 85V during operation. It’s powerful, but it’s also complicated.
LED uses semiconductor diodes that emit light when current flows through them. They need a driver circuit, but nothing like the voltage spike an HID ballast creates. This is the first hint at why LED is simpler to live with on a JK.
Here’s how they stack up on specs that actually matter when you’re deciding:
- Lumen output: HID kits typically deliver 3,000–4,500 lumens per bulb; LED housings generally run 4,000–6,000 lumens. Real talk: check the specific kit’s datasheet instead of trusting the marketing numbers. They vary wildly between manufacturers.
- Color temperature: HID commonly comes in 4,300K–6,000K; LED usually 5,000K–6,500K. Stick with 4,300K–5,000K if you want good road visibility without blinding oncoming traffic or looking like you’re running illegal lighting.
- Warm-up time: HID takes 5–30 seconds to reach full brightness. LED fires up instantly.
- Lifespan: HID bulbs last 2,000–3,000 hours before they need replacing. Quality LED drivers are rated 30,000–50,000 hours—basically the life of your JK.
- Heat management: HID generates significant infrared heat right at the bulb. LED runs cooler at the lens but concentrates heat at the driver and heatsink, which is easier to manage in a headlight housing.
- The ballast failure problem: HID ballasts are a known weak point, especially in the wet, muddy, vibration-soaked environment of off-road use. A ballast failure means replacement costs.
LED wins on reliability and wiring simplicity—that’s the single most important takeaway when you’re choosing between these two systems for a JK. Everything else flows from that.
For context on how headlight upgrades fit into your overall build strategy, the complete Jeep JK modification guide walks through the full picture of what actually matters when upgrading a JK.
Get new guides by email
One email when we publish something worth reading. Unsubscribe anytime.
HID vs LED Wiring Requirements: Side-by-Side Comparison
Wiring is where the HID vs LED choice becomes concrete and real. LED conversions can often plug directly into the JK’s stock H13 connector. HID conversions almost always need a relay harness to keep that ballast inrush current from overstressing the Body Control Module.
| Attribute | HID Conversion | LED Conversion |
|---|---|---|
| Stock H13 socket compatible | Sometimes (kit-dependent) | Yes (most full housings) |
| Relay harness required | Yes—always | Recommended for 2007–2012 JKs |
| Ballast needed | Yes (one per headlight) | No |
| Adapter pigtail needed | Often (H13 to H4/H7) | Rarely |
| CANBUS error risk | High | Low–Medium |
| Load resistors needed | Occasionally | Sometimes (flicker fix) |
| BCM overload risk | Higher (inrush current) | Lower |
| Install complexity | Moderate–High | Low–Moderate |
| Waterproofing concern | High (ballast sealing) | Low |
| 2-door vs JKU wiring | Same connector, different run length | Same connector, different run length |
The two rows that matter most for your JK are the relay harness requirement and BCM overload risk. The JK’s Body Control Module was engineered for 55W halogen bulbs. HID ballasts create a large current spike at ignition—something the BCM wasn’t built to handle repeatedly. Even a solid LED conversion benefits from a relay harness on 2007–2012 JKs, where the factory wiring is aging and brittle.
The H13-to-H4 adapter pigtail is the specific piece of hardware that bridges incompatible sockets. Many HID kits output to an H4 connector, but the JK uses H13. The adapter lets you connect them without cutting any factory wiring. Using a quality adapter like the H13-to-H4 adapter pigtail means you can swap your headlights later without permanent modifications.

2PCS 7 Inch LED Headlight Connector Pigtail, H13 to H4 Adapter Headlight Socket
- Converts H13 (9008) to H4 socket
- Heat-resistant construction
- Pair (left and right)
For more context on how the JK handles auxiliary electrical loads, see our guide on how to wire aux switches on the Jeep JK.
How to Wire LED Headlights on a Jeep JK (Plug-and-Play Done Right)
Wiring LED headlights on a 2007–2018 Jeep JK is genuinely straightforward if you buy a proper full-housing replacement and follow the non-negotiable steps. And there are non-negotiable steps. “Plug-and-play” only stays trouble-free when you bench-test before you bolt anything in, and you wire a relay harness properly.
The Super7 2.0 LED Headlight Housings represent the standard that other JK LED conversions get compared against. They’re flicker-free out of the box and have CANBUS error suppression built into the driver circuit—which means you’re less likely to chase phantom warning lights.
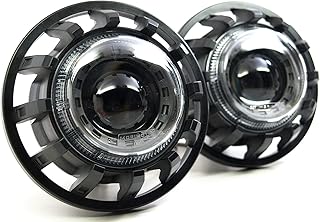
Super7 2.0 LED Headlight Housings for 2007-2018 Jeep Wrangler JK
- Full LED housing replacement (both low and high beam)
- Flicker-free operation
- CANBUS error suppression built-in
- H13 socket compatible
- 30,000+ hour lifespan
The True Mods H6054 LED headlight wiring harness shows up in more JK build threads than any other relay harness because it actually solves the voltage drop and BCM stress problems. It’s fused, uses a negative-switched configuration, and it’s been proven by thousands of installations.
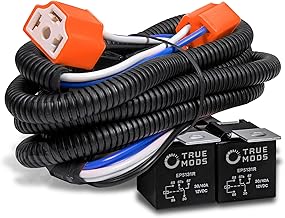
True Mods H6054 H4 LED Headlight Wiring Harness [Negative Switched] [Fused]
- Negative-switched configuration
- 40A fused design
- Routes power directly from battery
- Protects BCM from voltage spikes
- Universal H4 output (use H13-to-H4 adapter for JK)
Step-by-Step LED Headlight Wiring for the Jeep JK
-
Disconnect the negative battery terminal first. The JK’s BCM stays active even when the ignition is off. Always start here. No exceptions.
-
Remove the factory headlight housing. The JK uses three T-15 Torx screws on the retaining ring. On a 2-door, you have straightforward access. On the JKU, the wiring harness runs slightly longer behind the grille—give yourself plenty of slack and don’t force it.
-
Bench-test your LED housing before you install anything. This is the single most important step most people skip, and it’s the step that costs the most to learn the hard way. I learned this through another builder’s expensive mistake during a LED light bar installation that should have taken two hours but took two days because a polarity issue went undetected until the bar was already mounted and current ran through it—and melted the connector inside the housing. Connect your new LED housing to the relay harness, touch the harness leads to a 12V source (a jump pack works great), and verify both low and high beam function, correct polarity, and that no connector is warm after 60 seconds of operation. Do not skip this. It takes five minutes and prevents a teardown.
-
Install the relay harness properly. Route the True Mods harness so the fused positive lead connects directly to the battery positive terminal, and the ground wire attaches to bare metal on the JK’s frame—not a body panel bolt. The JK is body-on-frame, which means solid grounding points exist on the main frame rails. This is critical: a poor ground is the #1 cause of LED flicker on the JK. Clean the grounding point with a wire brush before you attach the ring terminal. Make it shiny.
-
Connect the H13 plug. The relay harness triggers off the factory H13 signal wire, then powers the LED directly from the battery. If your LED housing uses an H4 output pigtail, use the H13-to-H4 adapter to bridge it without cutting factory wiring. Secure connections with heat-shrink or electrical tape.
-
Seat and align the housing. Torque the retaining ring screws evenly. The JK’s plastic grille surround flexes, and misaligned headlights are more visible with LED than halogen because the cutoff pattern is sharper.
-
Aim the headlights correctly. Park 25 feet from a flat wall, mark the center of each beam pattern, and adjust the vertical aim screw on the back of the housing. This is less forgiving with LED than it was with halogen.
-
Reconnect the battery and test everything. Check low beam, high beam, and DRL if your kit has it. If you see a CANBUS warning light, we’ll cover the fix in the next section.
Good LED headlights pair well with solid Jeep JK bumper upgrades that improve your JK’s front-end geometry and lighting performance.
How to Wire HID Headlights on a Jeep JK (and Why It’s More Complicated)
HID headlight wiring on a 2007–2018 Jeep JK is more involved than LED because every HID kit requires external ballasts, and those ballasts have to be mounted, sealed against moisture, and properly grounded—all in an engine bay that sees water, mud, extreme temperature swings, and constant vibration.
Step-by-Step HID Headlight Wiring for the Jeep JK and JKU
-
Buy an H13-compatible HID kit. The JK uses an H13 (9008) bi-xenon socket. Confirm your kit is H13 bi-xenon, not single-beam H7 or H11. This is the most common mistake in sourcing, and swapping ballasts later is a hassle you don’t want.
-
Disconnect the negative battery terminal. Non-negotiable before any ballast wiring touches the JK’s electrical system.
-
Mount the ballasts with care. Each headlight needs one ballast. Space is tight in a JK engine bay, so most owners mount ballasts in the upper grille area or behind the headlight buckets. Use self-tapping screws into the metal grille support structure, never into the plastic grille. Ballasts must be mounted vertically or at a slight angle—lying them flat can trap moisture inside the potting compound.
-
Install a relay harness—this is non-negotiable. Failing to use a relay harness on a JK HID conversion risks overloading the Body Control Module with the ballast’s high inrush current. A BCM repair costs far more than a $30 harness. The relay draws power directly from the battery and uses the factory H13 signal only as a trigger to the ballast.
-
Route ballast wiring away from heat sources. The JK’s engine bay gets seriously hot near the exhaust manifold. Use loom or conduit on any wiring that runs near the firewall or manifold. Bundle wires so they’re not touching anything hot.
-
Use H13-to-H4 adapter pigtails if your ballast output requires it. Many HID ballast outputs are H4 connectors; the JK’s factory harness is H13. The adapter bridges this gap without cutting factory wiring. Secure all connections with heat-shrink after you connect them.
-
Ground the ballasts to bare frame metal. Same rule as LED: the JK’s body-on-frame construction means you have solid grounding points on the main rails. Sand the contact surface clean before attaching the ground ring terminal.
-
Test with headlights aimed before you fully button everything up. HID takes a few ignition cycles to settle into full brightness. Verify both ballasts fire and that you’re not getting any thermal shutdown warnings.
On 2007–2012 JKs especially, inspect every connector in the headlight circuit before adding a ballast load. Factory wiring insulation gets brittle over time. For a similar approach to protecting JK components against long-term electrical stress, check out our guide on protecting your JK’s drivetrain with skid plates.
Mounting Hardware and Accessories for Your JK Headlight Conversion
The right mounting hardware is what separates a rattle-free, sealed installation from one that fogs up and works loose on the first rocky trail. For 2007–2017 Jeep JK and JKU builds, two accessories are worth your attention.
The X AUTOHAUX 7-inch round headlight mounting retaining bracket ring is engineered specifically for 2007–2017 JK headlight housings. It provides the vibration-damping mount that prevents rattle and prevents the housing from shifting under trail bumps.

X AUTOHAUX 7-Inch Round Headlight Mounting Retaining Bracket Ring Set
- Fits: 2007–2017 Jeep Wrangler JK
- Material: Metal, black finish
- Includes hardware for both left and right
- Vibration-damping construction
Confirm your JK model year before ordering—these are built for 2007–2017 specifically.
The clip-on front grille mesh inserts with “Angry bird style” headlight cover adds protection and an aggressive look without permanent modification to your JK’s grille.

Clip-On Front Grille Mesh Inserts & "Angry Bird" Headlight Cover
- Fits: 2007–2017 Jeep Wrangler JK and JKU
- Style: "Angry bird" headlight surround
- Material: Matte black plastic
- Clip-on install—no drilling
- Protects headlight housing from trail damage
Both accessories work well alongside front bumper options for the Jeep JK and complement recovery-focused builds nicely. If you’re running a recovery-oriented front end, also check out Jeep JK recovery gear mounting to understand how all the front-end hardware works together.
HID or LED for Your Jeep JK? Here’s the Honest Answer
For most Jeep JK owners, LED is the right choice—and the answer isn’t even close.
That verdict isn’t based purely on spec sheets. It comes from real-world experience accumulated across thousands of JK owners who’ve run both systems on roads and trails and lived with the long-term consequences. The pattern is consistent: LED conversions generate fewer electrical headaches, require less hardware, and when the wiring is done correctly, they simply work. HID conversions add ballasts that can fail when mud-packed or water-intruded, introduce inrush current that stresses the JK’s aging BCM, and require more mounting space in an already tight engine bay.
Get LED. Wire it with a relay harness. Ground it to bare frame metal. Done.
HID makes sense in exactly one scenario: you already own a quality HID kit from another build and want to reuse it on your JK. Even then, budget for a proper relay harness and secure ballast mounting. If you don’t, the savings evaporate quickly on a failed ballast or a fried BCM.
For other upgrades that follow the same “do it right once” philosophy, see our guide to essential JK trail upgrades and Jeep JK performance upgrades that actually deliver results.
Frequently Asked Questions: HID vs LED Headlight Conversion on Jeep JK
Q: Will LED headlights cause a warning light on my Jeep JK dashboard?
A: They can, and here’s why. The JK’s BCM monitors headlight circuit resistance, and LED headlights draw significantly less current than the factory halogens they replace. The BCM sometimes interprets that reduced draw as a burnt-out bulb and triggers a warning light. The fix is either a quality LED housing with built-in CANBUS suppression (like the Super7 2.0, which is marketed as flicker and error-free) or inline load resistors wired in parallel with the LED circuit. Keep in mind: a relay harness alone doesn’t solve CANBUS errors. The relay harness protects against inrush current and voltage drop—CANBUS suppression is a separate issue that requires either the LED housing driver to handle it or load resistors.
Q: Do I need a relay harness for LED headlights on a Jeep JK?
A: It’s strongly recommended, especially on 2007–2012 JKs with aging factory wiring. A relay harness routes battery power directly to the LED housing while using the factory H13 connector only as a trigger signal. This protects the BCM, reduces voltage drop (which causes flicker), and keeps the electrical load off wiring that wasn’t designed for repeated high-draw cycling. On a newer 2015–2018 JK with a quality plug-and-play LED housing, you might get away without one—but the harness costs $20–$25 and it’s cheap insurance against a BCM failure that costs $500+.
Q: What headlight socket does the Jeep JK use?
A: The 2007–2018 Jeep Wrangler JK uses the H13 (also called 9008) socket for both headlights. It’s a dual-filament connector that handles both low and high beam through a single plug. Many aftermarket LED and HID kits are designed for H4 connectors instead—if your kit uses H4, you’ll need an H13-to-H4 adapter pigtail to bridge that gap without cutting factory wiring. Check your kit’s specifications before you order anything.
Q: Are HID headlights legal on a Jeep JK?
A: In most U.S. states, HID headlights are legal on the JK provided the housing itself is DOT-approved for HID use. The catch: retrofitting HID bulbs into housings designed for halogen (which many budget kits do) creates glare that violates state lighting laws and blinds oncoming drivers. For road-legal builds, use a purpose-built HID or LED housing rather than just swapping the bulb in the stock reflector housing. The housing design matters as much as the bulb technology.
Q: How long does a Jeep JK LED headlight conversion take?
A: For a plug-and-play full LED housing like the Super7 2.0, the physical swap takes 30–60 minutes per side if you take your time. Add another 30–45 minutes if you’re installing a relay harness and running it cleanly with proper grounding. Budget two to three hours total for a clean, properly grounded install that includes headlight aiming. Rushing the aiming step is one of the most common mistakes—the LED’s sharper cutoff pattern makes misalignment obvious and annoying. For other quick-win upgrades while you have the garage time, check out the best air compressor for your Jeep JK and lightweight wheel upgrades for off-road performance.
Free: JK Fluids at a Glance
Every fluid, spec and capacity for the 2007-2018 Wrangler JK on one page, plus a cut-out glovebox card. Checked against the owner's manuals. From the JK Service Kit.
Email me the download and new guides when they are published. Unsubscribe anytime. Privacy Policy.
Allan
I'm Allan. I own a 2014 Jeep Wrangler JKU and I research the hell out of every mod before I touch it. When I've fitted something to my own Jeep, I say so. Everything else is researched from manufacturer specs and other owners' reports. No sponsored fluff.
Learn more about me →Free: JK Fluids at a Glance
Every fluid, spec and capacity for the 2007-2018 JK on one page, plus a glovebox card.
Email me the download and new guides when they are published. Unsubscribe anytime. Privacy Policy.
Related Articles
Oracle Lighting LED Headlights for Jeep JK: Halo, Projector & Sealed Beam Options Reviewed
Oracle Lighting is a US-based aftermarket lighting brand that specialises in LED and halo headlights, fog lights, and accent lighting. Their 7-inch...
JW Speaker 8700 LED Headlights for Jeep JK: Full Review & Install Notes
The JW Speaker 8700 Evolution J2 is a DOT-compliant, 7-inch round LED headlight designed as a direct plug-and-play replacement for the 2007–2018 Jeep...
Best Light Bars for JK Wrangler: Complete Guide
The best light bars for a 2007-2018 Jeep JK: seven Amazon picks from $41 to $145, where to mount them, the windshield fold-down test, and the wiring that makes an install last.