Jeep JK Wiring Harness Guide: Aux Circuits, Fuse Taps & Clean Power Runs
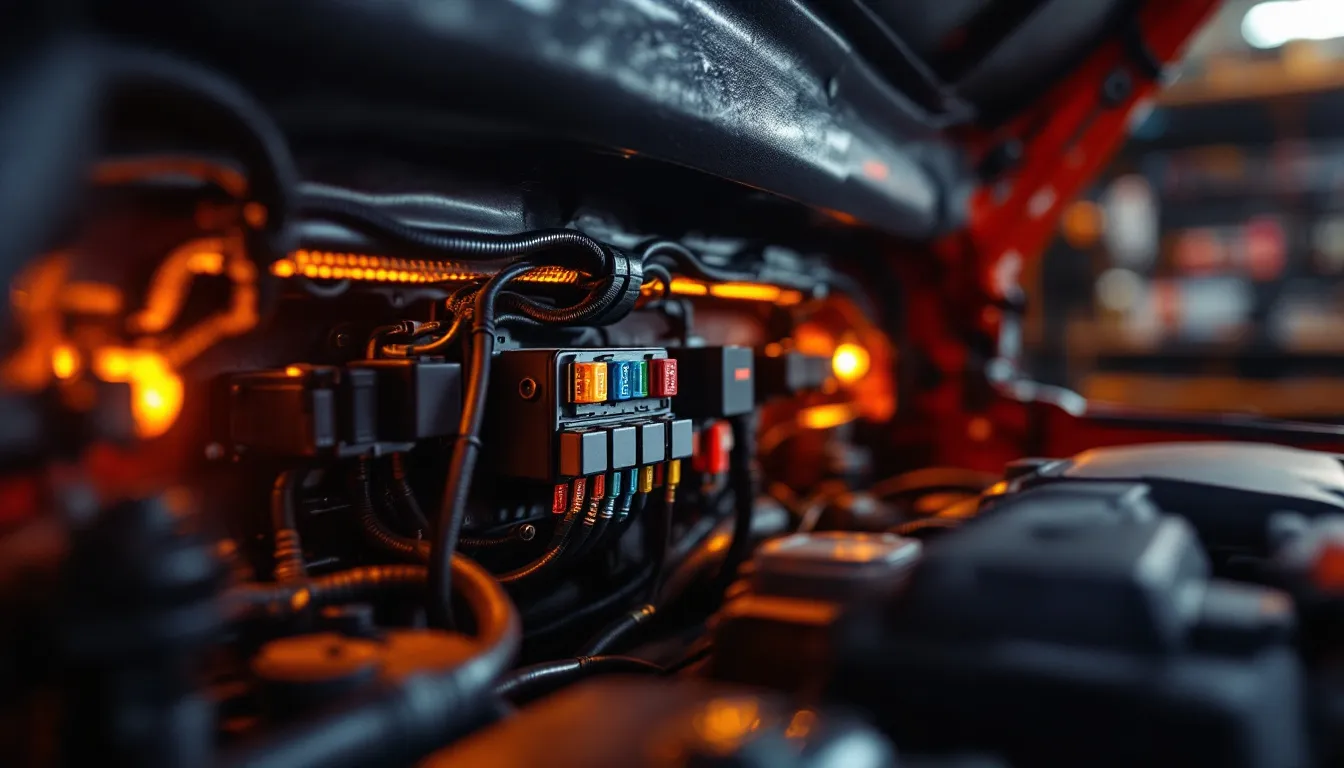
Jeep JK Wiring Harness Guide: Aux Circuits, Fuse Taps & Clean Power Runs
A Jeep JK wiring harness upgrade is any modification that adds, replaces, or improves the electrical circuits in a 2007–2018 Wrangler JK or JKU beyond the factory configuration—covering everything from fuse tap adapters for small accessories to full relay harness kits for LED light barss and plug-and-play trailer connectors.
The factory JK electrical system handles OEM loads just fine, but the moment you start stacking aftermarket accessories—LED light bars, aux switches, upgraded headlights, a winch—the limits show up fast. The right jeep jk wiring harness upgrade prevents blown fuses, melted connectors, and electrical gremlins that can sideline you on the trail. Whether you’re tapping a single fused circuit for a dashcam or running a dedicated relay for a 240W light bar, this guide covers the right approach for every scenario.
For more on powering aftermarket switches cleanly, see the aux switch panel wiring guide for the JK. If lighting is your main goal, the JK LED lighting upgrade guide covers interior and exterior options in full.
Understanding the JK Factory Fuse Box and Its Limits
The JK’s Power Distribution Center (PDC), located under the hood, and its interior fuse panel together manage every factory circuit. Neither was designed with a full aftermarket accessory load in mind. Many circuits are shared, amperage headroom is tight on a bone-stock fuse box, and the factory grounds are adequate only for OEM components.
Two main fuse centers run the JK: the under-hood PDC and the interior Totally Integrated Power Module (TIPM). The TIPM in particular has a reputation for gremlins in older JKs. Owners report intermittent failures with windows, wipers, and fuel pumps that trace back to the TIPM rather than the individual component.
The most important takeaway: never share a chassis ground point between multiple high-draw aftermarket accessories. Each shared ground introduces resistance and voltage drop. A bad or shared ground is behind more mysterious accessory failures than any other single cause in the JK community.
Here’s what you’ll consistently run into with the factory fuse box:
- Limited spare slots — many JKs leave the factory with few or no open fuse positions in the TIPM
- Shared circuits — accessories like power windows, door locks, and interior lighting share fused circuits, so overloading one affects the others
- Thin factory wiring — the OEM harness is sized for OEM loads; hanging a 10A accessory off a 15A factory circuit that’s already pulling 12A is a problem
- Corrosion-prone connectors — especially on JKs that have seen water crossings or years of weather exposure
One mistake worth calling out directly: many owners assume a power window failure means the switch is dead. Before you order a new switch, check harness continuity at the PDC first. Owners report that corroded or pinched harness wiring at the door jamb is a frequent culprit when front windows stop responding but rear windows still work. The switch is easy to blame; the harness is harder to inspect but often the real issue.
If your JK needs an engine-bay harness repair or replacement, the 68081220AI 3.6L Engine Wiring Harness Fits for Jeep Wrangler JK 2012-2015 covers OEM-specification replacements:

On Amazon and eBay
68081220AI 3.6L Engine Wiring Harness Fits for Jeep Wrangler
Check price on Amazon → See new and used on eBay →
See all current listingsPaid links. We may earn a commission from Amazon or eBay. Prices can change.
For a broader look at which JK upgrades make sense at different budget levels, see JK mods by budget.
How to Use Fuse Tap Adapters for Quick Aux Circuits
A fuse tap is the right tool for low-draw accessories—under 10A—where you need a switched or constant 12V source without cutting into factory wiring. Dashcams, USB chargers, small LED strips, tire inflators—fuse taps get the job done cleanly and reversibly. For anything drawing more than 10A, skip the fuse tap and go relay harness.
Owners report that radio head units in older JKs develop intermittent cutout issues that worsen over time. A dedicated IGN-switched fuse tap often resolves this by giving the head unit a clean, isolated ignition-on power source rather than sharing a circuit with other accessories.
Installation is straightforward:
- Identify the right fuse slot. Use a test light or multimeter to find a fuse that switches with ignition (for accessories you want off with the key) or stays on (for dashcams or trackers). The fuse tap’s load side replaces the original fuse; the add-a-circuit fuse sits in the new tap slot.
- Match the amp rating. Size the fuse in the tap to your accessory, not the original circuit. If the original slot was 15A and your accessory draws 3A, use a 5A fuse in the tap.
- Choose the correct blade fuse type. JK fuse boxes use a mix of mini (ATO/ATC), micro2, and micro3 blade fuses. Check your owner’s manual—using the wrong blade type is the most common fuse tap mistake.
- Seat the tap fully. A loose fuse tap that isn’t fully engaged causes exactly the kind of intermittent power loss owners complain about.
- Route the wire cleanly. Zip-tie the lead so it can’t contact moving parts or sharp edges. Even a low-draw accessory wire shorts if it’s left loose behind the dash.
- Test before closing up. Cycle the ignition, test the accessory, and confirm the original circuit still works.
A multi-pack of 16 Pack 4 Types 12V Car Add-a-Circuit Fuse Tap Adapter covers all four blade types and keeps you set for every slot in both the TIPM and PDC:

On Amazon and eBay
16 Pack 4 Types 12V Car Add-a-Circuit Fuse Tap Adapter
Check price on Amazon → See new and used on eBay →
See all current listingsPaid links. We may earn a commission from Amazon or eBay. Prices can change.
For clean integration of multiple switched circuits, the wiring a rocker switch panel in the JK guide shows you how to bring several fuse-tapped leads into a single managed panel.
Relay Harness Kits: Clean Power for LED Light Bars and High-Draw Accessories
A relay harness is non-negotiable for any accessory drawing more than 10A. Fuse taps and factory switch circuits aren’t designed to carry sustained high-amperage loads. Owners learn the hard way that undersized connectors melt when a relay harness is skipped—the LED light bar works fine on the bench, but under sustained load on the trail, the factory connector can’t handle the heat.
A relay harness solves this by drawing main power directly from the battery and using the switch circuit only to trigger the relay coil (tiny draw). The high-current path runs through properly gauged wire with its own inline fuse. The switch stays cool. The wiring stays intact.
I thought installing a 50” LED light bar would be a two-hour job. It took two days. The bar itself mounted to the windshield brackets without drama. But the wiring is where I learned some expensive lessons. First attempt, I ran the harness through the firewall grommet without a proper relay setup. The draw pulled too much through the factory switch, and I melted the connector within ten minutes of testing. Second attempt: proper 40A relay, fused at the battery, dedicated switch on the A-pillar. Clean install. The difference on dark dirt roads was transformative. The lesson stuck: buy from reputable brands, wire properly from the start, and don’t skip the relay for anything that draws real amperage.
Key specs to check on any relay harness kit:
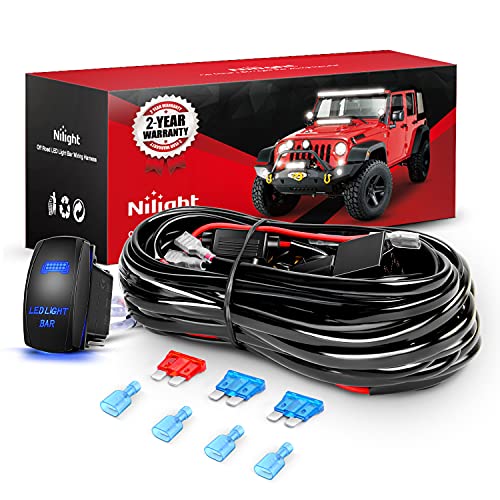
- Wire gauge: 14AWG handles most single light bars; 16AWG is marginal for loads above 15A
- Fuse rating: should match or slightly exceed the light’s rated draw
- Switch type: 5-pin rocker switches are standard; confirm the switch panel cutout size before ordering
- Connector quality: look for weatherproof connectors if the harness runs anywhere near the grille or undercarriage
- Warranty: a 2-year warranty is the baseline for any harness you’d buy for trail use
For a standard single or dual LED light bar up to about 180W on a 16AWG harness, the Nilight 10011W 16AWG Wiring Harness Kit-2 Leads LED Light Bar 12V On/Off 5 Pin Rocker Switch Power R is the entry-level standard:
If you’re running a larger curved bar in the 240W range and want the light bundled with a properly gauged 14AWG harness and 5-pin rocker switch, the Nilight 42Inch 240W Curved Led Light Bar Spot Flood Combo Led Off Road Lights and 14AWG 5Pin Rocker provides the capacity you need:

For round pod lights—common for A-pillar or bumper mounts on JKs—the Auxbeam 4In 90W Round Led Offroad Lights, 2PCS 9000LM Led Light Pod Super Bright Round Driving Light bundles two 90W pods with a complete harness:

If drilling for a mount bracket concerns you, the 4PCS Amber LED Grill Lights for Trucks, Universal Clip-On Truck Grill Lights with Wiring Harness and no-drill clip-on grille light option attaches directly to the grille bars and routes its own harness with a fuse tap included:

The no-drill approach matters. Owners sometimes hesitate to drill the main hitch bar or any structural member for a wiring bracket mount, and that hesitation is well-founded. Drilling through structural steel changes load dynamics and creates a corrosion entry point. Where a clip-on or non-penetrating mount is available, it’s the smarter choice.
For a complete look at LED light options this upgrade supports, see full LED lighting upgrade options for the JK and trail-ready underglow lighting for the JK.
Headlight Wiring: What Connector and Harness Does a JK Actually Need?
JK headlights use the H13 (9008) connector, a dual-filament plug with two power pins and one ground pin. When you upgrade to aftermarket halo or LED headlights, that H13 connector is your starting point. Getting the pin type right matters if you’re doing any direct harness crimping. The H13 uses male blade-style pins on the vehicle harness side and female socket pins on the lamp side. Many aftermarket LED headlights ship with their own pigtail adapters, but the JK community notes that included adapter quality varies widely.
The factory JK headlight circuit is not relay-switched. Full power for the headlights runs through the headlight switch and the TIPM, which means voltage drop is real on older harnesses, especially on high-mileage JKs with corroded connectors. For LED headlights—which are sensitive to voltage irregularities—a relay harness that pulls power directly from the battery resolves both the voltage drop issue and any flicker caused by TIPM switching.
For aftermarket halo headlights, you’ll typically need:
- An H13-to-H4 or H13-to-H6054 adapter harness (depending on the headlight housing format)
- A relay harness wired to the battery to supply clean, regulated voltage
- A negative-switched conversion if your aftermarket light uses a positive-switched H4-style input
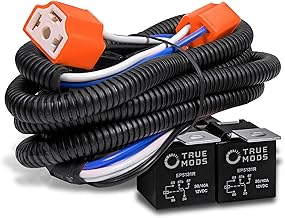
The True Mods H6054 H4 LED Headlight Wiring Harness [Negative Switched Conversion] [Fused] Universal H4 relay harness handles negative-switched conversion and covers 9003/H6024/H4 applications—common with 7-inch round halo headlight housings on JKs:
On Amazon
True Mods H6054 H4 LED Headlight Wiring Harness [Negative Switched Conversion] [Fused] Universal H4
Check price on Amazon →For fog lights using H11 or H8 bulbs—standard on many JK trims—the Anina H11 H8 880 881 Fog Light Relay Wiring Harness for Toyota Jeep dedicated fog light relay harness isolates the fog circuit from the factory switch:

Owners report that skipping the relay harness for LED headlights often results in flicker, error codes on the TIPM, or premature LED driver failure. The relay harness isn’t optional for a clean LED headlight install; it’s the foundation.
For related upgrades inside the cabin, see the interior LED lighting upgrade for the JK.
Trailer Wiring, Backup Lights & Specialty Harnesses for the JK
The JK offers solid factory trailer prep on tow-equipped trims, but the right harness choice depends on what you’re towing, how the rig is configured, and whether you need backup light integration or flat-tow capability. If you’re running a tow bar, the plug-and-play T-connector is your cleanest option: no splicing, no cutting, no guesswork.
The 4-pin T-connector is the standard starting point for most trailer setups on 2007–2018 JKs. It plugs into the factory trailer connector port on JKs that have one, or taps into the tail light harness on models that don’t. It covers running lights, brake lights, and left/right turn signals. The 4-Pin Trailer Wiring Harness for Jeep Wrangler JK JKU 2007-2018, Tow Hitch Wiring for Rubicon Sahara provides the plug-and-play integration most owners need:

On chassis ground versus outlet ground: A question that comes up regularly is whether a trailer harness ground can be connected to the ground pin of a 12V power outlet rather than directly to the chassis. The short answer is no. Power outlet grounds in the JK run through the TIPM and are not rated for sustained trailer lighting current. Connect your trailer harness ground to a clean chassis ground point: a bare metal bolt on the unibody, properly cleaned to bare metal.
For backup lights and cargo area lighting that integrates with the existing brake/reverse circuit on the 4-door JKU, the Quadratec Back Up Light Harness - Fits Jeep Wrangler JK & Unlimited 4-Door 2007-2018 - Run Accessory provides full integration:

For flat-towing behind an RV, the 58903 Custom 4 Pin RV Dinghy Towing Wiring Harness Kit for 2007-2018 Jeep Wrangler JK, RV Flat-Towin dedicated dinghy tow harness with pure copper wiring is the only way to do it safely:

On drilling into the hitch bar: If you’re considering fastening an electrical bracket or wiring clip to the main hitch assembly with a drilled hole, don’t. Hitch receivers on the JK are structural; they’re part of the rear frame rail connection. Drilling introduces a stress riser and a corrosion point. Use adhesive-backed cable clips, zip-tie mounts, or existing bolt holes in the hitch plate instead.
For hitch-integrated rear bumper options that simplify trailer wiring routing, see rear bumper options with integrated hitch mounts for the JK. If you’re still weighing which JK to buy or build, the JK buyers guide covers factory tow prep by trim and year.
Side Markers, License Plates & OEM Replacement Harnesses
Plug-and-play replacement harnesses are the easiest wins in JK electrical work. They restore factory function or add clean LED lighting with no cutting required. For 2007–2017 JKs, side marker replacement harnesses use the factory connector and swap in without modification.
Before you assume a failed side marker or license plate light is a bulb problem, check the connector. Owners report that OEM side marker connectors on JKs with high mileage or trail exposure corrode internally, causing intermittent or dead lighting even with a good bulb. Pull the connector, inspect the terminals, and clean with electrical contact cleaner before spending anything.
The same diagnostic logic applies to power windows. Many owners assume a power window failure means a bad switch, but the harness is often the real culprit. Check continuity through the door jamb harness and inspect the connector pins for corrosion before ordering a replacement switch. A switch swap that doesn’t fix the problem is a wasted $40 and a wasted afternoon.
For LED side markers with wiring harness included, covering 2007–2017 JK and JKU, the LED Side Marker Lights with Wiring Harness for 2007-2017 Jeep Wrangler JK JKU, Amber Smoked Lens, Le provides a clean upgrade:

For the fender-mounted license plate light and third brake light on JKUs, with 2M of harness and OEM-style connectors, the Partsam Compatible with Wrangler JK Fender LED License Plate And Third 3rd Brake Light 2M wiring Har offers a straightforward replacement:

If your radiator cooling fan is running constantly, cutting out, or throwing codes on 2009–2018 JKs, the 55056789AC Engine Cooling Fan Motor Wiring Harness, Radiator Fan Blower Motor Relay Resistor Fits fo fan motor wiring harness—not the fan motor itself—is worth inspecting first:

For a full look at cabin and dome LED upgrades that pair well with these exterior harness improvements, see interior LED lighting upgrades for the JK.
JK Wiring Harness Options at a Glance
Which JK wiring harness solution fits which job? The table below maps each product category to its use case, wire spec, and typical price point so you can match the solution to the task before you order.
| Product | Use Case | Wire Gauge | Fuse Included | Price Range | Best For |
|---|---|---|---|---|---|
| Add-a-Circuit Fuse Tap (16-pack) | Low-draw aux circuits, dashcam, USB | N/A (uses existing) | Yes (blade fuse) | ~$10 | First aux circuit, dashcam |
| Nilight 10011W Relay Harness | Single/dual LED light bar up to ~180W | 16AWG | Yes | ~$15 | Entry-level light bar wiring |
| Nilight 240W Curved Bar + Harness | Large curved LED bar, truck or JK | 14AWG | Yes | ~$83 | High-output light bar bundle |
| Auxbeam 90W Pod Lights + Harness | Round pod lights, A-pillar or bumper | Included | Yes | ~$85 | Pod light pairs |
| Clip-On Grille Lights + Harness | Grille accent/work lights, no-drill | Included | Yes (fuse tap) | ~$40 | No-drill grille install |
| True Mods H4 Relay Harness | LED headlight upgrade, halo housings | Included | Yes | ~$25 | Aftermarket 7” headlights |
| 4-Pin T-Connector Trailer Harness | Trailer lighting, 2007–2018 JK/JKU | OEM-matched | No | ~$29 | Plug-and-play trailer setup |
| Dinghy Flat-Tow Harness | RV flat-towing, pure copper | Copper wire | Yes | ~$73 | RV tow behind setup |
For a first-time aux wiring project, the Nilight 10011W relay harness is the recommended starting point. It’s inexpensive, well-documented, and covers the majority of single-bar LED installs.
For more upgrade context, see best JK mods by budget.
Get new guides by email
One email when we publish something worth reading. Unsubscribe anytime.
How to Choose the Right JK Wiring Harness: Buying Guide
Picking the right JK wiring harness comes down to four factors: what the accessory draws, where the power comes from, how the circuit is switched, and whether the harness is weatherproof enough for your use case. Get those four right and the rest follows.
Here are the four selection criteria in order of importance:
-
Amperage demand. Calculate or look up the rated current draw of your accessory. Add 20% headroom. Anything under 10A can use a fuse tap from the TIPM; anything over 10A needs a relay harness running direct from the battery.
-
Switch type and location. Do you want the accessory on whenever the ignition is on, or manually switched? IGN-switched fuse taps handle the first case. Relay harnesses with rocker switches handle the second. Plan the switch location before you route any wire.
-
Wire gauge for the run length. Longer wire runs lose voltage. For runs over 10 feet carrying more than 15A, step up one wire gauge from the minimum rated. Undersized wire on a long run causes heat and voltage drop that shows up as dim lights or accessory malfunction.
-
Weatherproofing. Under-hood and grille-area harnesses need weatherproof connectors. Dash and interior runs can use standard connectors. Any harness that might see water spray—even from a car wash—should have sealed, locking connectors.
Community experience matters more than spec sheets. Seek out owner reports for your specific model year before ordering. A harness that works perfectly on a 2012 JKU Sport may need an adapter on a 2007 JK X due to connector-generation differences. This is especially true for TIPM-adjacent wiring, where model-year variation is real and poorly documented in manufacturer listings.
Warranty matters too. For any harness you’re depending on for trail lighting or trailer brakes, a 2-year minimum warranty is a reasonable baseline, not a bonus.
For a broader perspective on what changes when you start modifying your JK, see what else changes when you upgrade your JK.
Frequently Asked Questions
The most common wiring harness mistake JK owners make is treating electrical failures as component failures—bad switch, bad bulb, bad fuse—without first checking whether the harness itself is the problem. Corroded connectors, pinched wires, and shared grounds cause the majority of JK electrical gremlins, and no amount of parts-swapping fixes a wiring issue.
Q: How do you diagnose and repair power window control issues when front windows stop responding but rear windows work?
A: When rear windows operate but front windows don’t, the fault is almost always upstream of the front door switches. Start by checking the door jamb harness connector; this flex point cracks and corrodes with repeated door cycling. Test for voltage at the front door switch connector with the ignition on. If voltage is present but the window doesn’t move, then suspect the switch. If voltage is absent, trace the harness back toward the PDC and check for pinching or corrosion at the door jamb.
Q: Can a trailer harness ground be connected to a 12-volt power outlet ground instead of the main chassis?
A: No. Power outlet grounds in the JK are low-current circuits routed through the TIPM and are not rated for trailer lighting loads. Connect your trailer harness ground to a dedicated chassis ground point; a clean, bare-metal bolt on the unibody avoids voltage drop, flickering lights, and potential TIPM overload. Owners report that improper grounding is the leading cause of trailer lighting issues on JKs.
Q: What pin type do H13 headlight sockets use for direct harness crimping?
A: The H13 (9008) uses three male blade-style pins on the vehicle harness side (two power for high and low beam; one ground). If you’re building a custom pigtail or crimping directly, you’ll need H13-compatible female terminal pins sized to match the OEM socket blade width. Many JK headlight relay harnesses come with pre-terminated H13 connectors, which is simpler than crimping from scratch.
Q: What causes a radio head unit to flicker on and off intermittently?
A: Owners report that intermittent radio cutout in older JKs typically worsens over time and usually traces to one of three causes: a marginal TIPM relay, a shared accessory circuit with fluctuating load, or a loose connection at the radio’s power pigtail. Installing a dedicated IGN-switched fuse tap for the radio’s constant and switched 12V inputs—bypassing the shared circuit—often resolves the issue. Check the head unit’s ground connection too; a loose ground causes cutout under vibration.
Q: What connector harness is required for aftermarket halo headlights on a JK Wrangler?
A: Most aftermarket 7-inch round halo headlights for the JK use an H4 or H6054-style connector on the light side, while the JK’s factory harness uses an H13 (9008) plug. You’ll need an H13-to-H4 adapter pigtail plus a relay harness that pulls power from the battery. Both handle the voltage conversion and provide the clean, stable power LED drivers require. See the aux switch panel guide for routing integrated switch control.
Q: What are the structural concerns with fastening electrical brackets to a vehicle hitch assembly?
A: Drilling into the main hitch receiver bar is not recommended. The hitch receiver on a JK is a structural component connected to the rear frame rails; drilling introduces a stress concentration point and an entry point for corrosion. For wiring brackets, use existing bolt holes in the hitch plate, adhesive-backed cable mounts on non-structural surfaces, or zip-tie mounts. For related lighting integrated into the rear end, the JK interior lighting upgrade guide covers non-invasive mounting approaches.
Final Thoughts: Building a Clean, Reliable JK Electrical System
The right approach to JK aux wiring is methodical: match the harness to the load, run dedicated grounds for every high-draw accessory, and never share a circuit that wasn’t designed to share. Dedicated grounds are the single most impactful step you can take for long-term electrical reliability on a JK. A properly grounded accessory with a correctly sized relay harness will outlast anything that piggybacks on a factory circuit.
Start small. A fuse tap kit and a basic relay harness handle the majority of JK accessory wiring. Once you’ve mapped your TIPM and identified the switched circuits you need, adding more accessories is straightforward.
For your next steps, the how to wire an aux switch panel in a JK guide covers consolidating multiple circuits into a managed switch panel. The LED lighting upgrade guide for the JK shows how those clean power runs translate into reliable trail lighting: from light bars to interior LEDs.
Free: JK Fluids at a Glance
Every fluid, spec and capacity for the 2007-2018 Wrangler JK on one page, plus a cut-out glovebox card. Checked against the owner's manuals. From the JK Service Kit.
Email me the download and new guides when they are published. Unsubscribe anytime. Privacy Policy.
Allan
I'm Allan. I own a 2014 Jeep Wrangler JKU and I research the hell out of every mod before I touch it. When I've fitted something to my own Jeep, I say so. Everything else is researched from manufacturer specs and other owners' reports. No sponsored fluff.
Learn more about me →Free: JK Fluids at a Glance
Every fluid, spec and capacity for the 2007-2018 JK on one page, plus a glovebox card.
Email me the download and new guides when they are published. Unsubscribe anytime. Privacy Policy.
Related Articles
Jeep JK Interior Lighting: How to Upgrade Dome, Map & Cargo Lights to LED
Upgrading the interior lights on your Jeep Wrangler JK is one of the fastest, cheapest modifications you can make, and one of the most noticeable.
KC HiLiTES Daylighter vs Slimlite for Jeep JK: Which Aux Lights Win?
KC HiLiTES aux lights are American-made auxiliary driving lights built for off-road and overlanding use, combining high-output bulb or LED technology with...
Holley Retrobright LED Headlights for Jeep JK: Classic Look, Modern Output
Holley Retrobright LED headlights are DOT-approved, 7-inch round LED sealed-beam replacements designed to deliver modern light output while preserving the...