Best JK Aux Switches: Complete Buyer's Guide & Product Comparison
Introduction: Why Your JK Needs an Auxiliary Switch System
Your Jeep JK came from the factory with a limited number of switch positions on the dashboard. If you’re like most JK enthusiasts, you’ve already maxed out those slots with aftermarket accessories—LED light bars, rock lights, air compressors, winches, auxiliary lighting, or supplemental cooling fans.
Running these accessories through factory switches is a recipe for electrical problems. Factory switches aren’t designed to handle the high amperage draws that modern aftermarket equipment demands. Push too much current through them, and you’ll experience flickering lights, burnt-out switches, potential electrical fires, or complete system failures.
This is where auxiliary switch systems come in. Combined with a dual battery setup, aux switches provide the foundation for a reliable electrical infrastructure that supports serious modifications.
An auxiliary switch panel (or “aux switch system”) gives you multiple controllable circuits with dedicated relays, proper wiring gauges, and fuses for each accessory. Instead of fighting your factory electrical system, you work alongside it with a purpose-built auxiliary system.
In this guide, we’ll cover everything you need to know about JK auxiliary switches: how they work, where to mount them, how to wire them properly, and detailed reviews of the five best systems on the market.
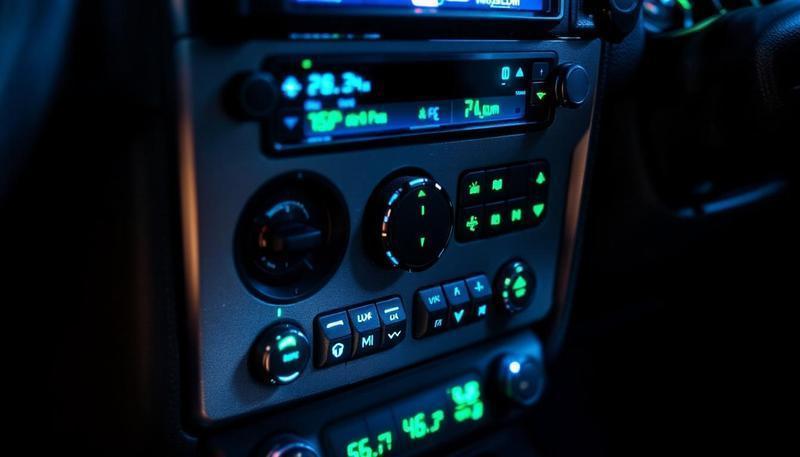
What Are JK Auxiliary Switches and How Do They Work?
Auxiliary switches are aftermarket control panels that safely manage power distribution to multiple accessories on your Jeep. Here’s how the system works:
The Basic Circuit:
- Power Source: Heavy-gauge wire runs directly from the battery to a power distribution block or fused panel
- Fuses: Individual fuses protect each circuit (typically 30-60 amps depending on the accessory)
- Relays: Electromagnetic relays use low-amperage switch signals to control high-amperage power circuits
- Switch Control: Dashboard or pillar-mounted switches send small electrical signals to the relays
- Accessory Load: The relay switches high-amperage power to your lights, winches, compressors, or other equipment
Why This Matters:
Factory switches are designed for moderate loads—basically, interior lights, wipers, and basic electrical functions. They typically handle 10-20 amps maximum. Modern LED light bars can draw 30-60+ amps. A 10,000 lb winch draws 100+ amps.
Without relays, that high current flows directly through your dashboard switch contacts. The contacts can’t handle it—they overheat, corrode, weld together, or fail catastrophically. You might also experience voltage drop affecting other electrical systems.
With properly installed relays, your switches only carry the small control current (usually less than 1 amp), and the relays do the heavy lifting. Your factory electrical system remains undamaged, and your accessories get clean, reliable power.
Mounting Options: A-Pillar vs. Overhead vs. Dash
Your choice of mounting location affects usability, appearance, and installation complexity.
A-Pillar Mounting
What it is: Switches mounted on the vertical pillar next to the driver’s door, within thumb’s reach.
Pros:
- Excellent ergonomics—easy to operate while driving
- Professional appearance
- Doesn’t consume dashboard space
- Good visibility of switch indicators
- Popular on built-out JKs
Cons:
- Requires cutting into interior plastics
- More complex installation
- Can be slightly more prone to water intrusion if not sealed properly
- Limited space for large switch panels
- May interfere with aftermarket door speakers
Overhead Mounting
What it is: Switches mounted in the headliner space above the driver and passenger, usually in the center console area.
Pros:
- Clean, integrated appearance
- Plenty of space for large panels
- Protected from weather
- Easy access while driving
- Popular with professional builders
- Natural mounting location near power source
Cons:
- Requires headliner removal
- Wiring runs through roof panel
- Less visible while driving (must look up)
- Can be harder to reach for passengers
- More complex installation
Dash Mounting
What it is: Switches integrated into the factory dashboard or mounted in available dash openings.
Pros:
- Simplest installation
- Visible and within easy reach
- Minimal interior modification
- Good for switches controlling less-frequently-used accessories
- Best for compact switch panels
Cons:
- Consumes valuable dashboard real estate
- Can look less integrated
- Limited mounting space
- May block gauge visibility
- Less comfortable to reach while driving
Our Recommendation: For most JK owners, A-pillar mounting offers the best compromise between ergonomics and appearance. Overhead mounting is excellent for heavily built-out rigs. Dash mounting works best for simple 2-4 switch setups.
Understanding Relay Systems and Proper Wiring
Even the best aux switch panel is only as good as its wiring. Here’s what you need to know about safe, reliable installations.
Why Relays Are Non-Negotiable
A relay is a simple electromechanical switch. When you apply a small voltage to the relay’s control coil, it magnetically switches a high-amperage circuit on or off. This means:
- Your dashboard switch handles maybe 0.5 amps of control current
- The relay handles the heavy 30-100+ amps to your accessory
- Your factory electrical system sees minimal load
- Everything operates safely and reliably
Without relays, you’re asking dashboard switches rated for 10-20 amps to handle 100+ amps. They will fail. Relays are essential for powering high-draw accessories like LED light bars, winches, and onboard air compressors.
Proper Wire Gauges
This is critical. Using undersized wire causes voltage drop, heat buildup, and fire risk. Here’s a quick reference for most JK accessories:
- 30-amp circuits (interior lights, moderate LEDs): 10 AWG wire
- 40-50-amp circuits (heavy LED bars, fans): 8 AWG wire
- 60-100-amp circuits (winches, compressors): 4 AWG wire
- Battery to main power block: 2/0 AWG or larger (depends on total system draw)
Always run a direct wire from the battery to your main fused distribution block. Never tap into factory wiring.
Fusing Requirements
Every circuit must have a dedicated fuse sized 10% higher than the maximum circuit amperage. Examples:
- 30-amp circuit: 30-amp fuse
- 50-amp circuit: 50-amp fuse
- 100-amp circuit: 100-amp fuse
Fuses should be mounted within 12 inches of the battery connection for that circuit.
Common Installation Mistakes to Avoid
- Running hot power through the cabin without proper conduit—creates fire risk
- Daisy-chaining fuses—each circuit needs its own fuse
- Undersizing wire—causes voltage drop and heat
- No ground return—all circuits need proper ground back to battery negative
- No relay protection—running high amperage through dashboard switches
- Improper relay sizing—relay coil voltage must match your system (12V or 24V)
All the systems we review below handle these concerns properly if installed correctly. Read the instructions carefully.
Top 5 Best JK Auxiliary Switch Systems
1. sPOD PowerBox
Price: $500-700 | Switches: 4-8 | Mounting: Overhead or dash | Relay Integration: Built-in
Overview: sPOD (Switch Panel On Demand) is the premium choice for serious JK builders. The PowerBox system is a fully integrated solution with built-in relay modules, fused distribution, and an elegant master control unit.
Pros:
- Integrated relay modules eliminate separate relay wiring
- Excellent build quality and reliability
- Comprehensive customer support and online community
- Compatible with most JK aftermarket systems
- Clean, professional appearance
- Available with 4, 6, or 8 switch configurations
- Includes detailed installation instructions
- Good resale value
Cons:
- Higher price point than competitors
- Steeper learning curve for wiring
- Some users report software glitches (depending on model year)
- Requires good battery voltage for optimal performance
- Not as compact as some alternatives
Best For: Heavily modified JKs with multiple accessories, builders wanting professional-grade reliability and integration, those prioritizing long-term durability.
Installation Difficulty: Intermediate to Advanced
2. Trigger Controller
Price: $300-450 | Switches: 4-6 | Mounting: A-pillar, dash, or overhead | Relay Integration: External relays included
Overview: Trigger Controller offers an excellent balance of affordability, functionality, and ease of installation. The system uses discrete relays and a clean switch panel, making it ideal for DIY installers.
Pros:
- Excellent price-to-performance ratio
- Straightforward relay wiring (easier to troubleshoot)
- Modular design—add switches as needed
- Great community support and video tutorials
- Compact switch panel options
- A-pillar mounting works exceptionally well
- Reliable and proven design
- Good warranty support
Cons:
- Relay modules take up more space than integrated solutions
- Requires separate relay mounting location
- Switch panel can look less integrated than OEM-style options
- Limited smartphone integration vs. sPOD
- Fewer customization options
Best For: Budget-conscious builders, first-time aux switch installers, A-pillar mounting preference, simple to moderate accessory setups.
Installation Difficulty: Beginner to Intermediate
3. Rough Country Modular Lighting Controller (MLC)
Price: $350-550 | Switches: 3-6 | Mounting: Dash-integrated or standalone | Relay Integration: Built-in
Overview: Rough Country’s MLC is designed to integrate seamlessly with modern JK dashboard designs. If you’re running Rough Country lighting or suspension, this system integrates cleanly.
Pros:
- Factory-style appearance when dash-mounted
- Good integration with Rough Country product ecosystem
- Robust relay design
- Competitive pricing
- Available as standalone or integrated into dash bezel
- Comprehensive wiring harnesses included
- Reliable build quality
- Good technical support
Cons:
- Best integration only works with Rough Country lighting systems
- Less expandable than some competitors
- Dashboard mounting location may limit switch count
- Not ideal for A-pillar installation
- Limited customization options
- Some reports of inconsistent quality control
Best For: Rough Country product users, those wanting factory-integrated appearance, straightforward installations, dash-mounted preference.
Installation Difficulty: Beginner to Intermediate
4. OTRATTW Auxiliary Switch Panel
Price: $250-400 | Switches: 4-6 | Mounting: A-pillar, dash, or overhead | Relay Integration: External relays included
Overview: OTRATTW represents an excellent budget option without sacrificing quality. This system is popular among budget-conscious JK builders and provides straightforward functionality.
Pros:
- Lowest price point of quality systems
- Simple, reliable design
- Easy installation for beginners
- Compatible with standard relays and wiring
- Compact switch panel
- Good customer reviews on budget forums
- Minimal plastic parts—won’t degrade
- Straightforward troubleshooting
Cons:
- Basic feature set—no fancy integrations
- Less robust documentation than premium brands
- Limited phone/online support
- Smaller online community
- Less aesthetic integration options
- Can feel “utilitarian” in appearance
- Limited warranty compared to competitors
- Fewer color/style options
Best For: Budget builders, simple 4-switch setups, first-time installers wanting to learn wiring, utilitarian builds, those comfortable with minimal support.
Installation Difficulty: Beginner to Intermediate
5. Switch-Pros
Price: $600-900 | Switches: 6-12 | Mounting: Custom (usually overhead) | Relay Integration: Fully integrated with custom power distribution
Overview: Switch-Pros is the choice of professional builders and extreme off-roaders. These are essentially custom-built systems tailored to your specific needs, with professional-grade reliability.
Pros:
- Professional-grade quality and reliability
- Fully customizable to your accessory setup
- Highest amperage capacity available
- Extremely clean appearance when professionally installed
- Excellent technical support from knowledgeable builders
- Industry-standard among professional fabricators
- Can handle 200+ amps total system load
- Excellent warranty and backup support
- Premium materials and construction
Cons:
- Highest price point—often requires professional installation
- Longer lead times (custom build)
- Steeper learning curve for DIY installation
- Overkill for basic setups
- Requires more planning before ordering
- Less “plug and play” than off-the-shelf options
- Smaller dealer network outside major cities
Best For: Extreme builds with 8+ accessories, professional installations, those willing to invest in top-tier reliability, custom applications, commercial/expedition use.
Installation Difficulty: Advanced (usually professional installation recommended)
Featured Product Cards
Pros:
- Purpose-built for JK Wrangler ensures proper fitment and function
- Durable construction handles trail abuse and daily driving
- Backed by positive community reviews and trail-tested results
Cons:
- Premium pricing compared to generic aftermarket options
- May require longer lead times for specialty or popular items
- Some products require professional installation for best results

Detailed Comparison Table
| Feature | sPOD | Trigger | Rough Country | OTRATTW | Switch-Pros |
|---|---|---|---|---|---|
| Price Range | $500-700 | $300-450 | $350-550 | $250-400 | $600-900 |
| Switch Count | 4-8 | 4-6 | 3-6 | 4-6 | 6-12 |
| Integrated Relays | Yes | No | Yes | No | Yes |
| Best Mounting | Overhead | A-pillar | Dash | A-pillar | Overhead |
| DIY Friendly | Intermediate | Beginner | Beginner | Beginner | Advanced |
| Customization | Good | Excellent | Limited | Good | Excellent |
| Warranty | 2-3 years | 1-2 years | 1 year | Limited | 2+ years |
| Community Support | Large | Large | Medium | Small | Professional |
| Best For | Premium builds | Budget DIY | RC ecosystem | Minimal budget | Pro builds |
Installation Basics: What to Expect
Tools You’ll Need
- Wire stripper/crimper
- 10mm and 8mm wrenches (battery terminals)
- Panel removal tools
- Electrical tape and wire loom
- Multimeter
- Cordless drill
- Small flashlight
- Relay test light (optional but helpful)
Time Commitment
- Simple 4-switch system: 4-6 hours for an experienced DIYer
- Moderate 6-switch system: 6-10 hours
- Complex 8+ switch system: 12+ hours or professional installation recommended
Key Installation Steps
- Disconnect the battery negative terminal and wait 15 minutes to drain residual power
- Plan your route: Determine how wires will run from battery through engine bay and into cabin
- Install main battery cable from battery to main distribution block (fused within 12 inches)
- Mount relays: Usually near the battery or in the engine bay for shortest runs
- Run switch control wires from relay triggers through cabin to your switch location
- Ground all circuits back to battery negative (usually through grounding block under hood)
- Install switch panel at your chosen location
- Connect accessories to the appropriate relay outputs
- Test each circuit individually before driving
- Secure all wiring with loom, clips, and cable management
Common Issues and Solutions
Problem: Switches don’t work
- Solution: Check fuse first, verify relay coil has power, test switch with multimeter
Problem: Accessory works intermittently
- Solution: Loose connection—check all crimps, likely at relay terminals or switch connection
Problem: Accessories dim when you turn on engine
- Solution: Undersized battery cable or weak battery—upgrade to larger gauge wire
Problem: Electrical burning smell
- Solution: Turn off immediately—circuit is overloaded or wire is undersized
Problem: Relay clicking but accessory doesn’t turn on
- Solution: Check that high-amperage wire to accessory is properly connected and fused
Wiring Best Practices for JK Aux Switches
Battery Terminal Connections
Always use appropriately sized cable lugs and bolts. For high-amperage systems:
- Use OEM-style battery terminals (get them from Mopar)
- Tighten securely—loose connections cause voltage drop
- Apply dielectric grease to prevent corrosion
- Never use aftermarket “fancy” terminals for main battery connection
Grounding
This is critical and often overlooked. A poor ground is the #1 cause of electrical gremlin issues.
- Ground to the battery negative terminal or a dedicated ground block
- Use the same gauge wire for ground as for the hot side
- Don’t share ground with factory electrical
- Test ground continuity with a multimeter (should show 0 ohms)
- Clean any corrosion from ground surfaces before bolting down
Wire Routing
- Run all power cables through the firewall in a dedicated path
- Use conduit or loom to protect wires from sharp edges, heat sources, and UV
- Avoid routing near exhaust manifolds (minimum 4-6 inches)
- Don’t run auxiliary power near factory computer wiring
- Secure every 12 inches with cable clips
- Separate hot and ground runs if possible
- Label all wires at connections with weatherproof labels
Fuse Placement
- Fuse holder must be within 12 inches of the battery connection for that circuit
- Use marine-grade fuse holders in the engine bay (waterproof)
- Use ATC blade fuses (most common) or ANL fuses for very high amperage
- Keep spare fuses in the vehicle
- Size fuses at 110% of circuit amperage (30A circuit gets 30A fuse)
Making Your Decision: Which System Is Right for You?
Choose sPOD if:
- You’re building a premium, heavily modified JK
- You want the cleanest integration and most support
- Budget is secondary to reliability and features
- You plan to keep the vehicle long-term and want resale value
Choose Trigger Controller if:
- You’re a DIY installer on a moderate budget
- You want straightforward wiring you can troubleshoot yourself
- You like A-pillar mounting and ergonomic switch placement
- You want good long-term community support
Choose Rough Country MLC if:
- You’re already running Rough Country lighting or suspension
- You want factory-integrated appearance
- You’re building a basic setup with 4-6 accessories
- Dashboard mounting works for your layout
Choose OTRATTW if:
- Your primary concern is budget
- You’re experienced with basic electrical work
- You want a simple, reliable, no-frills system
- You don’t need extensive technical support
Choose Switch-Pros if:
- You’re running 8+ accessories or extreme amperage
- You want professional-grade reliability
- You’re willing to invest significantly in quality
- You’re considering professional installation
- You need custom integration beyond standard options
Installation Resources and Support
Video Tutorials
Most manufacturers offer comprehensive YouTube installation videos. sPOD and Trigger Controller have particularly active YouTube communities with multiple build examples.
Online Communities
- JK-Forum.com: Active electrical subforums for all aux switch brands
- JeepTalk.org: Experienced builders sharing install tips
- Facebook Groups: Brand-specific groups (sPOD Community, Trigger Controller Users, etc.)
- Reddit r/Jeep: Real-world user experiences and troubleshooting
Professional Help
If you’re uncomfortable with electrical work, professional installation typically costs $300-800 depending on system complexity. Look for:
- Local 4WD shops specializing in Jeeps
- Jeep dealerships offering accessory installation
- Independent automotive electricians
- Custom builders in your area
Maintenance and Troubleshooting Tips
Regular Maintenance
- Monthly: Visually inspect wiring and connections under the hood
- Every 6 months: Check for corrosion on battery terminals and grounds
- Annually: Test each circuit with a multimeter to verify voltage
- As needed: Replace blown fuses (check amperage before replacing)
Preventing Problems
- Keep battery terminals clean and tight
- Use dielectric grease on all exposed connections
- Replace worn or damaged wire insulation immediately
- Check fuse holders for corrosion
- Ensure ground straps are secure
Upgrading Your System
Most systems allow adding switches later. If you’re considering future expansion:
- Buy a system with 2-3 extra switch slots from the start
- Keep extra relay mounting space available
- Future-proof your main battery cable (size for 20-30% more than current load)
Conclusion: Best JK Aux Switches for 2026
After evaluating options, here’s our final recommendation based on use case:
Overall Best Value: Trigger Controller offers the best balance of price, reliability, ease of installation, and community support for most JK owners.
Best for Premium Builds: sPOD PowerBox is the choice for heavily modified JKs with professional-grade integration and features.
Best Budget Option: OTRATTW delivers solid functionality at the lowest price point for simple setups.
Best Factory Integration: Rough Country MLC excels if you’re already invested in Rough Country products.
Best for Extreme Builds: Switch-Pros is the only choice for serious expedition vehicles with 8+ accessories and custom integration requirements.
Regardless of which system you choose, the most important thing is proper installation. Take your time with wiring, don’t skip any fuses, use appropriately sized wire, and verify each circuit before driving. A properly installed auxiliary switch system will serve your JK reliably for years, supporting whatever adventures you have planned.
Ready to upgrade your JK’s electrical system? Check out our detailed installation guides for each brand, or browse our recommended wiring diagrams in the resources section below.
Related Articles
- JK Electrical Upgrades Guide
- JK Dual Battery Setup
- JK Winch Installation Guide
- Best JK Light Bars
- Best LED Headlights for JK
Related Guides
Explore more JK upgrade guides to complement your build:
For related upgrades, see our lift kit guide.
- Best Winches for JK — winch options that need proper wiring
- Armor & Protection Guide — bumper and protection upgrades
- Best JK Phone Mount — phone mounting solutions
Frequently Asked
Q: Can I use any relay with any aux switch system? A: Mostly yes, but verify relay coil voltage (12V vs. 24V) and contact rating (amps). Standard automotive relays are interchangeable for most applications.
Q: How many switches do I actually need? A: A basic setup handles lights and power outlets (4 switches). A moderate build adds a winch and air compressor (6 switches). Extreme builds might use 8-12 switches for every accessory.
Q: Can I upgrade from 4 switches to 6 later? A: Yes, most systems allow adding switches and relays. Plan ahead and buy systems with extra relay mounting space if you might expand.
Q: What’s the maximum amperage for a JK electrical system? A: Stock alternator outputs about 120-150 amps. After accounting for engine systems, you have 60-80 amps available. Heavy builds should upgrade to a larger alternator. Serious projects adding winches, dual batteries, and multiple light bars should invest in alternator upgrades.
Q: Do I need to upgrade my battery? A: Stock battery is fine for most builds. High-amperage draws (winches, heavy LEDs) benefit from a dual battery setup or larger main battery, especially for repeated heavy use. Overlanders frequently rely on dual batteries to power accessories while ensuring guaranteed starting power.
Get the Free JK Build Planner
Complete PDF with mod checklists, gear ratios, tire sizing charts, and budget worksheets. Everything you need to plan your JK build.
No spam. Unsubscribe anytime. By subscribing, you agree to our Privacy Policy.
Frequently Asked Questions
What are JK aux switches and why do I need them?
JK aux switches (auxiliary switches) are aftermarket control panels that allow you to operate additional electrical accessories on your Jeep JK without rewiring the factory electrical system. You need them because factory switch slots are limited, and running heavy accessory loads directly through factory switches can cause damage. Aux switches solve this by using relays and proper wiring to safely control lights, winches, air compressors, and other aftermarket accessories.
What's the difference between A-pillar, overhead, and dash-mounted aux switches?
A-pillar mounted switches are installed on the side pillar for easy thumb access while driving. Overhead switches mount in the headliner space and provide a clean appearance. Dash-mounted switches integrate into the dashboard area. A-pillar mounting offers best ergonomics, overhead is most aesthetic, and dash mounting saves interior space. Your choice depends on your rig's layout and which accessories you're controlling.
Do I need a relay system for aux switches?
Yes, relay systems are essential for any heavy-load accessories. Relays use low-amperage switch signals to control high-amperage power circuits, protecting your factory electrical system. Without relays, drawing heavy current through your aux switches can damage the switch contacts and factory wiring. A proper relay setup with fused circuits is the safest way to power accessories like LED light bars, winches, and compressors.
Can I install JK aux switches myself?
Yes, if you have basic electrical knowledge and proper tools. Most aux switch systems include detailed instructions. Key skills needed: running wire through the engine bay and interior, crimping connectors, understanding relay circuits, and using a multimeter. If you're uncomfortable with electrical work, professional installation is recommended. Improper installation can cause electrical fires or damage expensive systems.
What's the best JK aux switch system?
The best system depends on your needs. sPOD is most user-friendly with integrated relay mounting. Trigger Controller offers excellent affordability and customization. Rough Country MLC provides factory-integrated controls. OTRATTW excels in installation ease. Switch-Pros delivers professional-grade reliability. For most JK owners, sPOD or Trigger Controller offer the best balance of features, price, and support.
Jeep JK Guide
We're JK owners who've been building, breaking, and fixing Wranglers for years. Everything here is tested on our own rigs - no sponsored fluff, just honest recommendations.
Learn more about us →Get the JK Build Planner
Free PDF with complete build checklists, gear ratios, and tire fitment guides.
By subscribing, you agree to our Privacy Policy.
Related Articles

Best LED Halo Headlights for Jeep Wrangler JK: Top 7 Picks
The best LED halo headlights for Jeep Wrangler JK balance brightness, DOT approval, and budget. Compare 7 top picks from $60-$600 with installation tips.
How to Install LED Headlights on Jeep Wrangler JK: Complete Step-by-Step Guide
Learn how to install LED headlights on your Jeep Wrangler JK with this step-by-step guide. DOT-approved options, aiming tips, and flicker fixes included.

Best LED Fog Lights for Jeep JK: Brightest Off-Road Vision