How to Install a Light Bar on a Jeep JK: Wiring, Mounting & Legal Tips
How to Install a Light Bar on a Jeep JK: Wiring, Mounting & Legal Tips
Affiliate Disclosure: JeepJK Guide earns a commission on qualifying purchases made through links on this page. This costs you nothing and helps keep the site running.
What Actually Goes Into Installing a LED Light Bar on Your JK
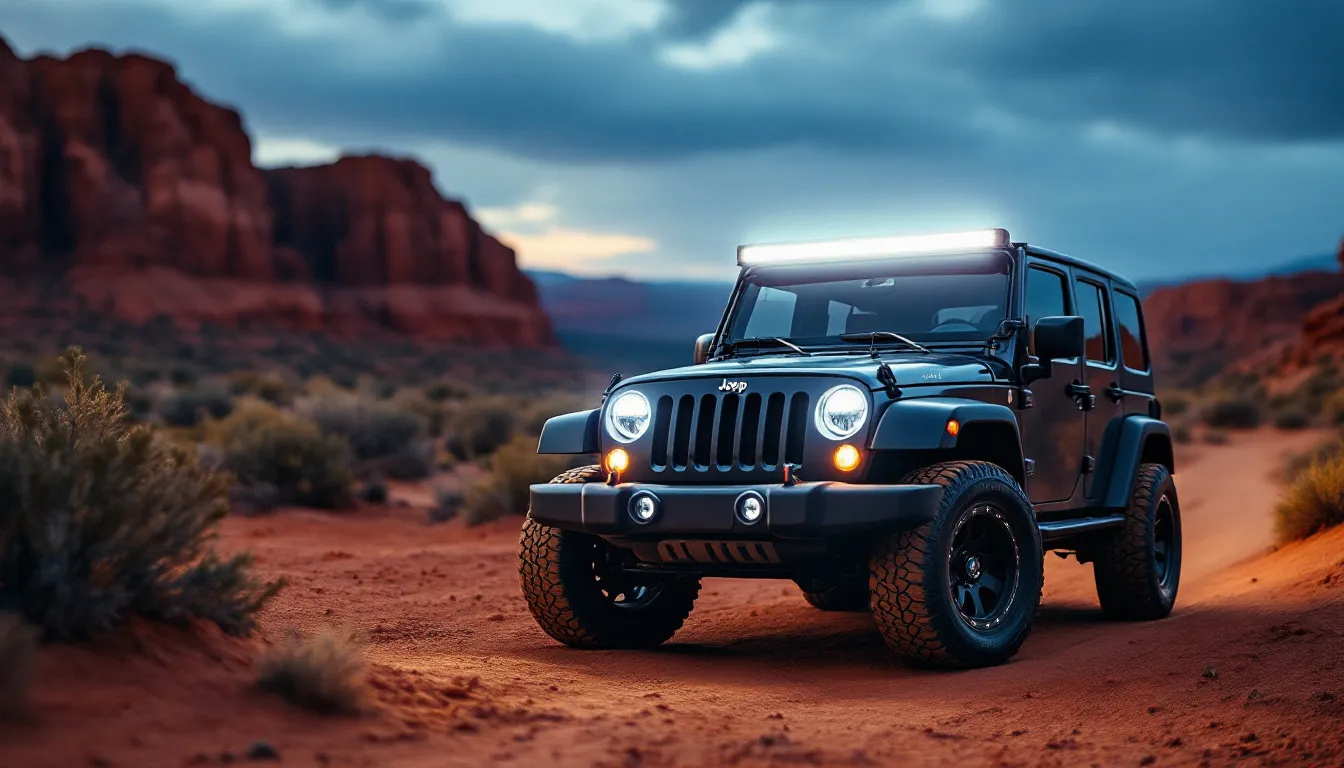
A Jeep JK LED light bar install is straightforward in theory: mount a bar to your 2007–2018 Wrangler’s roof, bumper, or A-pillar, wire it through a relay and fuse, flip a switch, and light up the trail. In practice, it’s the wiring that catches most people off guard.
Done right, the whole job takes two to four hours for a roof mount. You need basic hand tools, a relay harness, and either existing mounting brackets or the hardware to add them. Sounds simple enough.
But here’s what actually kills installs: skipping the relay because the bar’s instructions say it’s optional, routing power wire through the firewall without a grommet and discovering it’s chafed six months later, or not bench-testing before you bolt everything down and learning the bar’s DOA after 15 feet of wire is already routed.
I learned that third lesson the hard way. A 50-inch bar that looked perfect on the roof turned out to have a manufacturing defect — one LED pod was dead from the factory. After two full days of wiring, testing, and troubleshooting, I traced it back to a single dead driver module inside the bar itself. Warranty claim took three weeks. The lesson stuck: always fire up the bar with clip leads before permanent mounting. Finding a defect at that point takes ten minutes. Finding it after it’s bolted to the roof and wired through the firewall is something worse.
For broader electrical context on JK battery upgrades and fuse block routing, start with our JK electrical upgrades guide before you dive in.
Roof Mount vs Bumper Mount vs A-Pillar: Where Your Light Bar Actually Goes
The best position for your JK’s LED light bar depends entirely on how you drive it. Roof rail wins for maximum throw distance on open trails. Bumper mount is best for close-in rock crawling where you need to see the ledge three feet in front of you, not 300 feet away. A-pillar pods fill the blind spots both of those miss.
All three work on 2007–2018 JK 2-door and JKU 4-door models. The JKU’s longer roof is the key difference — it easily handles a 50-inch bar where the 2-door’s shorter roofline caps out practically at 40 inches before things start looking awkward.
Roof Rail Mount
High vantage point, maximum beam distance, and the ability to illuminate two-track country in front of you for a quarter-mile. That’s the upside.
The downside is real: every soft top removal, windshield fold, or wash day now involves working around the bar. Hood glare is a tuning problem until you dial in the beam angle correctly. And if you’re frequently folding the soft top back and forth, a quick-release bracket becomes less of a luxury and more of a necessity.
Front Bumper Mount
Lower beam angle means shorter effective distance, but that’s not actually a drawback on the terrain where bumper bars shine. Rock crawling, technical trail sections, and tight boulder fields — you don’t need to see a quarter-mile ahead. You need to see the next obstacle. A bumper bar puts light exactly where you need it: directly on the line.
The reality: bumper bars take abuse. Rock strikes, branch whips, and trail contact are inevitable. Pair yours with a quality steel bumper built with integrated light tabs rather than retrofitted brackets. See our JK front bumper options guide if you’re choosing a new bumper anyway.
A-Pillar Pod Lights
These aren’t a replacement for a full bar — they’re complementary. Small 3-inch or 4-inch pods mounted on the A-pillars fill the immediate corner zones that even a roof bar struggles to illuminate while driving tight terrain. They’re also the easiest to install and remove.
For specific pod recommendations and integration with a main bar, check out our best LED pod lights for JK A-pillar mounts guide.
Most JK owners find a single roof-mounted 40–50-inch bar delivers the best balance of throw distance, simplicity, and compatibility with soft top storage. If you’re mixing terrain — some road, some trail — that configuration is genuinely hard to beat.
Tools and Parts You’ll Actually Need
Get everything staged before you touch the Jeep. Hunting for a heat-shrink connector halfway through wiring is how a two-hour install becomes a four-hour project.
Tools
- Wire stripper / crimper combo
- Heat-shrink butt connectors and terminals
- Drill with step bit (for new switch holes if needed)
- 10mm socket and ratchet
- Torx T30 (for JK roof rail bolts)
- Electrical tape and zip ties
- Multimeter (non-negotiable for testing)
- Fishing wire or wire snake
- Utility knife
- Firewall grommet punch (or an existing unused grommet)
Parts
- LED light bar (sized to your mount — see Section 2)
- Roof rail mounting brackets (JK-specific fitment)
- Relay harness (30-amp minimum; 40-amp for bars over 100W)
- Inline fuse holder with 30–40A blade fuse
- 14-gauge wire minimum for control circuit, 12-gauge for power feed
- Firewall grommet (rubber, for wire protection)
- Rocker switch or dash panel switch
- Loom / split conduit for protection on exposed runs

The H13-to-H4 connector pigtail becomes invaluable if you’re pulling a trigger signal from the JK’s headlight circuit — you tap the signal without cutting factory wiring.
How to Wire a LED Light Bar on Your JK: The Relay, Fuse & Switch Explained

Here’s what separates a clean, safe install from the kind of failure that leaves you standing on the side of a dark trail with a melted connector: running battery power through a relay, not directly through your switch.
The switch controls a low-current trigger signal to the relay. The relay itself handles the high amperage the bar actually draws. This distinction matters so much that I can trace every failed JK light bar install I’ve heard about back to skipping this step.
My own education on this came the hard way during an early bar install. I wired a 50-inch bar using the manufacturer’s “simplified” instructions — no relay, just a switch running direct power to the bar. The harness was undersized 18-gauge wire because, according to the instructions, “relay is optional.” Within three trail runs, the connector at the switch burned. The switch housing discolored, the connector smelled like charred plastic, and the bar quit mid-run. Tracing it back was immediate: a 10-amp draw through a 5-amp-rated switch circuit using undersized wire. That’s a thermal disaster waiting to happen, and it’s entirely preventable.
6-Step Wiring Sequence (Done Right)
-
Disconnect the negative battery terminal. Work on a dead circuit every single time.
-
Mount the relay near the firewall. Use a local ground point for terminal 85 (relay coil ground) and run 14-gauge wire from terminal 86 to your dash switch. This is the low-current trigger side — it sees maybe 100 milliamps.
-
Run 12-gauge power wire from battery positive to relay terminal 30. Install an inline fuse holder within 18 inches of the battery post. Use 30A for bars up to ~150W; 40A for anything larger.
-
Run 12-gauge wire from relay terminal 87 to the light bar’s positive lead. This is where the real current flows — 10 to 20+ amps depending on bar wattage. The relay opens and closes this circuit, not your switch.
-
Ground the bar directly to bare chassis. Don’t share a ground with other accessories. A dedicated ground point — a clean, paint-free bolt on the chassis — eliminates the resistance that causes flicker.
-
Route the power wire through a firewall grommet. Use an existing unused hole if available, or make a new one. Fit a rubber grommet before threading wire through. Wrap the section between the firewall and the bar in split conduit or braided loom. This is the step that prevents shorts six months later when the wire insulation finally gives way to age and vibration.
The True Mods relay harness combines steps 2–4 into a single pre-assembled unit. It’s the kind of kit that would have prevented that melted connector in my early install — everything is fused, gauged correctly, and ready to wire.
Bench-Test Before You Mount
Connect the bar temporarily with clip leads, trigger the relay, and confirm full illumination across all LED pods. DOA (dead-on-arrival) units are rare but genuinely possible. Finding one before you’ve bolted the bar to the roof and routed 15 feet of wire upward saves real frustration.
For aux switch panel options that mount cleanly in the JK’s dash, check our best JK aux switches guide.
How to Mount a LED Light Bar to a JK Roof Rail: Step-by-Step
Mounting a bar to the roof rail is the straightforward half of the job. Wiring is the part that separates casual builders from people who’ve troubleshot electrical gremlins. But the mounting itself is honest work — nothing hidden, nothing that surprises you if you take five minutes to dry-fit first.
Step-by-Step Roof Rail Mount (2007–2018 JK and JKU)
-
Dry-fit the brackets on the roof rail first. Slide the bar’s mounting clamps onto the factory rails without tightening anything. On a 2-door, position it over the front half of the roof for aerodynamics. On a JKU, you have more rail — center it or shift forward based on your soft-top clearance needs.
-
Check soft-top clearance before you commit. If you run a soft top, fold it back and confirm it clears the bar during fold and storage. Many owners with soft tops run the bar on a quick-release bracket specifically to avoid this hassle.
-
Torque the clamps to spec. Most universal brackets specify 15–20 ft-lbs. Don’t overtighten — the JK’s roof rails are aluminum and will deform if you lean on them.
-
Set the beam angle. Park 50 feet from a garage door or building and adjust until the hot spot lands at headlight height on the surface. That’s a rough field zero — the beam center should hit roughly 100–150 feet down the road at full intensity.
-
Route the wiring down the A-pillar. The factory rubber seal along the A-pillar works as a natural wire channel. Use a trim removal tool to tuck 12-gauge wire behind the seal without cutting it.
-
Thread wire through the firewall grommet. Find an unused existing grommet on the driver’s side firewall, pop it out, thread your wire through, and reinstall the grommet around the wire. Seal the area with silicone if water intrusion concerns you.
-
Connect to the relay harness per the wiring section above. Zip-tie excess wire away from the exhaust manifold and serpentine belt.
-
Reconnect the battery and test. Confirm full illumination, check for flicker (which indicates a grounding issue), and verify the switch kills the bar cleanly.
LED Light Bar Options: Wiring Methods and Mount Positions Compared
The wiring method and mount combination that fits your build depends on your budget, technical comfort, and how you actually use the rig. Use these tables to identify your starting point before you buy parts.
Wiring Method Comparison
| Method | Complexity | Cost | Risk | Best For |
|---|---|---|---|---|
| Pre-wired relay kit | Low | $20–$35 | Low | Most JK owners; cleanest, safest approach |
| Custom relay wiring (DIY) | Medium | $10–$20 in parts | Low if done right | Owners comfortable with 12V systems |
| Direct switch (no relay) | Low | $0 extra | High — melted connectors, fire risk | Not recommended for any bar |
| Piggyback to factory aux circuit | Medium | $5–$15 | Medium — risks overloading factory fuse | Low-draw pods only |
Mount Position Comparison
| Position | Complexity | Cost | Risk | Best For |
|---|---|---|---|---|
| Roof rail (clamp brackets) | Low–Medium | $15–$60 | Low | Long-range trail, JKU 50” bar |
| Front bumper (integrated tabs) | Low | $0 if bumper has tabs | Low | Rock crawling, close-range |
| A-pillar pods | Low | $20–$50 | Low | Side fill, technical work |
| Windshield top | Medium | $30–$80 | Medium — affects fold-flat | Maximum height specialty builds |
JK LED Light Bar Laws: What You Can Actually Run

LED light bars aren’t street-legal in most U.S. states — but that’s a use restriction, not an ownership restriction. You can own one, install it, and run it anywhere off-road or on private property. Running it illuminated on a public highway is a different story.
The rule across most states: auxiliary forward-facing lights above a certain brightness or beam pattern must be covered or switched off when you’re on a public road. That’s it. That’s the takeaway to keep.
What This Actually Means
A light bar cover — the neoprene sleeves most manufacturers include — solves it. You install the bar, cover it for pavement driving, pull the cover off at the trailhead. Many JK owners pair this with a rocker switch that’s deliberately positioned so you can’t accidentally leave it on.
Some states reference specific lumen or candela limits. Others follow SAE beam pattern standards. A few — particularly Washington and Oregon — enforce these rules more aggressively than others. An honest answer: check your state’s DMV vehicle equipment code or talk to a local traffic attorney before running an uncovered bar on public roads. Laws vary enough that a one-size-fits-all answer doesn’t exist.
What you can do anywhere:
- Install the bar (that’s a parts decision)
- Run it on private property or legal off-road areas without restriction
- Cover it on public roads to maintain compliance
For broader context on keeping your JK’s electrical system compliant, see our JK electrical and lighting compliance guide and our DOT-approved LED headlight upgrades guide.
Recommended Components for Your JK Light Bar Install
The supporting cast for a solid JK light bar setup includes a relay harness, a quality trigger adapter, and DOT-compliant LED headlights that match your bar’s output quality. Here are three products worth considering for your 2007–2018 JK or JKU.
The True Mods relay harness is the single most important part to get right. This pre-fused kit eliminates the biggest variable in aftermarket JK installs: undersized wiring between switch and bar. Everything comes correctly gauged, fused, and relay-equipped. The negative-switched conversion works with JK factory switch circuits.
Pros: All-in-one kit, fused, correct wire gauge, simple install
Cons: H4 connector may require an adapter depending on your bar’s plug type
At $7.99, this is cheap insurance. The JK uses H13 connectors on the headlight circuit. If you’re pulling a trigger signal from near the headlights, this adapter lets you tap cleanly without cutting factory wiring. Heat-resistant construction handles engine bay temperatures. Works on all 2007–2018 JK and JKU models.
Pros: Plug-and-play, no factory wiring spliced, very affordable
Cons: Only for trigger signal, not for bar power delivery
Running a high-output roof bar while keeping factory-brightness headlights creates a visual mismatch and a real safety gap. The Super7 2.0 is a plug-and-play LED housing designed specifically for 2007–2018 JK and JKU. It’s DOT-approved and flicker-free on JK CANBUS systems that commonly cause issues with lesser LED aftermarket units. Pairs naturally with any roof or bumper bar.
Pros: DOT compliant, plug-and-play, no error codes on JK systems
Cons: Price fluctuates; confirm current availability before ordering
For a full breakdown of LED headlight options across different budgets, see our best LED headlights for Jeep JK guide.
Troubleshooting Your JK Light Bar Install: Common Problems and Fixes
If your bar isn’t working post-install, start with the relay trigger circuit before assuming the bar itself failed — most failures trace back to wiring, not the light.
Bar doesn’t light at all. Check the fuse first. Then verify the relay is getting a trigger signal using a multimeter on relay terminal 86 with the switch on. No voltage means your trigger signal isn’t making it from the switch to the relay.
Switch or connector runs hot. This is the direct-wire failure in action. If you wired bar power through the switch rather than through the relay, a 15-amp bar current flowing through a 5-amp-rated switch will produce a hot connector every time. Install a relay harness immediately. This is a fire risk.
Bar flickers or pulses when running. Almost always a grounding problem. Verify the bar’s ground wire runs to a clean, paint-free chassis bolt with good metal-to-metal contact. A shared or corroded ground point causes voltage drop and visible flicker.
Bar works but the beam is uneven or one side is dim. Internal driver issue or a loose connection inside the bar. If it’s new, this is a warranty claim. Most reputable brands replace without pushback.
Bar works off-road but throws a warning light on the dash. Certain JK CANBUS systems flag unexpected electrical loads. A load resistor in the trigger circuit usually resolves it. Check with your bar manufacturer or ask in JK-specific forums.
When troubleshooting gets complicated, JK owner forums are genuinely valuable — you’ll find real install reports documenting wiring quirks that never make it into manufacturer documentation. Cross-checking your symptoms against other JK owners’ experiences often surfaces the exact issue faster than any generic guide.
Frequently Asked Questions: LED Light Bar Install on a Jeep JK
Q: What size light bar fits a Jeep JK roof?
A: On a 2-door JK, 40 inches is the practical maximum for a clean, non-overhanging roof rail fit. The JKU’s longer roof accommodates 50-inch bars cleanly. Some owners run 52-inch bars on the JKU, but always confirm bracket fitment before ordering — overhang affects departure angle and looks awkward.
Q: Do I actually need a relay for an LED light bar?
A: Yes — for any bar drawing more than 5 amps, a relay is mandatory, not optional. A relay lets your switch trigger high current without carrying it. Without one, full bar current flows through your dash switch and undersized wiring, which produces melted connectors, damaged switches, and genuine fire risk. See the wiring section for the correct setup.
Q: Are LED light bars legal to run on my JK?
A: In most U.S. states, running a high-output LED bar illuminated on public roads isn’t legal. The standard workaround is a light bar cover worn on pavement, removed at the trailhead. Laws vary enough that you should check your state’s DMV vehicle equipment code or ask a local traffic attorney — a blanket national answer doesn’t exist.
Q: How much time should I budget for a LED light bar install on a JK?
A: For a first-time installer doing a roof mount with relay wiring, expect two to four hours at a comfortable pace. A bumper mount with integrated light tabs can be done in under two hours. Having all tools and parts staged before you start shaves significant time off the project.
Q: Can I wire a LED light bar into my JK’s existing aux switch panel?
A: Yes, if your aux panel has a switched 12V output. The switch provides the low-current trigger signal to the relay; the relay’s power side connects directly to the battery. This keeps high current out of your dash wiring entirely. See our best JK aux switch panels guide for panels that integrate cleanly with a light bar setup.
Ready to Light Up the Trail
Before you start, three things matter above everything else:
-
Use a relay. This isn’t negotiable. A relay is the difference between a safe install and a fire hazard.
-
Bench-test the bar before mounting. Ten minutes of clip-lead testing on the ground beats troubleshooting a bar you’ve already bolted to the roof.
-
Protect your wiring. Grommets and split conduit cost almost nothing. Six months from now, you’ll be grateful you did.
For broader context on building a reliable JK electrical system, start with our full JK electrical upgrades guide. If you’re upgrading headlights alongside the bar, see our best LED headlights for the JK guide. And if you’re adding A-pillar pods to fill in the corners, our LED pod lights for JK A-pillar mounts guide has current picks.
Now wire it up right, and get that bar on the roof. The trailhead looks a lot better with 50 inches of LED across it.
Get the Free JK Build Planner
Complete PDF with mod checklists, gear ratios, tire sizing charts, and budget worksheets. Everything you need to plan your JK build.
No spam. Unsubscribe anytime. By subscribing, you agree to our Privacy Policy.
Allan
I'm Allan. I bought a 2014 Jeep Wrangler JKU and I research the hell out of every mod before I touch it. Everything here is tested or deeply researched on my own rig - no sponsored fluff, just honest findings.
Learn more about me →Get the JK Build Planner
Free PDF with complete build checklists, gear ratios, and tire fitment guides.
By subscribing, you agree to our Privacy Policy.
Related Articles
HID vs LED Headlight Conversion Jeep JK Wiring: The Complete Guide
When you're staring at your JK's aging halogen headlights on a dark trail, you realize pretty quickly why this is one of the most popular upgrades in...
How to Install Halo Headlights on Jeep JK: Step-by-Step Guide
Install halo headlights on your Jeep JK in under an hour with this complete DIY guide. H13 wiring, anti-flicker setup, and proper aiming explained.
How to Wire Aux Switches on Jeep JK: Complete Installation Guide
Step-by-step guide to wiring aux switches on Jeep JK with relays, fuse protection, and safe power routing. Includes troubleshooting and complete diagrams.