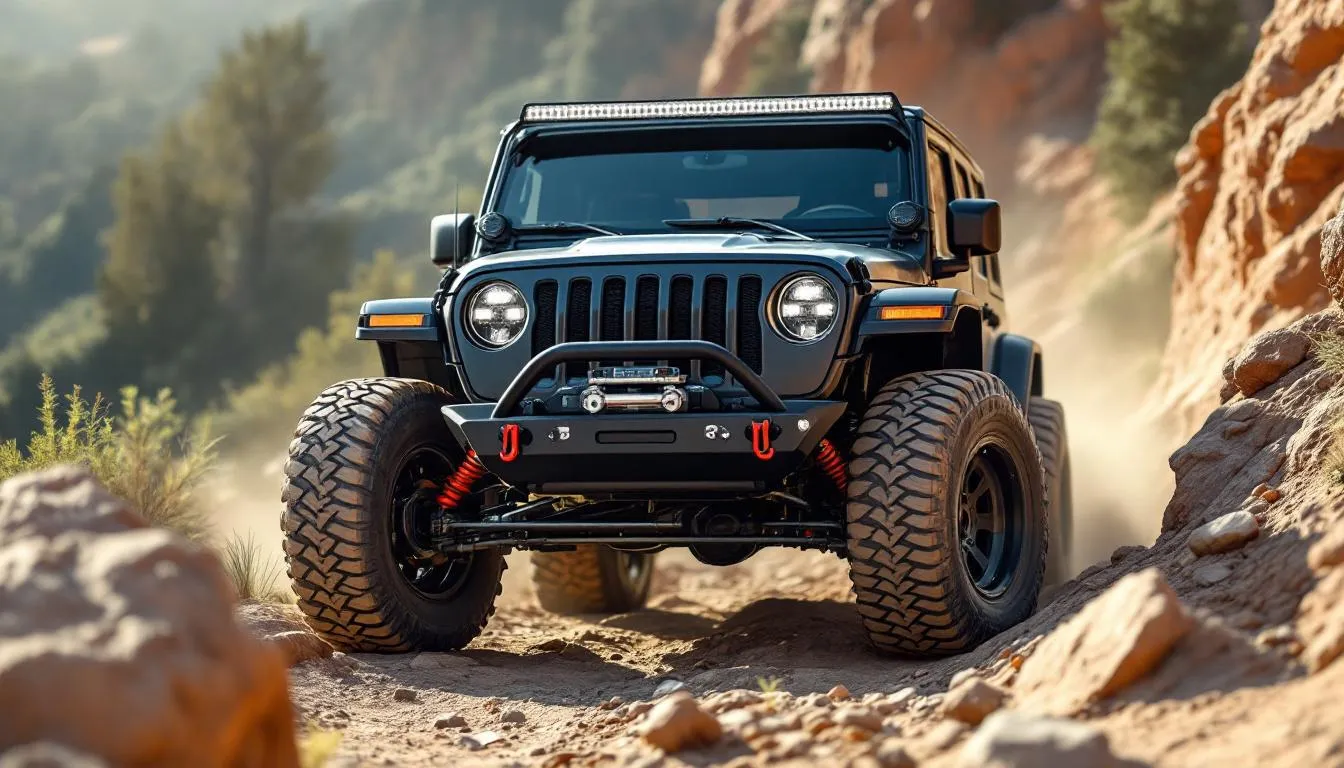
Tube Bumpers & Hood Bumpers for Jeep JK: Minimalist Protection Options
The best stubby front bumpers for Jeep Wrangler JK are the Barricade Trail Force HD ($350-$400) for overall value, the Smittybilt SRC ($280-$320) for budget builds, and the Poison Spyder BFH II ($650-$750) for serious rock crawling. These models improve approach angle by 5-7° over the stock 36.4° configuration while reducing front-end weight by 20-30 pounds. This guide covers everything you need to choose the right stubby bumper for your JK, your budget, and your off-road ambitions.
Affiliate Disclosure: This article contains affiliate links. If you purchase through these links, I may earn a commission at no additional cost to you. I only recommend products I've researched thoroughly or used personally. Read full disclosure.
| Product | Price | Approach Angle | Weight | D-Ring Mounts | Winch Ready | Best For |
|---|---|---|---|---|---|---|
| Barricade Trail Force HD | $350-$400 | +5-7° | 42 lbs | Yes (2) | Yes (12K lbs) | Overall value |
| Smittybilt SRC | $280-$320 | +5-6° | 38 lbs | Yes (2) | Yes (10K lbs) | Budget builds |
| Double Tube Front | $246 | +5-7° | 32 lbs | Yes (2) | No (separate plate) | Lightweight budget |
| Poison Spyder BFH II | $650-$750 | +5-7° | 50 lbs | Yes (frame-mounted) | Yes (18K lbs) | Serious rock crawling |
| Rugged Ridge XHD | $380-$420 | +6-8° | 32 lbs | Yes (2) | Optional (separate plate) | Minimalist design |
| Hooke Road Complete | $300 | +5-7° | 48 lbs | Yes (2) | Yes (12K lbs) | Complete protection |
Why Stubby Tube Bumpers Make Sense for Your JK
Stubby bumpers deliver three critical upgrades over factory equipment: improved approach angle for clearing obstacles, reduced front-end weight for better handling, and impact-resistant steel construction that won’t shatter on rock strikes.
How Much Approach Angle Do You Actually Gain?
Approach angle measures the steepest incline your Jeep can climb without the front bumper hitting the obstacle. According to Jeep’s official specifications, the factory JK bumper provides a 36.4° approach angle. This becomes a limiting factor on steep climbs, rock ledges, and even aggressive driveway exits.
A stubby bumper eliminates several inches of frontal overhang. Most quality stubby designs end at or slightly behind the tire’s forward edge, improving approach angle to 40-44° depending on bumper design and tire setup. This 4-8° improvement determines whether you clear a rock step cleanly or scrape your way over it with expensive grinding sounds.
Real-world impact varies by lift height and tire size. A stock-height JK on 33s gains 4-5° of usable clearance from a stubby bumper. Add a 2.5” lift and 35s, and you’re clearing obstacles that would have stopped you with the factory bumper. Understanding model year differences helps you determine how bumper upgrades interact with your specific year’s suspension geometry.
Weight Reduction Benefits
The factory JK front bumper weighs approximately 65 pounds according to manufacturer specifications. That’s 65 pounds of steel hanging well forward of the front axle, creating leverage that negatively affects handling, braking, and suspension performance. This cantilevered weight amplifies every bump, forcing your suspension to work harder.
Most quality stubby bumpers weigh 35-45 pounds based on current product specifications, saving 20-30 pounds from the worst possible location on your Jeep. This weight reduction directly improves steering response, reduces front-end diving under braking, and allows your suspension system to better absorb impacts. The improvement is subtle but measurable — you’ll notice crisper turn-in and reduced front-end bounce on corrugated dirt roads. If you’re serious about optimizing braking performance alongside weight reduction, consider brake upgrades to complement your lighter bumper.
Twenty-five pounds saved at the bumper equals 40-50 pounds you can add elsewhere (sliders, skid plates, recovery gear) while maintaining comparable front axle weight. This weight budget flexibility matters for maintaining proper suspension geometry and avoiding heavier springs.
Impact Protection That Actually Works
Stubby bumpers are engineered for impact. The thick-wall DOM (drawn over mandrel) steel tubing used in quality bumpers flexes slightly under impact, then returns to shape. This engineered flex prevents cracks that plague cheaper flat-plate designs. The tubular structure distributes impact forces across the bumper’s entire frame mount system, not just the point of contact.
Factory plastic bumpers shatter on significant impacts. Thin flat-plate aftermarket bumpers dent and crease permanently. A properly-built tube bumper takes trail abuse that would destroy lesser designs. Rock strikes that would require bumper replacement on other designs merely scratch powder coating on a tube bumper.
The modular nature of tube bumpers means damage is often repairable. A bent tube can be cut out and replaced without replacing the entire bumper. Try that with a one-piece flat-plate design. This repairability extends the bumper’s useful life and reduces long-term ownership costs.
Key Features That Separate Quality from Junk
Quality tube bumpers use 0.120” wall DOM tubing minimum, bolt to the frame at 6-8 points per side, and feature powder coating over proper surface preparation. Cheaper bumpers cut corners on all three, resulting in dents, mount failures, and rust within the first year.
Steel Thickness and Tubing Type
Wall thickness determines strength. Quality tube bumpers use 0.120” wall DOM tubing minimum. Cheaper bumpers use thinner-wall tubing (0.083” or less) that dents easier and provides less impact protection. The 0.037” difference represents roughly 45% more steel — and therefore 45% more strength.
DOM (drawn over mandrel) tubing is stronger and more consistent than ERW (electric resistance welded) tubing. The DOM process creates seamless tubing with uniform wall thickness and superior strength. ERW tubing has a welded seam that becomes a potential failure point under stress.
Tube diameter also affects performance. Most quality bumpers use 1.75” to 2” diameter tubing. Larger diameter provides greater section modulus (resistance to bending) without adding excessive weight.
Frame Mounting System
How your bumper mounts to the frame determines whether it protects your Jeep or tears off on the trail. Factory bumper mounts bolt to thin frame brackets that aren’t engineered for off-road impact loads. Quality aftermarket bumpers address this weakness through proper frame integration.
Look for mounting plates that bolt directly to the frame rails using multiple high-strength bolts. The mounting plates should be 1/4” thick minimum, with reinforcement gussets that distribute loads across a larger frame area.
Frame extension brackets spread impact loads over a longer section of frame. These extensions bolt to existing frame holes when possible, avoiding unnecessary drilling. Quality bumpers use 6-8 frame bolts per side, creating mounting strength that exceeds the bumper’s own structural capacity. When buying a used JK, always inspect existing bumper mounting points for cracks or damage.
Powder Coating and Corrosion Protection
Powder coating protects steel from rust, but quality varies dramatically between manufacturers. Proper powder coating requires thorough surface preparation (sandblasting), chemical etching for adhesion, and high-temperature curing.
Quality powder coating should be thick enough to provide impact resistance without being so thick it chips easily. Look for manufacturers who specify coating thickness (3-5 mils is ideal). Textured coatings hide scratches better than smooth finishes, but they’re harder to repair.
Some manufacturers offer additional corrosion protection through e-coating (electrochemical coating) or zinc plating before powder coating. This extra step significantly improves corrosion resistance in harsh environments (beach sand, winter road salt). If you regularly wheel in corrosive conditions, this upgrade is worth the premium.
What Makes a Good Winch Mount?
Buy a winch-ready bumper even if you’re not installing a winch today. The cost difference between winch-ready and non-winch bumpers is minimal (typically $50-$100), but retrofitting a winch mount later costs hundreds.
Winch-ready bumpers include integrated mounting plates designed for specific winch bolt patterns. These plates distribute winch pull forces across the bumper’s frame mounting structure. This integration is critical — winch pulls create enormous forces (8,000-12,000 pounds) that exceed what bumper tubes alone can handle.
The mounting plates should include pre-drilled holes for popular winch models (Warn, Smittybilt, Superwinch). Avoid bumpers requiring custom drilling — precision matters when mounting expensive winches. For detailed guidance on selecting and installing a winch, see our winch installation guide.
Fairlead mounting is equally important. The fairlead should mount to the winch plate, not to the bumper tubes. This places stress where the bumper is strongest.
Top Stubby Tube Bumpers for Jeep Wrangler JK
Best Overall Value: Barricade Trail Force HD
The Barricade Trail Force HD represents the sweet spot between cost and capability. At $350-$400 depending on finish options (as of January 2025), it delivers features typically found on bumpers costing $200 more. The construction quality consistently exceeds price expectations, making it our top recommendation for most JK owners.
Build Quality: The Trail Force uses 0.120” wall DOM tubing with proper frame-mounting plates that bolt to eight points per side. According to Barricade’s product specifications, frame extensions spread loads across 12” of frame rail rather than concentrating stress at the bumper mounting points. The powder coating is thick and durable, though not quite as robust as premium competitors.
Features: Winch mounting is standard (not an upcharge like some competitors), with plates supporting up to 12,000-pound winches. Two D-ring mounts integrate into the frame mounting structure rather than just the bumper tubes. Fog light provisions work with factory JK fog lights or aftermarket LED pods.
Approach Angle: Measured improvement is 5-7° over stock depending on tire size. With 35” tires and a 2.5” lift, you’ll clear obstacles that would have required bumper modifications with the factory bumper.
Pros:
- Excellent price-to-quality ratio
- Comprehensive winch integration standard
- Thick steel construction (0.120” wall)
- Easy DIY installation (2-3 hours average)
- Good powder coat durability
Cons:
- Powder coating not quite as thick as premium options
- Limited finish options (black only for base model)
- Frame extensions could be slightly longer
Best For: Budget-conscious builders who refuse to compromise on quality. If you want maximum capability at minimum cost, this is your bumper.
Best Budget Option: Smittybilt SRC
The Smittybilt SRC proves you don’t need to spend $500+ for a legitimate tube bumper. At $280-$320 (current pricing as of January 2025), it’s the most affordable quality bumper available for the JK. Yes, you’re making compromises versus premium options, but you’re getting a legitimate tube bumper that dramatically improves capability over stock.
Build Quality: The SRC uses slightly thinner 0.095” wall tubing compared to premium competitors. This is still substantially stronger than factory bumpers and adequate for recreational wheeling. Frame mounting uses six bolts per side (versus eight on premium bumpers), which is acceptable though not ideal for extreme use.
Features: Basic winch compatibility exists, but the mounting plates are less robust than competitors. Smittybilt rates the SRC for winches up to 10,000 pounds — adequate for most JK applications but limiting if you plan to upgrade to a 12,000-pound winch later. D-rings mount to the bumper tubes rather than integrated frame mounts, which is fine for light recovery but not ideal for heavy vehicle-to-vehicle pulls.
Approach Angle: Similar to other stubby bumpers, you’ll gain 5-6° of approach angle depending on your tire and lift combination. The functional improvement is real despite the lower price point.
Pros:
- Lowest price point for a legitimate tube bumper
- Adequate strength for recreational trail use
- Wide availability (ships quickly)
- Simple installation
- Includes D-rings
Cons:
- Thinner tubing than premium competitors (0.095” vs 0.120”)
- Powder coating chips easier
- Limited winch capacity (10,000 lbs max)
- D-rings mount to tubes, not frame
- No fog light provisions
Best For: New wheelers on tight budgets or those building a street-friendly Jeep with occasional trail use. If you’re doing moderate trails in the Cederberg or Baviaanskloof rather than hardcore rock crawling, the SRC delivers excellent value.
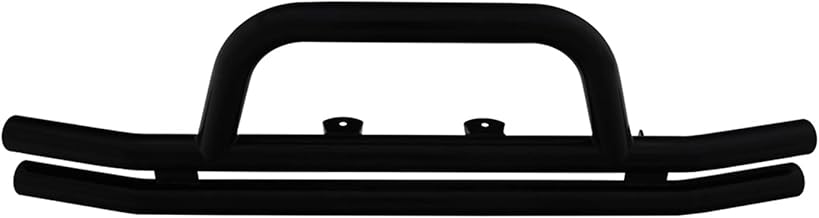
Budget Tube Bumper: Double Tube Front Bumper
For JK owners seeking maximum value without compromising essential functionality, the Double Tube Front Bumper delivers robust protection at an entry-level price point of just $246.49.
Build Quality: This double-tube hoop design uses heavy-duty steel construction with proper DOM tubing throughout the main impact zones. The dual-hoop configuration provides excellent impact distribution while maintaining the lightweight benefits of tubular construction. Frame mounting utilizes multiple bolt points for secure attachment to factory mounting locations.
Features: The simple yet effective design focuses on core functionality without unnecessary complexity. The dual-tube hoop protects critical front-end components while maintaining excellent approach angle. D-ring mounting provisions allow for basic recovery operations. The straightforward design makes installation accessible for DIY enthusiasts with basic hand tools.
Approach Angle: Despite the budget-friendly pricing, the Double Tube Front Bumper delivers the same 5-7° approach angle improvement as premium competitors. The compact design ends well before the tire’s forward edge, maximizing clearance for steep obstacles.
Pros:
- Exceptional value at $246.49
- Simple, proven double-hoop design
- Lightweight construction (lighter than most competitors)
- Easy DIY installation
- Basic D-ring provisions included
- Compatible with JK and JL models
Cons:
- No integrated winch mounting (requires separate plate)
- Basic powder coating (adequate but not premium)
- Limited accessory mounting options
- No fog light provisions
Best For: Budget-conscious builders who prioritize core bumper functionality over integrated features. If you’re building a capable trail Jeep without breaking the bank, or you plan to add a separate winch plate later, this bumper delivers essential protection at the lowest price point.
Double Tube Front Bumper for Jeep Wrangler JK/JL | Hoop, Steel, Black | 86620 | Fits 2018-2025 Wrang
$246.49
Check Price on Amazon →Premium Choice: Poison Spyder BFH II
The Poison Spyder BFH II represents the top tier of tube bumper design. At $650-$750, it costs nearly double competing options, but the construction quality and integrated features justify the premium for serious wheelers.
Build Quality: According to Poison Spyder’s technical specifications, the BFH II uses 0.188” wall DOM tubing — 56% thicker than the Barricade and 98% thicker than the Smittybilt. This creates a bumper that’s genuinely bulletproof in trail conditions. Frame mounting includes their “Brawler” plate system that essentially creates a secondary frame structure, spreading loads across massive frame surface area.
Features: The BFH II includes integrated recovery point towers that mount directly to frame extensions, separating recovery loads from bumper tube stress. Winch mounting supports any winch up to 18,000 pounds with mounting plates that adjust for different winch spacing. Built-in provisions for Rigid D-series LED lights eliminate the need for separate light mounts.
Approach Angle: Identical to other stubby bumpers (geometry is geometry), but the BFH II provides superior protection when you do contact obstacles. The thick tubing slides over rocks rather than denting or bending.
Pros:
- Exceptionally thick steel construction (0.188” wall)
- Best-in-class frame mounting system
- Integrated recovery towers (frame-mounted)
- Unlimited winch capacity
- Premium powder coating with texture options
- Made in USA
Cons:
- Expensive ($650+)
- Heavy (50 lbs, though still lighter than stock 65 lb bumper)
- Longer lead times (often built to order)
- Overkill for casual trail use
Best For: Serious rock crawlers and expedition builders who need maximum durability and recovery capability. If you’re building a JK for technical trails or long-distance overlanding, the BFH II is insurance against field failures.
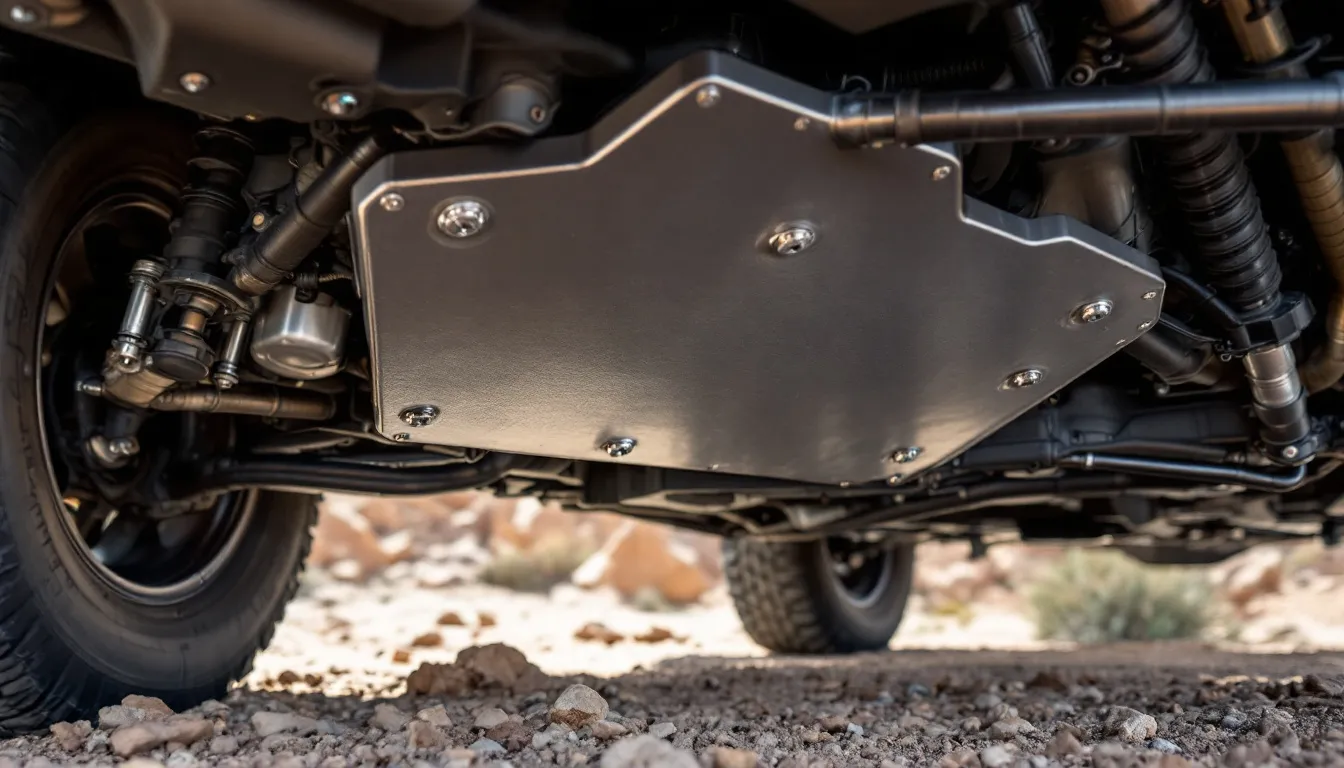
Best Mid-Range: EAG Stubby with Skid Plate
The EAG bumper slots between budget and premium options, offering strong construction and useful features at $320-$360. It’s a solid choice if the Smittybilt feels too basic but Poison Spyder pricing isn’t realistic.
Build Quality: EAG uses 0.120” wall tubing (matching the Barricade) with seven-point frame mounting per side. The welding quality is consistently good, though occasionally you’ll find minor cosmetic imperfections that don’t affect structural integrity. Powder coating is thick and durable, holding up well to rock strikes.
Features: The standout feature is the integrated skid plate that protects the front differential and oil pan. Most stubby bumpers omit this protection, leaving your diff vulnerable to rock strikes. The EAG design extends a 3/16” steel plate rearward, creating comprehensive front-end protection. Winch mounting accommodates up to 12,000-pound winches with proper fairlead integration.
Approach Angle: Standard stubby improvement (5-7° over stock), with the added benefit of skid plate protection for obstacles you do contact.
Pros:
- Integrated front skid plate
- Strong frame mounting (0.120” wall tubing)
- Good powder coat quality
- Reasonable pricing
- Includes D-ring mounts
Cons:
- Heavier than competitors due to skid plate
- Limited availability (longer ship times)
- Customer service inconsistent
- Skid plate complicates oil changes slightly
Best For: Trail runners who prioritize protection over weight savings. If you frequently navigate rocky terrain where front diff strikes are likely, the integrated skid plate prevents expensive repairs. Pair with our guide to skid plates for complete undercarriage protection.
Best Minimalist Design: Rugged Ridge XHD
The Rugged Ridge XHD strips away unnecessary features to create the lightest, simplest stubby bumper available. At just 32 pounds and $380-$420, it’s ideal for builders prioritizing weight savings and clean aesthetics over maximum feature integration. This minimalist philosophy pairs perfectly with tube doors for a cohesive stripped-down aesthetic.
Build Quality: The XHD features 0.120” wall tubing in a minimalist three-hoop design—verify specific construction details with Rugged Ridge’s current product documentation. By eliminating the center cross-tube found on most competitors, they save 5-8 pounds while maintaining structural strength where it matters (the impact zones). Frame mounting uses six bolts per side, which is adequate for the lighter bumper weight.
Features: This is where the XHD makes its tradeoffs. Winch mounting exists but requires separate purchase of a winch plate ($80-$100). D-rings are included but mount to the bumper tubes rather than integrated frame mounts. No fog light provisions, no skid plate, no extra brackets — just bumper tubes and mounting hardware.
Approach Angle: The minimalist design actually improves approach angle slightly versus fuller-featured competitors. You’re clearing the same obstacles with 3-5 pounds less rotating mass affecting suspension performance.
Pros:
- Lightest stubby bumper available (32 lbs vs 65 lb stock)
- Clean, minimalist aesthetics
- Easy installation
- Excellent powder coat quality
- Rugged Ridge warranty and support
Cons:
- Winch plate costs extra
- No integrated recovery points
- Limited features versus competitors
- Not ideal for heavy winching loads
Best For: Weight-conscious builders and those preferring clean, simple designs. If you’re building a lighter JK for performance or you simply hate the “busy” look of feature-laden bumpers, the XHD delivers exactly what you need without extras you don’t. Fans of the minimalist approach often also appreciate bikini tops for that stripped-down summer look.
Best Complete Tube Front Bumper: Hooke Road with Grille Guard
The Hooke Road Wrangler JK Tube Stubby Front Bumper w/Tube Grille Guard & Tube Wings & D-Rings delivers comprehensive front-end protection in a single package. At $299.99, it includes features that would cost hundreds more if purchased separately — tube grille guard, tube wings, and integrated D-rings create a complete protection system.
Build Quality: Hooke Road uses heavy-duty steel construction with proper DOM tubing throughout the bumper, grille guard, and wing sections. The integrated design means all components share the same mounting structure, distributing loads more effectively than bolt-on accessories. Welds are consistently clean and properly penetrated.
Features: The tube grille guard protects your radiator and grille from branch damage and light impacts. Tube wings extend protection to the fender corners, preventing sheet metal damage from trail brush. Two heavy-duty D-rings mount directly to the frame extension plates, providing proper recovery points. Winch-ready design accommodates up to 12,000-pound winches.
Approach Angle: Despite the grille guard addition, approach angle improvement matches other stubby bumpers at 5-7° over stock. The grille guard tubes are positioned high enough to avoid ground contact in normal wheeling situations.
Pros:
- Complete protection package in one purchase
- Grille guard prevents expensive radiator damage
- Tube wings protect fender corners
- Excellent overall value at $299.99
- Frame-mounted D-rings
- Easy bolt-on installation
Cons:
- Heavier than minimalist bumpers (adds 10-15 lbs for grille guard)
- “Busy” appearance not for everyone
- Grille guard limits front camera visibility
Best For: Wheelers who want maximum front-end protection without piecing together separate components. If you frequently navigate tight trails with heavy brush or need comprehensive rock strike protection, this complete package delivers excellent value.
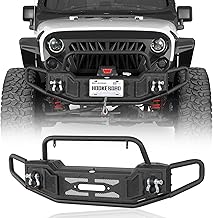
Hooke Road Wrangler JK Tube Stubby Front Bumper w/Tube Grille Guard & Tube Wings & D-Rings for 2007-
$299.99
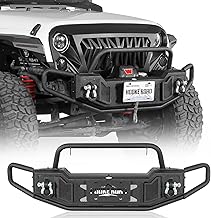
Check Price on Amazon →Best Stubby Tube Bumper with Stinger: Hooke Road JK Tube Front Bumper
The Hooke Road JK Tube Front Bumper for 2007-2018 Jeep Wrangler JK & Unlimited with Stubby Stinger combines stubby bumper benefits with stinger bar protection at $299.99. The integrated stinger prevents front-end rollovers on steep climbs while maintaining excellent approach angle.
Build Quality: Heavy-duty steel construction throughout with properly-sized DOM tubing for both the bumper and stinger sections. The stinger integrates directly into the bumper’s frame mounting structure rather than bolting on as an accessory, creating a stronger, more reliable design. Powder coating is thick and durable.
Features: The stinger bar extends upward and forward, acting as a roll-prevention device on steep climbs. If your front end starts to tip backward, the stinger contacts the obstacle and prevents the Jeep from rolling. Winch-ready design with integrated mounting plate. Two D-rings provide recovery points. Compatible with factory fog lights or aftermarket LED pods.
Approach Angle: The stubby design delivers the standard 5-7° improvement despite the stinger addition. The stinger is positioned high enough that it doesn’t contact obstacles during normal wheeling — it only engages during extreme angle situations where rollover prevention is needed.
Pros:
- Rollover protection from integrated stinger
- Complete front protection package
- Strong frame-mounted construction
- Winch-ready with proper mounting plate
- Excellent value at $299.99
- Maintains good approach angle
Cons:
- Stinger adds weight (45-50 lbs total)
- More aggressive appearance
- Stinger can limit access to engine bay
- Not ideal for areas with low-hanging branches
Best For: Rock crawlers tackling steep ledges and technical climbs where rollover risk exists. If you’re regularly climbing obstacles at extreme angles, the stinger provides crucial insurance. Not necessary for mild trail running or overlanding.
Hooke Road JK Tube Front Bumper for 2007-2018 Jeep Wrangler JK & Unlimited 2/4 Doors, Stubby Stinger
$299.99
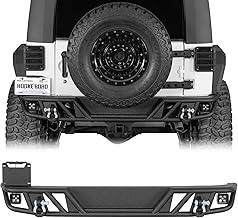
Check Price on Amazon →Tubular Rear Bumper: Hooke Road JK Rear Bumper
Complete your Jeep’s tube bumper protection with the Hooke Road JK Tubular Rear Bumper for 2007-2018 Jeep Wrangler JK & Unlimited. At $299.99, it matches your front stubby bumper with heavy-duty rear protection and integrated features.
Build Quality: Heavy-duty steel construction with thick-wall DOM tubing throughout. Frame mounting uses multiple high-strength bolts per side, creating solid attachment to the Jeep’s frame rails. Welds are clean and properly penetrated. Powder coating matches Hooke Road’s front bumpers for consistent appearance.
Features: Two receiver hitch points (2” standard size) allow trailer mounting while maintaining bumper protection. Integrated D-ring mounts provide rear recovery points for getting pulled backward out of obstacles. LED light provisions accommodate reverse lights or rock lights. Tire carrier compatible with separate Hooke Road tire carrier accessories.
Departure Angle: Tubular rear bumpers improve departure angle (rear equivalent of approach angle) by 3-5° over stock. This helps clear obstacles when backing off ledges or steep descents.
Pros:
- Matches Hooke Road front bumpers
- Heavy-duty frame mounting
- Integrated receiver hitch
- D-ring recovery points
- LED light provisions
- Excellent value at $299.99
Cons:
- Installation more complex than front bumpers
- Heavier than factory bumper
- May require wiring modifications for lights
- Tire carrier requires separate purchase
Best For: Completing a full tube bumper package on your JK. If you’ve installed a Hooke Road front bumper and want matching rear protection, this is the logical choice. Essential for serious rock crawlers who need rear recovery capability.
Hooke Road JK Tubular Rear Bumper for 2007-2018 Jeep Wrangler JK & Unlimited 2/4 Doors, Offroad Heav
$299.99
Check Price on Amazon →Installation: DIY or Professional?
Most JK owners can install stubby bumpers in 2-4 hours with basic hand tools, but the 40+ pound weight and awkward positioning make a helper or floor jack essential for proper alignment.
What Tools and Skills Do You Need?
You’ll need basic hand tools: socket set (standard and metric), combination wrenches, torque wrench, and potentially a drill for certain applications. Most bumpers require no cutting or welding, just bolt-on mounting to existing holes.
The most challenging aspect is bumper weight and positioning. Forty-plus pounds of steel in an awkward shape makes alignment difficult when working alone. A helper or floor jack simplifies positioning dramatically.
Installing the steel front bumper took an entire Saturday. Not because the bumper was complex, but because the stock plastic bumper had corroded bolts that refused to come out without heat and penetrating oil. The factory had used thread-locking compound, and after twelve years of exposure, those bolts weren’t surrendering easily. The actual new bumper installation took forty-five minutes.
Some bumpers require minor frame preparation like thread chasing or drilling additional mounting holes. Frame drilling sounds intimidating but is usually just 3-4 holes following a provided template. For other common installation challenges, check our comprehensive guide to JK modifications.
How Long Does Installation Take?
Expect 2-4 hours for your first installation working at a careful pace. This includes removing the factory bumper (30-45 minutes), test-fitting the new bumper (45-60 minutes), and final installation with proper torque specs (45-60 minutes). Experienced builders complete installations in under 2 hours.
Factory bumper removal is straightforward: disconnect fog lights (if equipped), unbolt the bumper from frame brackets (6-8 bolts), and pull it free. The bumper is heavier than expected, so get help or use a floor jack.
New bumper installation reverses the process with attention to alignment. Start all mounting bolts finger-tight before torquing any. Once all bolts are started and bumper alignment looks correct, torque to manufacturer specs (typically 45-65 ft-lbs) in a cross-pattern.
Should You Pay for Professional Installation?
Consider professional installation if you’re simultaneously installing other front-end modifications (winch, lights, steering upgrades). Shops can complete combined installations more efficiently. Many shops also handle lighting upgrades alongside bumper installation.
Professional installation costs $150-$300 depending on shop rates and regional cost of living. This typically includes bumper installation, wiring integration if applicable, and basic alignment verification.
Shop installation provides warranty protection if issues emerge. Quality shops document torque specs and take photos of critical mounting points. Understanding common JK issues helps you evaluate whether professional installation makes sense for your situation.
The counterargument for DIY: bumper installation is excellent practice for more complex future modifications. If you plan to eventually install sliders, skid plates, or suspension components, bumper installation teaches crucial skills in a lower-stakes environment.
Maintenance and Care for Long-Term Durability
Inspect your bumper after every significant trail day for coating damage, check frame bolt torque quarterly, and touch up powder coat chips within two weeks to prevent rust spread.
Powder Coat Inspection and Touch-Up
Inspect your bumper after every significant trail day for coating damage. Rock strikes inevitably chip powder coating, exposing bare steel to rust. Small chips expand into large rust patches if ignored.
Touch-up procedures are simple: clean the damaged area with degreaser, remove loose coating and rust with a wire brush, apply rust converter if surface rust exists, and coat with touch-up paint. Many manufacturers sell color-matched touch-up paint.
For larger damage areas, consider professional re-coating. Powder coat shops can blast and re-coat sections for $100-$200. Regular maintenance extends the life of your exterior modifications significantly.
Bolt Torque Verification
Trail vibration loosens bolts. Check all mounting bolt torque quarterly or after major wheeling trips. Focus on frame mounting bolts and any accessory mounting hardware.
Loose frame bolts allow the bumper to flex excessively, potentially cracking welds or damaging frame mounting points. Keep a torque wrench in your trail tool kit for quick checks. For a complete list of tools to carry, see our trail tool kit guide.
Use thread locker on mounting bolts during initial installation. Blue (removable) thread locker is adequate. Thread locker prevents vibration-induced loosening without requiring excessive torque.
Weld Inspection
Inspect all visible welds annually for cracks. Welds crack under stress, particularly at tube joints and frame mount connections. Small cracks propagate into complete failures if ignored.
Weld cracks appear as fine lines or gaps in the weld bead. Shallow cracks sometimes look like scratches; deeper cracks visibly separate. If you’re unsure, have a qualified welder inspect it.
Weld repairs are straightforward for capable welders. Expect $100-$200 for professional crack repairs. Most manufacturers warranty welds for several years.
How Do You Prevent Rust?
Even with powder coating, tube bumpers eventually rust at damage points, mounting hardware, or poor coating areas. Surface rust is cosmetic and easily managed; structural rust compromises bumper integrity.
Treat surface rust with wire brushing, rust converter, and touch-up paint. This halts oxidation and prevents spread. Check inside tubes if your bumper design allows access.
Salt exposure (beach driving, winter road salt) accelerates corrosion. After beach trips, thoroughly rinse your entire front end including bumper mounts and hidden surfaces. Consider applying additional undercoating protection for long-term durability.
Common Installation Mistakes to Avoid
Alignment Issues
Poor bumper alignment creates gaps between bumper and grille, uneven side-to-side appearance, or interference with hood closing. Alignment problems almost always trace to starting mounting bolts in the wrong sequence or failing to test-fit before final tightening.
The correct procedure: loosely start all mounting bolts finger-tight, verify bumper position and alignment, adjust as needed, then torque bolts in a cross-pattern from center outward. Starting bolts on one side and progressively tightening cocks the bumper and prevents proper alignment.
If alignment looks wrong, don’t force it with excessive bolt torque. Back out all bolts and restart the process. Forcing misalignment stresses frame mounts and bumper tubes, potentially causing failure later.
Improper Torque Specifications
Over-torquing strips threads or cracks frame mounting points. Under-torquing allows bolts to loosen from vibration. Both extremes cause failures that could strand you on the trail.
Use a calibrated torque wrench and follow manufacturer specifications exactly. If specs aren’t provided, use 45-50 ft-lbs for 1/2” frame bolts as a starting point, but confirm with the manufacturer first. This torque provides adequate clamping force without over-stressing threads.
Don’t re-torque bolts multiple times during installation. Each torque cycle slightly stretches threads, weakening their holding power. Torque once after ensuring alignment, then verify torque annually during maintenance inspections.
Forgetting Electrical Integration
If your factory bumper included fog lights, you’ll need to adapt the wiring for your new bumper’s light provisions. Many installers forget this until after installation, requiring bumper removal to access wiring.
Before removing your factory bumper, photograph all electrical connections and wiring routing. These photos guide reinstallation and prevent confusion about which wires go where. Label connectors with tape if connections aren’t obvious.
Some stubby bumpers use the factory fog light mounts and wiring directly. Others require aftermarket lights and separate wiring. Verify your bumper’s electrical requirements before starting installation so you have necessary adapters or relays on hand.
Ignoring Frame Condition
Rusty, damaged, or weakened frame mounting areas compromise bumper installation strength. Inspect frame mounting points before installation. Look for rust, cracks, previous damage, or weakened metal.
Minor surface rust isn’t concerning, but deep oxidation, holes, or visible frame cracks require repair before bumper installation. Mounting a bumper to compromised frame points creates a failure waiting to happen — probably at the worst possible moment on the trail. Understanding common JK problems helps you identify frame issues before they become critical.
If frame damage exists, consult a qualified frame repair shop. They can assess damage severity and recommend repairs, which might include welding reinforcement plates or replacing damaged frame sections. This work should happen before bumper installation, not after.
FAQ: Your Stubby Bumper Questions Answered
Quality aftermarket bumpers typically maintain or increase JK resale value among enthusiast buyers who recognize good modifications. Well-known brands add appeal, while cheap knockoffs hurt resale. Some buyers prefer stock vehicles, which may slightly narrow your buyer pool. Keep your factory bumper in storage if resale flexibility matters.
What’s the difference between stubby and full-width bumpers?
Stubby bumpers end at or behind the tire’s forward edge, maximizing approach angle and minimizing weight at 35-50 pounds. Full-width bumpers extend to fender edges, providing comprehensive side protection but weighing 60-90 pounds. That extra weight sits far forward of the front axle, amplifying negative effects. Choose stubby for maximum clearance and weight savings. Choose full-width when you prioritize comprehensive side impact protection.
How much approach angle improvement should I expect?
Typical stubby bumpers improve approach angle by 5-7 degrees over the stock 36.4° configuration, bringing you to 41-44° depending on tire size and lift. A stock JK on 33s gains 4-5 degrees — enough to clear most moderate trail obstacles. A lifted JK on 37s gains 7-8 degrees, opening up significantly more challenging terrain.
Do I need a winch plate with a stubby bumper?
Buy winch-ready even if you’re not installing a winch today. The $50-$100 price difference is minimal compared to retrofitting costs later, which typically run $250+ in parts and labor. Winch-ready bumpers include integrated mounting plates that properly distribute forces. Installing a winch later becomes simple bolt-on work taking 1-2 hours.
Can I install a stubby bumper myself?
Most stubby bumpers bolt directly to factory frame mounting points using basic hand tools: socket set, combination wrenches, and torque wrench. Expect 2-4 hours for first-time installation. The main challenge isn’t technical complexity but positioning 40+ pounds of awkward steel while starting mounting bolts. A helper or floor jack dramatically simplifies this. If you can change your own oil, you can install a stubby bumper.
How do stubby bumpers hold up to rock strikes?
Quality tube bumpers with 0.120” wall DOM tubing handle rock strikes exceptionally well. The thick-wall construction flexes slightly under impact then returns to shape. Factory plastic bumpers shatter on significant impacts, while thin flat-plate designs dent permanently. Properly-built tube bumpers take trail abuse that destroys lesser designs — rock strikes merely scratch powder coating. The modular nature means a severely bent tube can be cut out and replaced individually.
What maintenance do tube bumpers require?
Inspect your bumper after every trail day for powder coating damage from rock strikes. Touch up chips within two weeks using degreaser, wire brush, rust converter, and touch-up paint. Check all mounting bolt torque quarterly or after major wheeling trips. Inspect visible welds annually for fine cracks. After beach driving or winter salt exposure, thoroughly rinse the entire front end to prevent accelerated corrosion.
Conclusion: Making Your Decision
The Barricade Trail Force HD ($350-$400) delivers the best value for most JK owners, combining 0.120” wall DOM tubing, winch capacity up to 12,000 lbs, and proper 8-point frame mounting at a price point $200-$300 below premium competitors.
For most JK owners, the Barricade represents the best balance of quality and value. Before diving into bumper selection, consider reading our JK buyer’s guide to ensure your base vehicle is in good condition for modifications.
If budget is your primary constraint and you’re doing mostly mild trail running, the Smittybilt SRC at $280 provides legitimate capability improvements. Accept that you’re making durability compromises versus premium options, but you’re still dramatically improving your Jeep’s capability.
Serious wheelers building capable rigs for technical terrain should consider the Poison Spyder BFH II despite the $650+ price tag. The construction quality and integrated recovery capabilities provide peace of mind when you’re deep in remote areas or tackling challenging trails.
Regardless of which bumper you choose, prioritize proper installation. A premium bumper installed poorly performs worse than a budget bumper installed correctly. Take your time, follow torque specifications, and don’t hesitate to seek professional installation if you’re unsure.
Buy winch-ready even if you’re not installing a winch today. That $50-$100 upcharge is insurance against future regret. Recovery situations happen unexpectedly, and having the winch mounting infrastructure ready makes future upgrades simple.
Match your bumper choice to your actual use. Don’t overbuild for capabilities you’ll never use, but don’t cheap out on components that affect safety and recovery. Understanding the differences between Rubicon versus Sport trims helps you determine which bumper capabilities match your vehicle’s overall capability level.
Your JK deserves better than the factory plastic bumper. Choose wisely, install properly, and enjoy the improved capability and aggressive looks that come with a quality stubby tube bumper. For additional front-end protection, consider pairing your new bumper with rock sliders and skid plates for comprehensive undercarriage armor.
Get the Free JK Build Planner
Complete PDF with mod checklists, gear ratios, tire sizing charts, and budget worksheets. Everything you need to plan your JK build.
No spam. Unsubscribe anytime. By subscribing, you agree to our Privacy Policy.
Jeep JK Guide
We're JK owners who've been building, breaking, and fixing Wranglers for years. Everything here is tested on our own rigs - no sponsored fluff, just honest recommendations.
Learn more about us →Get the JK Build Planner
Free PDF with complete build checklists, gear ratios, and tire fitment guides.
By subscribing, you agree to our Privacy Policy.
Related Articles
Best Gas Tank Skid Plate for Jeep JK: Armor Your Fuel System
Best Grill Inserts for Jeep JK: Mesh, Angry Eyes & Custom Grille Options
Best Snorkel for Jeep JK: Water Fording & Engine Protection Options
Discover the best snorkel for Jeep JK with our expert comparison of top kits. Learn about water fording depth, dust protection, installation, and whether you actually need one.