Best Lift Kits for Jeep Wrangler JK: Ultimate 2026 Buying Guide
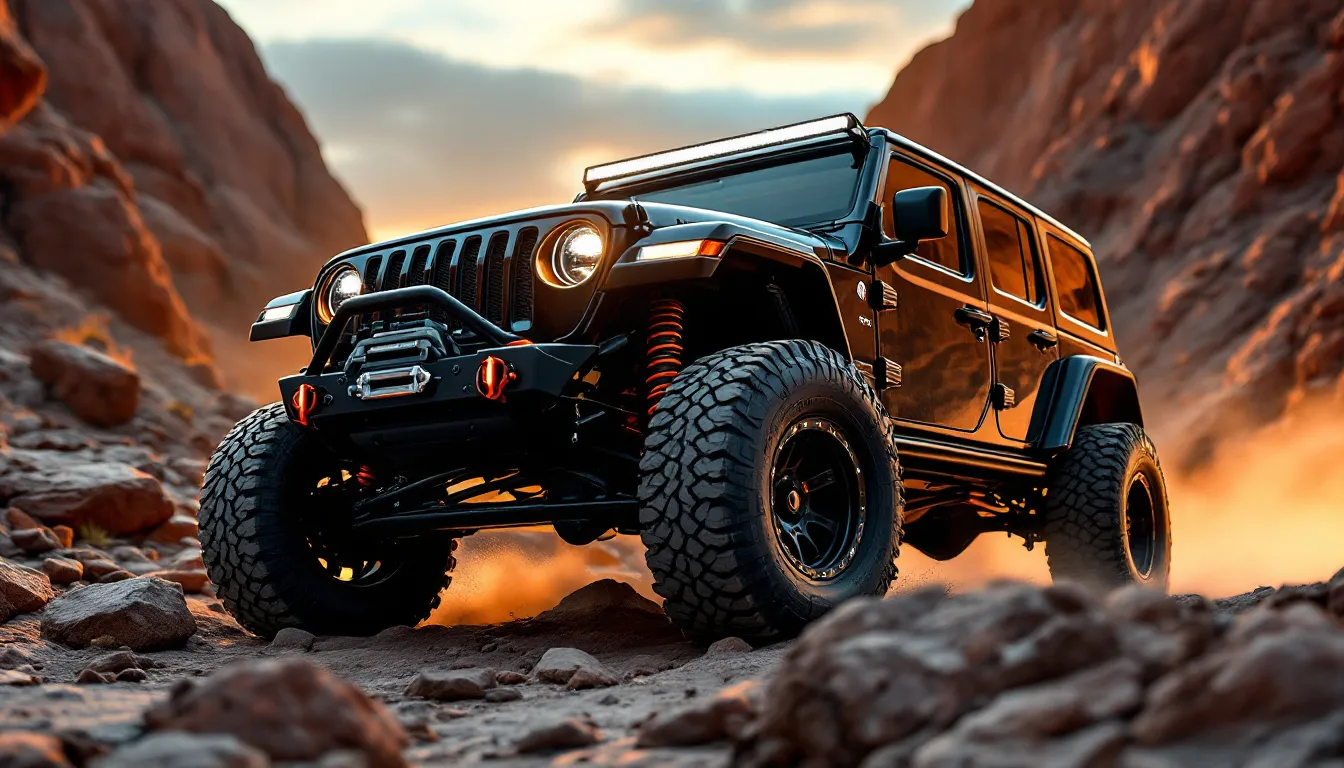
Best Lift Kits for Jeep Wrangler JK: Ultimate 2026 Buying Guide
Finding the best lift kits for Jeep Wrangler JK isn’t as simple as grabbing whatever shows up first in search results. The JK platform ran from 2007 to 2018, and there are real differences between early and late generations, between 2-door and 4-door builds, and between a lift that’s “good enough” and one that’ll actually support your rig five years from now.
I’ve spent the last three months buried in forum threads and YouTube build logs, talking to owners running everything from modest 1.5” spacers to full 4.5” long-arm setups. What I found is that community knowledge beats spec sheets every single time. Manufacturers will always make their kits sound perfect. Owners who’ve already done the miles? They’ll tell you where the real trade-offs are.
This guide covers everything you need to make a confident decision: the different lift types and what they actually do, lift height versus tire size (with a detailed reference chart), in-depth reviews of the top kits available right now, installation reality checks, and what supporting mods you’ll realistically need beyond the kit itself. Whether you’re building a practical daily driver or a serious overlander, this is where you start. For broader context on the platform itself, check our JK buyer’s guide. If you’re not sure which generation you own yet, JK model year differences (2007–2018) will get you there fast.
Best Lift Kits for Jeep JK: Quick-Pick Summary
Short on time? Here’s your roadmap.
Best Overall: Rough Country 2.5” Lift Kit
The Rough Country 2.5” lift hits the sweet spot for most JK owners. It clears 33-inch tires easily, handles 35s with minimal trimming, and bolts in without requiring a complete suspension redesign. For 2007–2018 JK and JKU models, it’s the most balanced entry point on the market right now.
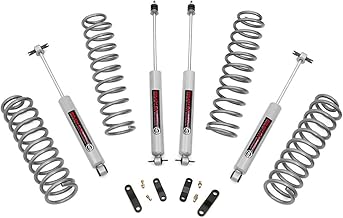
2.5" Lift Kit for 2007-2018 Jeep Wrangler JK Unlimited - 67930
Check Price on Amazon →Category Quick-Picks at a Glance:
- 🏆 Best Overall: Rough Country 2.5” Lift Kit — solid all-around choice for both daily driving and trail use
- 💰 Best Budget Option: 1.5” spacer lift kit — lowest entry cost, easiest install, minimal supporting mods
- 🔧 Best for Serious Off-Road: 3.5”–4” coil suspension lift with adjustable control arms
- 🛠️ Best Long-Arm System: 4”+ long-arm kit with SYE — for dedicated off-road builds or competition use
- ➕ Best Safety Add-On: Rough Country N3 Dual Steering Stabilizer — worth pairing with any lifted JK to reduce death wobble
Trim level matters too. Rubicon owners have factory sway bar disconnect and Dana 44 axles that change how some components interact with lift hardware. Look through our Rubicon vs Sport vs Sahara trim comparison for the specifics that apply to your rig.
Types of Lift Kits for the Jeep Wrangler JK: Spacer, Coil & Long-Arm
Before you buy, you need to understand what you’re actually buying. Pick the wrong type for your real-world use, and you’re either throwing money away or setting yourself up for frustration.
Spacer Lifts
Spacers (sometimes called leveling lifts or budget boosts) sit on top of your factory coil springs. They add height—usually 1” to 2.5”—without replacing the spring itself.
What you get and what you give up:
- ✅ Cheapest option on the market—typically $80–$200
- ✅ Dead simple install—basic hand tools, usually done in 2–4 hours
- ✅ Easy to reverse if you change your mind
- ❌ Factory spring rate stays the same—no suspension improvement off-road
- ❌ Stock springs take more wear over time, especially if you add heavy accessories
- ❌ Realistic tire limit is 33” or smaller
Who should run spacers: JK owners who want the look of a lifted truck, plan to stick with 33” tires or smaller, and don’t want to sink serious money into supporting modifications.
Coil Suspension Lift Kits
These replace your factory coil springs (and often shocks) with aftermarket units that are both taller and stiffer. Most 2.5”–3.5” kits fall here, and for good reason—this is the most popular choice among JK owners, and it’s popular because it actually works.
What changes and what stays the same:
- ✅ Real improvement in both ride quality and off-road flex
- ✅ Comfortable fit for 33”–35” tires depending on lift height
- ✅ Huge range of options at different price points ($200–$1,200+)
- ✅ Shorter lifts (2.5” and under) work with factory control arms
- ❌ You need an alignment after install—plan on $80–$150
- ❌ Taller lifts (3.5”+) require adjustable control arms and track bar work
- ❌ More involved than a spacer—expect 4–8 hours of work if you DIY
Who should go this route: Most JK owners. You get real capability improvements, the flexibility to run bigger tires later, and the ability to dial in exactly the height you need.
Long-Arm Suspension Lifts
These replace your short factory control arms with significantly longer aftermarket units. They allow massive suspension travel and lift heights above 4 inches.
The full picture:
- ✅ Maximum articulation and serious off-road capability
- ✅ Better handling geometry at extreme lift heights
- ✅ Can run 37”+ tires cleanly
- ❌ Expensive—quality systems run $1,500–$4,000+
- ❌ Not a DIY project without serious shop resources
- ❌ Requires additional mods: SYE (slip yoke eliminator), CV driveshaft, track bar, brake line extensions
- ❌ Daily drivability can suffer if not properly tuned
Who needs this: Owners building dedicated off-road rigs, overlanders planning expedition use, or competition crawlers. Before committing, read through common JK problems by year—some early models have known suspension wear issues worth addressing before any lift install.
Get new guides by email
One email when we publish something worth reading. Unsubscribe anytime.
How Much Lift Do You Actually Need? JK Lift Height vs Tire Size Chart
This is the practical question that matters most. More lift doesn’t automatically mean better—the right height depends on your tire target, what you plan to do with the Jeep, and how much additional work you’re willing to tackle.
| Lift Height | Max Tire Size (No Rub) | Tire Size (With Minor Trimming) | Alignment Needed? | Additional Mods Required | |-------------|------------------------|----------------------------------|-------------------|--------------------------|| | Stock (0”) | 31” | 32” | No | None | | 1.5” Spacer | 32”–33” | 33” | Recommended | None (ideally) | | 2.5” Coil | 33”–35” | 35” (some trimming) | Yes | Sway bar end links | | 3.5” Coil | 35”–37” | 37” (trimming needed) | Yes | Control arms, track bar | | 4”+ Long-Arm | 37”+ | 40”+ (full flex) | Yes | SYE, CV shaft, control arms, track bar |
2-door JK versus JKU (4-door): The JKU’s longer wheelbase (116” versus 95.4”) means less fender rub at the same tire size. At 2.5” lift, a JKU owner can often fit 35s cleanly where a 2-door owner might need minor trimming. Factor this into your planning.
2007–2011 versus 2012–2018: Early JKs use a different front track bar bracket design. Some 3.5”+ kits need year-specific hardware for these earlier models. Always verify year-specific fitment before you buy. The JK versus JL Wrangler comparison also covers suspension geometry differences worth knowing.
⚠️ Death Wobble: The Real Problem You Need to Know About
Lifted JKs with worn suspension parts—especially a damaged or stretched track bar—develop death wobble at highway speeds. I’ve experienced it myself: the front end shakes hard enough that you need to slow below 45 mph to make it stop. It’s genuinely alarming to have it happen with passengers in the vehicle. In my case, the fix was a track bar replacement and building the habit of inspecting it before every highway trip. A proper track bar and a quality steering stabilizer aren’t optional on a lifted JK—they’re essential.
The Rough Country N3 Dual Steering Stabilizer is one of the most practical ways to improve highway behavior on a lifted JK. It won’t fix a worn track bar, but it significantly reduces wobble amplitude and adds real safety margin.
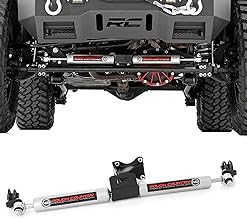
Rough Country N3 Dual Steering Stabilizer for 07-18 Jeep Wrangler JK - 8734930
Check Price on Amazon →Best Lift Kits for Jeep Wrangler JK: Detailed Reviews
I spent the better part of three months pulling from forum threads, reading YouTube build logs, and talking to owners running the full spectrum of lift configurations. That research led me to one conclusion: a 2.5” coil suspension lift hits the practical sweet spot. It gives you real capability without requiring a total suspension rebuild. You can run 35s without major fender work, and it leaves room to add more capability later as your needs evolve.
The reviews below reflect that research.
Best Overall: Rough Country 2.5” Lift Kit
Fits: 2007–2018 Jeep Wrangler JK and JKU (Unlimited)
What’s in the box:
- Lift height: 2.5 inches
- Front and rear lifted coil springs with heavy-duty front and progressive rear rates
- N3 nitrogen-charged shock absorbers front and rear
- Front and rear sway bar end links (most kits skip these—this one doesn’t)
- Front track bar drop bracket for geometry correction
- Complete hardware and instructions
- Lifetime replacement warranty from Rough Country
What works:
- Handles 33”–35” tires without major modifications
- N3 shocks are genuinely better than factory dampers—the ride improves noticeably
- Includes sway bar links and track bar bracket—the critical pieces most kits make you buy separately
- Fits all 2007–2018 JK and JKU variants without year-specific complications
- Excellent value proposition—few kits include this much hardware at this price
Where you’ll compromise:
- 35s on a 2-door JK at full suspension flex may need minor fender liner trimming
- Adjustable control arms aren’t included—you don’t need them at 2.5” but you will at 3.5”+
- Not designed for owners targeting 37” tires or serious rock crawling
For owners working with year-specific JK quirks, the 2012–2018 models respond slightly better to this kit’s track bar bracket. If you have an early 2007–2011 JK, verify bracket fitment with Rough Country before ordering.
Best Add-On: Rough Country N3 Dual Steering Stabilizer
Fits: 2007–2018 Jeep Wrangler JK and JKU
The specs:
- Two nitrogen-charged N3 cylinders (dual design)
- Direct bolt-on to factory frame—no cutting or welding
- Black powder coat finish
- All hardware included
- Works on stock and lifted JKs up to 4” lift
Why this works:
- The dual-cylinder setup provides noticeably more damping than single-stabilizer setups
- Highway handling improves markedly on lifted JKs
- Masks symptoms of minor suspension wear while you diagnose and fix the root cause
- Bolt-on installation for any 2007–2018 JK—no fabrication required
- Priced well compared to competing dual systems
Real limitations:
- It’s not a fix for actual problems like worn track bars—replace damaged components first
- Some extreme off-road builders prefer hydraulic bump stops
- It doesn’t replace a post-lift alignment—get one anyway
Transparency Note: This article centers on Rough Country products because they represent genuinely strong value for JK owners at these price points right now. Other brands make excellent kits—Teraflex, Rubicon Express, Fox, Icon, and Bilstein all produce quality work, particularly at higher price points. We’ll cover those in dedicated comparison pieces. Our recommendations come from real community research and owner feedback, not brand loyalty.
JK Lift Kit Buying Guide: What Actually Matters Before You Buy
Shopping smart for a JK lift kit means answering five clear questions before you spend money.
1. What tire size are you actually targeting? This drives everything. A 2.5” coil lift for 33s is a completely different build than a 3.5” lift targeting 35s. Lock in your tire goal first, then work backward to the lift you need. If you’re planning 37s or larger, be realistic about budgeting for a 4”+ lift with long-arm components.
2. Which JK model year do you own—2-door or JKU? Year and configuration matter more than most buyers realize. The 2007–2011 JK uses different track bar bracket geometry than the 2012–2018 model. Some kits fit both, others require year-specific hardware. The JKU’s longer wheelbase also changes how aggressively you need to trim for a given tire size at a given lift height. Check suspension problems by year for model-specific wear patterns worth inspecting before you lift.
3. What will you actually do with this Jeep? An honest answer here saves money and frustration. Daily driver with light trail use? A 2.5” coil lift is probably your ceiling. Regular trail days or overlanding? 3.5” with adjustable control arms starts making sense. Serious rock crawling? Long-arm, no question.
4. What other parts are you prepared to buy? No lift kit exists in a vacuum. A 2.5” lift realistically needs: alignment ($80–$150), possibly extended brake lines (verify clearance), and sway bar end links (usually included but verify). A 3.5”+ lift adds: adjustable control arms ($300–$700), track bar relocation ($100–$300), and probably a steering stabilizer. Budget for the full system, not just the kit itself. Rubicon owners need to check Rubicon-specific factory features—some factory components interact with lift hardware differently.
5. Are you DIY or going professional? Be honest about your tools, your comfort level, and your time availability.
🔧 DIY versus Professional: Real Talk
Lift Type Doable DIY? Tools You’ll Need Recommendation Spacer Lift (1”–1.5”) Yes Basic hand tools, floor jack ✅ Go DIY Coil Lift 2.5” Yes (moderate) Spring compressor, torque wrench, breaker bar ✅ DIY with prep Coil Lift 3.5” Challenging Full shop tools, alignment capability ⚠️ Proceed carefully Long-Arm 4”+ No Full shop, lift, fabrication equipment 🚫 Go professional
Cost reminder: the lift kit price is never the full cost. Add in the kit itself, supporting hardware, alignment, and any required additional work. Budget an extra $300–$800 beyond the kit price for a proper 2.5”–3.5” installation.
Installing a Lift Kit on Your Jeep JK: What to Realistically Expect
Plan your lift as part of a bigger build from the start—new tires, bumpers, paint work, overland gear. Do it once, do it right. Pulling components twice because the next modification requires it costs more money and more frustration.
Here’s what a 2.5” coil suspension lift actually looks like:
- Get tools and verify fitment — Confirm year and model compatibility before anything moves. Read the instruction sheet completely before you start working.
- Lift and securely support the vehicle — Quality floor jack and rated jack stands under all four corners. Never, ever work under a vehicle supported only by a jack.
- Remove front wheels — This gives you access to the front suspension.
- Disconnect sway bar end links — These come off so the axle can drop enough for coil removal.
- Remove factory front shocks — Upper and lower bolts, then slide the shock out.
- Compress and remove factory front coil springs — This is the step that requires a spring compressor. Don’t skip this step.
- Install new coil springs and shocks — New springs go in with the compressor loaded. Torque shocks to specification.
- Install new sway bar end links — The aftermarket links are longer than factory—this is not optional at lift height.
- Repeat steps 3–8 for the rear — Rear suspension is usually more straightforward with fewer components.
- Install track bar drop bracket (front) — This corrects your front end geometry at 2.5” lift.
- Reinstall wheels, lower vehicle, torque lug nuts — Final torque after the vehicle is back on the ground.
- Drive to alignment shop — Do this before any highway miles. The lift has changed your caster and toe.
What you’ll need:
- Floor jack (3-ton minimum) and properly rated jack stands
- Spring compressor (rent it, don’t buy it)
- Torque wrench
- Breaker bar and metric/standard socket sets
- Penetrating oil (rust is common on older JKs)
- Pry bar
- Safety glasses and work gloves
Real time estimate: 6–10 hours for someone doing their first 2.5” coil lift DIY. Budget the full day and don’t rush it.
💡 Practical Tip: Rent the spring compressor. Most auto parts stores offer free tool loans. A spring compressor costs $80–$120 to buy and you’ll use it once. Rent, use properly, return it.
Check year-specific maintenance issues before starting—some model years have known rust or suspension wear patterns that affect how easily fasteners come apart.
What Else You’ll Need After Lifting Your JK
Lifting is the beginning, not the end. Here are the supporting modifications, in order of priority, that every lifted JK owner should budget for.
1. Alignment — This isn’t negotiable. Lifting changes your caster, camber, and toe. An out-of-spec JK eats tires aggressively and handles poorly on the highway. Get it done within 50 miles of install.
2. Extended Sway Bar End Links — Most quality coil lift kits include these. Verify before you assume. Stock links will bind or fail at lift height.
3. Adjustable Track Bar — At 2.5” you can often use the drop bracket from your kit. At 3.5”+ an adjustable track bar becomes essential for correcting front axle centering.
4. Steering Stabilizer — Discussed in detail above. Especially important if you’re running 35s or larger.
5. Wheel Spacers — Bigger tires often expose backspacing issues that cause rub on the inner fender. A 1.5” wheel spacer pushes the tire outward and solves that cleanly.
For wheel spacers, the Orion Motor Tech hub-centric spacers are a solid choice for the JK’s 5x127 bolt pattern:
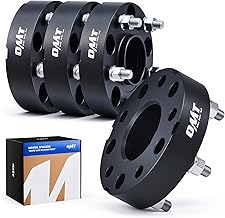
Orion Motor Tech 5x5 Wheel Spacers Compatible with Jeep Wrangler JK Grand Cherokee Commander, 1.5"
Check Price on Amazon →These are hub-centric (matching the JK’s 71.5mm hub bore), which matters—non-hub-centric spacers can introduce vibration at highway speeds.
6. Rear Axle Bearing Inspection — Lifted JKs running larger, heavier tires put additional stress on rear axle bearings. Worn bearings are a known issue on higher-mileage JKs, particularly 2007–2014 models. If your JK has over 80,000 miles, have them inspected or proactively replaced during the lift install while the axle is accessible.
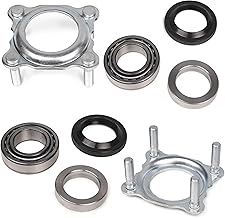
2pcs Rear Axle Bearing and Seal Kit Compatible with Jeep Wrangler JK/JKU 2007-2018
Check Price on Amazon →For perspective on how JK suspension compares to the JL generation, see JK and JL suspension systems compared.
Budget reality check: Supporting modifications, alignment, and hardware typically add $200–$600 on top of the kit price. Plan for this from day one, not as a surprise later.
Frequently Asked Questions: Lift Kits for Jeep Wrangler JK
What is the best lift kit for a Jeep Wrangler JK?
For most 2007–2018 JK and JKU owners, a 2.5” coil suspension lift kit offers the best balance of tire clearance, suspension performance, and cost. The Rough Country 2.5” kit is a strong option at its price point, including shocks, springs, sway bar end links, and track bar bracket. Owners targeting 37”+ tires should step up to a 3.5”–4” system with adjustable control arms.
How much does it cost to lift a Jeep JK?
A complete 2.5” lift—including the kit, alignment, and essential supporting hardware—typically costs $600–$1,200 for most JK owners. The kit itself may run $300–$500, but alignment ($80–$150) and supporting mods like extended brake lines, track bar, and steering stabilizer add up quickly. Higher-end 3.5”–4” systems with adjustable arms can push total cost to $1,500–$3,000 installed. Our complete JK buyer’s guide includes a broader build budgeting section.
Will a 2.5 inch lift fit 35 inch tires on a JK?
Yes, with realistic caveats. On a JKU (4-door), 35s fit at 2.5” with little to no trimming. On a 2-door JK, minor trimming of the front fender liner corner is often needed at full suspension flex. Wheel backspacing also matters—running a 1.5” wheel spacer or an offset aftermarket wheel resolves most rub issues without body modifications.
Do I need a lift kit to run bigger tires on my JK?
Technically, you can fit 33” tires on a stock JK with minor trimming. Anything larger will rub under normal driving or flex without additional lift. A 2.5” lift is the practical starting point for 35s. Running larger tires without appropriate lift height accelerates wear on control arm bushings, track bar, and steering components—it’s not just an appearance issue. Also consider whether a top change is part of your build; see our JK soft top versus hard top guide for how top selection works with full builds.
Does lifting a Jeep JK void the warranty?
For 2007–2018 JKs still under remaining powertrain coverage, suspension modifications can void warranty coverage on directly affected components. The Magnuson-Moss Warranty Act prevents dealers from voiding your entire warranty just because you added an aftermarket part—but they can deny claims on specific components if they prove the aftermarket part caused the failure. In 2026, most JKs are well outside any factory warranty period anyway.
What is the easiest lift kit to install on a Jeep JK?
A 1.5”–2” spacer lift is the easiest DIY option. It needs only basic hand tools, no spring compressor, and typically takes 2–3 hours. You won’t get suspension performance improvements, but you’ll gain modest clearance and run 33s comfortably. For anyone with basic mechanical skills, a 2.5” coil kit from a quality brand is achievable in a full day with the right tools.
Final Verdict: Which JK Lift Kit Is Right for Your Build
When I was hunting for my 2014 JKU, the lift kit decision came first—before the tires, before the bumpers, before anything else. I knew it would shape every modification that followed. I spent weeks researching, talking to owners, reading build logs, and thinking about what I actually wanted to do with the vehicle. Overland travel through Africa. Serious miles on serious terrain. The lift kit had to support that mission.
The reality is that every JK owner starts somewhere. The lift kit decision defines your direction.
Make the call this way:
- Running 33s on a daily driver? A 1.5”–2” spacer lift or entry-level coil lift handles it completely.
- Targeting 35s with genuine trail capability? A 2.5” coil suspension kit—like the Rough Country option reviewed above—is the right move for the vast majority of JK owners.
- Building for 37s or serious off-road work? Budget for a 3.5”+ coil lift with adjustable control arms, and plan for a long-arm upgrade if your use case demands it.
Start with the JK model year differences guide to understand year-specific fitment considerations. Then return to the JK buyer’s guide for the full build planning picture.
Your lift kit choice today is the foundation everything else sits on. Get it right.
Free: JK Fluids at a Glance
Every fluid, spec and capacity for the 2007-2018 Wrangler JK on one page, plus a cut-out glovebox card. Checked against the owner's manuals. From the JK Service Kit.
Email me the download and new guides when they are published. Unsubscribe anytime. Privacy Policy.
Allan
I'm Allan. I own a 2014 Jeep Wrangler JKU and I research the hell out of every mod before I touch it. When I've fitted something to my own Jeep, I say so. Everything else is researched from manufacturer specs and other owners' reports. No sponsored fluff.
Learn more about me →Free: JK Fluids at a Glance
Every fluid, spec and capacity for the 2007-2018 JK on one page, plus a glovebox card.
Email me the download and new guides when they are published. Unsubscribe anytime. Privacy Policy.
Related Articles
ICON Vehicle Dynamics Lift Kits for Jeep JK: Are They Worth the Premium?
ICON Vehicle Dynamics lift kits pair coilovers, remote-reservoir shocks, and precision-valved components to deliver a noticeably smoother, more capable...
Lifted Jeep JK: What to Expect After Installing a 2–4 Inch Lift Kit
A lifted Jeep Wrangler JK is a 2007–2018 Wrangler that has had its suspension or body raised between 1 and 6 inches above factory height. The payoff:...
Best JK Shocks for Off-Road: Complete Bilstein, Fox & King Comparison
A shock absorber does one essential job: it controls how fast your suspension bounces. When your tire hits a rock, the spring compresses. The shock...