Adaptive LED Headlight Systems Jeep JK: Automatic Beam Adjustment Explained
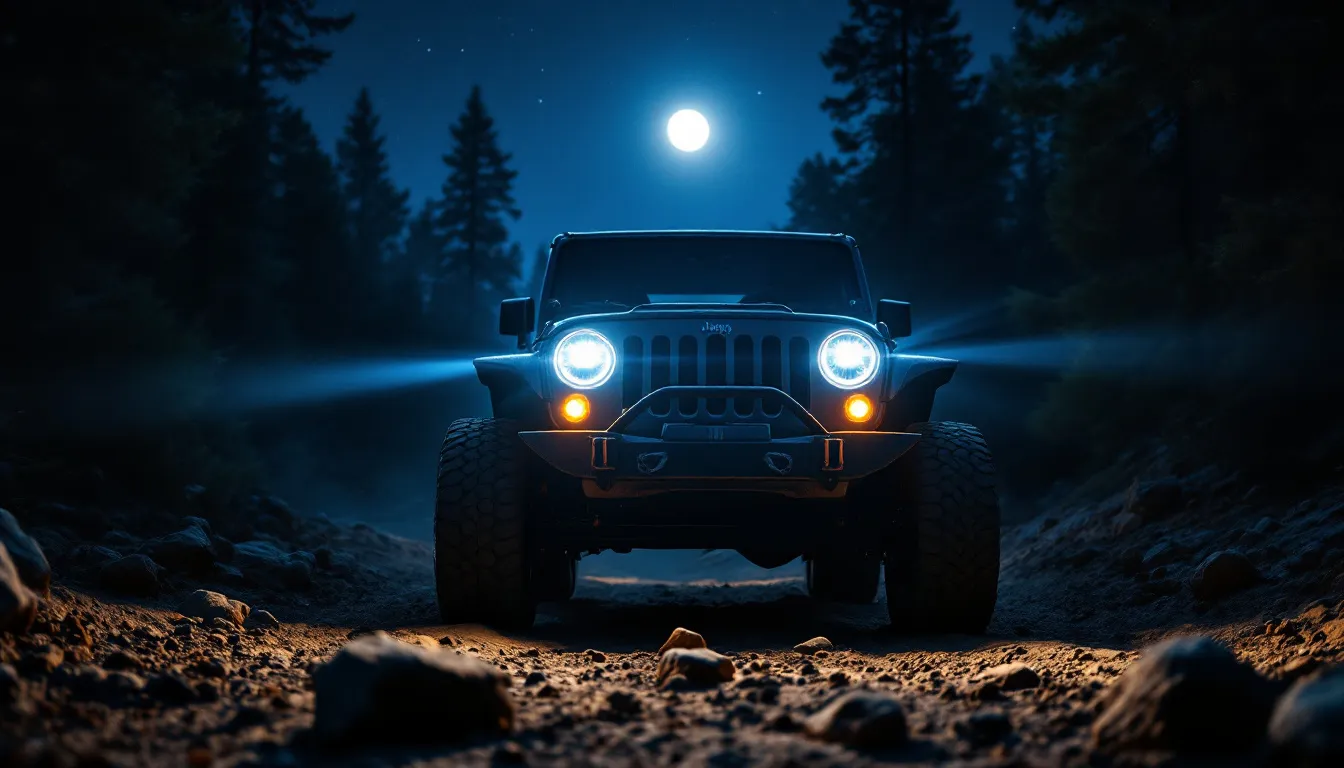
Adaptive LED Headlight Systems for the Jeep JK: What You Really Need to Know About Automatic Beam Adjustment
Adaptive LED headlight systems for the Jeep JK sound like they should do something fancy — something that tracks corners or levels itself with a load. The reality is simpler and more practical. When you see “adaptive LED” in an aftermarket listing for a 2007–2018 JK, what you’re actually looking at is better optics and smarter thermal management inside a 7-inch round housing. It’s not motorized beam steering. It’s not going to pivot with your steering wheel.
Understanding that distinction before you drop money on an upgrade is the difference between a great lighting investment and a frustrating purchase. I’ve talked to enough JK owners who thought they were getting true adaptive headlights—only to discover the word was just marketing—that I wanted to lay this out clearly from the start.
For a 2007–2018 JK, “adaptive” in LED headlights means superior light output and optical precision, not automatic beam adjustment. Full stop. And honestly? That’s still a fantastic upgrade if you pick the right product and install it properly.
If you’re planning a broader lighting overhaul, our guide to best LED halo headlights for the Jeep JK covers aesthetic projector options, and the JK buyers guide gives you the full platform picture before you commit to anything.
Affiliate disclosure: This article contains affiliate links. We earn a small commission if you buy through them—at no extra cost to you. We only recommend products we’ve actually researched and believe are right for JK owners.
What “Adaptive” Means—and What It Doesn’t—on Your 2007–2018 JK
Here’s the thing about factory adaptive systems: they exist, they work beautifully on modern luxury cars, and they have nothing to do with your JK. On a BMW or Mercedes from the last decade, adaptive headlights use electric motors or hydraulic actuators to physically pivot the headlight beam as you steer, keeping the road ahead lit no matter how sharp the corner gets. Some systems also tilt the beam based on vehicle load and suspension height. It’s genuinely clever engineering.
No 2007–2018 Jeep Wrangler JK—not even the Rubicon with every option checked—came from the factory with this technology. Not one. The JK’s stamped-steel headlight bucket was never designed to accommodate motorized actuators or the control modules and sensors that system requires. The wiring, the housing structure, the whole architecture is different.
So when an aftermarket LED company uses the word “adaptive” to describe a headlight for the JK, what are they actually selling you?
Better light output and optical engineering. That’s the upgrade. A quality LED housing gives you whiter, higher-output illumination with a sharper optical cutoff—meaning less spill, less glare, and more usable light on the road or trail. Some projector-based housings throw a tighter, more focused low-beam pattern than the OEM halogen reflector ever could. Others add a multi-stage high beam that lights up the road further ahead. Those are real improvements that make a tangible difference when you’re driving at night, especially off-road.
But it’s not automatic. You aim it once after install, and it stays aimed. No steering input, no load sensors, no motorized adjustments.
The practical implication? Don’t spend money expecting something this platform can’t deliver. Spend it on the optical quality and output that actually matter for seeing better at night.
The compatibility gate for any JK LED headlight is the 7-inch round format and connector type. 2007–2011 JKs use an H13 (9008) connector—a single plug carrying both high and low beam circuits. 2012–2018 JKs share the same housing diameter but have the same H13 connector (or, in some cases, H4 variants that need an adapter). If a housing is designed for an H4 connector and you’re installing it on an H13-equipped JK, you’ll need an H13-to-H4 adapter pigtail. Trim level doesn’t matter—whether you’re driving a base Sport or a fully loaded Rubicon, the housing opening and connector are identical.
For a complete breakdown of the trim differences that do affect your build (like the electronic locking differentials on the Rubicon), check out our Rubicon vs Sport vs Sahara trim comparison.
Four Verified LED Headlight Products for the JK: Best Picks and Real-World Context
{{IMAGE:hero-adaptive-led-headlights-jeep-jk-2007-2018.jpg|Adaptive LED headlight housing installed on a Jeep Wrangler JK, showing the 7-inch round format and white light output}}
The best LED headlight upgrade for most 2007–2018 JK owners is the Super7 2.0 full LED housing. It’s DOT-approved, engineered specifically for the JK, and—crucially—it eliminates the flicker and CANBUS error codes that trip up lesser LED options on the JK’s electrical system. But there are solid alternatives depending on budget and your JK’s model year. Here’s what’s actually available and worth your time.
Best Overall: Super7 2.0 Full LED Housing Replacement

Super7 2.0 LED Headlight Housings for 2007-2018 Jeep Wrangler JK
Check Amazon for current price
Check Price on Amazon →What you’re getting:
- Full LED housing replacement (you’re replacing the entire fixture, not just the bulb)
- DOT approved for street-legal operation
- Plug-and-play wiring for 2007–2018 JK (both 2-door and JKU)
- Built-in CANBUS load resistance—no flicker, no error codes
- Direct H13 connector to your factory harness
Why this wins: The Super7 2.0 eliminates the adapter and harness guesswork that trips up most DIY installs. It’s engineered specifically for JK fitment, which means you’re not jury-rigging an H4 housing with an adapter pigtail or hoping a relay harness fixes your electrical gremlins. You plug it in, aim it, and move on. DOT approval means you’re street-legal without any fine print. And because it’s a purpose-built LED housing—not an LED bulb jammed into a halogen reflector—the optical pattern is actually designed around the light source it’s using.
The trade-off: Higher upfront cost than a bulb swap, and you’re replacing the whole housing. If you love the look of your current OEM housings, this isn’t the move.
Ideal for: 2007–2018 JK and JKU owners who want a complete, zero-compromise solution and don’t want to spend a weekend troubleshooting CANBUS codes or aiming issues.
Best Budget Option: Termitor H13/9008 LED Bulbs

What you’re getting:
- Drop-in LED bulb replacement for H13 sockets
- 6500K cool white color temperature (matches newer vehicle lighting)
- IP68 waterproof rating (appropriate for any trail use)
- Claimed 85,000+ hour service life
- 2 bulbs per pack (covers both headlights)
Why this matters: If you’ve got a 2007–2011 JK with an H13 socket and you want to dip your toes into LED lighting without replacing the housing, this is the practical starting point. The H13 connector is a direct fit—no adapter pigtail needed. You pop the old halogen bulbs out, plug the LEDs in, and you’ve immediately got brighter, whiter light. The IP68 waterproofing is solid if you’re planning trail runs or water crossings.
Reality check: Putting an LED bulb inside a halogen reflector housing is a compromise. The optical pattern won’t be as clean as a purpose-built LED projector. You’re getting brighter light, but the beam shape is still dictated by a reflector designed for an incandescent filament. You may also still get CANBUS flicker without an additional relay harness, depending on your JK’s electrical system.
Ideal for: 2007–2011 JK owners on a strict budget who want a quick brightness upgrade and are willing to add a relay harness if CANBUS codes appear.
Essential Add-On: True Mods H4 LED Wiring Harness (CANBUS Solution)

What you’re getting:
- Negative-switched relay harness with integrated fuse protection
- Universal H4 connector fit (compatible with most modern LED housings)
- Designed for Jeep Wrangler JK, TJ, and sealed-beam applications
- Pulls power directly from the battery, bypassing the factory CANBUS circuit
Why you need this: CANBUS error codes and headlight flicker are the JK owner’s version of a cold sore—common enough that you expect it, painful enough that you want to prevent it. The JK’s Body Control Module watches the headlight circuit for the current draw of traditional halogen bulbs. LED bulbs draw way less current. The BCM sees that drop and flags it as a fault, causing flicker and DTC codes. A relay harness solves this by running power directly from the battery, completely bypassing the CANBUS monitoring circuit. No flicker, no codes, no drama.
The install factor: This isn’t a five-minute job. You’re routing the power lead to your battery (under the hood), grounding the harness to a clean chassis bolt, and tucking the relay neatly somewhere out of sight. It’s absolutely doable for someone comfortable with basic wiring, but it’s not plug-and-play.
Ideal for: Anyone installing an LED housing or bulb that doesn’t have built-in CANBUS load resistance. If you’re running the Super7 2.0 (which has built-in CANBUS circuitry), skip this. If you’re running aftermarket LEDs without specified CANBUS compatibility, budget for it.
Connector Bridge: H13-to-H4 Adapter Pigtail

What you’re getting:
- Two pre-wired adapter connectors bridging H13 (factory JK) to H4 (many aftermarket housings)
- Heat-resistant connector designed for headlight applications
- Allows you to use H4-pinned LED housings on your H13-equipped JK
Why this matters: A lot of aftermarket LED housings are wired for H4 connectors because that’s a common standard in the broader automotive world. Your JK comes with H13. This adapter sits between your factory harness and the new housing so you never have to cut any OEM wiring. Seriously—don’t cut the factory harness. Use this adapter.
Ideal for: JK owners installing an H4-pinned LED housing who want to preserve their original wiring intact.
LED Headlight Comparison Table: Quick Reference for All Four Options
This table gives you the core specs side by side. Use it to figure out which product matches your situation.
| Product | Type | Connector | DOT Approved | Install Complexity | Price Range | Best For |
|---|---|---|---|---|---|---|
| Super7 2.0 LED Housing | Full replacement | H13 (JK plug-and-play) | Yes | Simple (just swap housings) | ~$200–300 | Complete upgrade, zero compromises |
| Termitor H13 LED Bulbs | Bulb only | H13 (direct fit) | Not specified | Very simple (pop and plug) | $39.99 | 2007–2011 JK budget upgrade |
| True Mods Relay Harness | Wiring harness | H4 relay format | N/A (accessory) | Moderate (battery wiring) | $23.99 | CANBUS flicker/code prevention |
| H13-to-H4 Adapter Pigtail | Connector adapter | H13→H4 bridge | N/A (passive connector) | Simple (inline adapter) | $7.99 (2-pack) | Using H4 housings on H13 JK |
How to read this: Start with the Connector column and match it to your JK’s factory setup (H13 for 2007–2018). If your desired housing uses H4, you need either the adapter pigtail or a relay harness. The Super7 2.0 sidesteps all these decisions by being JK-native, which is why it wins for hassle-free installation.
For more in-depth options on aesthetic LED upgrades with halo rings, check our guide to LED halo headlights for the JK. For coordinating your whole lighting system, the fog light upgrades for off-road visibility pairs well with headlight work.
Installing LED Headlights on Your JK: The Right Way (And the Two Mistakes to Avoid)
{{IMAGE:jeep-jk-led-headlight-installation-wiring-harness-battery.jpg|True Mods relay harness routed from JK battery to LED headlight housing, showing proper fuse placement and ground connection}}
LED headlight installation on a 2007–2018 JK is genuinely straightforward—usually a Saturday morning job with a socket wrench and a flashlight. The issue isn’t the difficulty; it’s the two JK-specific gotchas that catch first-timers. Skip the relay harness on a non-CANBUS LED and you’ll get flicker and error codes. Over-tighten the retaining hardware and you’ll crack the housing. Both are avoidable if you know they’re coming.
Here’s the step-by-step sequence that actually works.
Model-year note: All 2007–2018 JKs (both 2-door and JKU) use an H13 factory connector in the headlight bucket. If you’re installing an H4-pinned housing, you’ll need either the adapter pigtail or a relay harness wired to bypass the factory connector. Always verify your connector type before ordering anything.
The Install Sequence
1. Kill the battery. Disconnect the negative battery terminal before touching any headlight wiring. Full stop. This isn’t optional.
2. Remove the OEM headlight assembly. On the JK, the headlight bucket is held by a trim ring around the lens and a series of screws behind the grille surround. You may need to remove the plastic grille trim panel first (it’s held by clips and a couple of plastic screws). Once the trim is out of the way, locate the three or four Phillips-head screws holding the trim ring, remove them, and gently pull the whole assembly forward. Disconnect the factory H13 plug—it’s a simple push-tab connector.
3. Handle the connector situation. Before you do anything else, check what connector your new LED housing expects. If it’s H13-native or marked as “JK plug-and-play,” proceed to step 4. If it’s H4, install the H13-to-H4 adapter pigtail now. Plug the female H13 end into your factory harness and leave the male H4 end hanging—you’ll plug the housing into this in a moment. Do not cut the factory harness. Ever. The adapter exists for this exact reason.
4. Add a relay harness if the LED housing isn’t CANBUS-equipped. Check the product listing or contact the seller—does the housing have built-in CANBUS load resistance? If yes, skip this. If no or unclear, install the True Mods relay harness:
- Run the positive lead from the relay to your battery’s positive post (use the existing jump-start post if your JK has one; otherwise, a post under the hood works fine)
- Run the negative/ground lead to a clean, unpainted chassis bolt (strip the paint if needed so you get bare metal-to-metal contact)
- Fuse the circuit properly (the harness comes with an inline fuse holder—use it)
- Tuck the relay and wiring neatly so it’s not hanging loose
This is the single most important step for avoiding CANBUS flicker and error codes. Don’t skip it.
5. Seat the LED housing into the bucket. Press it in squarely and make sure it’s centered in the opening. Reattach the retaining hardware by hand first. Snug each screw gently. Then—and this is the critical part—tighten them just enough so the housing doesn’t move. Stop there. These housings are not cast iron. They’re acrylic or polycarbonate. Over-tightening cracks them. You’ll know it’s right when the housing sits flush and doesn’t rock, but the screws turned freely without any strain.
6. Reconnect the battery and test on both low and high beams before you button up the grille and call it done. Make sure both lights are on, both brightness levels work, and—if you installed a relay harness—there’s no flicker.
{{IMAGE:jeep-jk-led-headlight-beam-aiming-25-foot-wall-method.jpg|Jeep Wrangler JK 25 feet from a wall with LED headlights aimed and tested, showing proper beam cutoff and hot spot placement}}
Beam Aiming: Non-Negotiable
Aiming is where most owners stumble—and where a poorly aimed LED headlight becomes a weapon that blinds oncoming drivers or leaves you fumbling in the dark. LED optics have a sharp, defined cutoff line. If that cutoff isn’t aimed correctly, you’ve created a problem.
The 25-foot wall method—the only way to do this right:
- Park on level ground, exactly 25 feet from a flat wall or garage door
- Measure your headlight centers’ height from the ground and mark that height on the wall (use masking tape or chalk)
- Turn on your low beams, one at a time
- The top of the hot spot (the brightest part of the beam) should sit at or just slightly below that marked height—aim for 2 inches below center as a solid baseline
- Use the vertical and horizontal adjustment screws on the back of each housing to dial in the aim
- Check both beams, then step back and look from a driver’s position to make sure neither light throws glare
Don’t aim by eye alone. Use the wall. Take your time. Get it right. An oncoming driver at night will either thank you or curse you depending on how well you did this step.
For more guidance on full-system lighting aiming—including fog lights—see our LED fog light upgrades for the JK. And if you’re doing a major electrical upgrade beyond just headlights, reference your 2018 JK maintenance schedule to understand what other systems you should inspect while you’re in there.
What Really Matters When You’re Buying LED Headlights for the JK
Skip the spec sheet hype. Here’s what actually separates a solid upgrade from a regrettable one:
DOT approval. This is mandatory for street-legal operation. If a product doesn’t explicitly say DOT-approved, assume it’s off-road use only and you could be cited for using it on public roads. Check the product listing and look for the DOT stamp on the lens itself.
CANBUS compatibility. This is the JK-specific gotcha. Either the housing has built-in load resistors and CANBUS circuitry (called out in the product description), or you need to add a relay harness. Don’t gamble on “it should work.” Either it’s specified or it isn’t. If it isn’t, factor in the $23.99 harness cost.
Connector type. H13 for your 2007–2018 JK. H4 housings need an adapter pigtail or a relay harness to bridge the gap. Verify before you order. Not all “Jeep Wrangler” listings are JK-specific.
7-inch round housing. The JK takes 7-inch round headlights. Don’t assume every round housing you find online is the right fit. Verify the listing explicitly says 2007–2018 JK.
Optical quality over raw lumens. Here’s where a lot of people get sidetracked. A manufacturer listing “10,000 lumens” sounds impressive. But lumens measure total light output, not how that light is directed. A well-designed 3,000-lumen LED with a focused projector beam will absolutely outperform a 10,000-lumen LED bulb scattering light in every direction inside a halogen reflector. Focus on beam pattern, optical design, and customer reviews about actual usability. Ignore the lumen wars.
Fitment across door count. Both 2-door JK and 4-door JKU models use the same 7-inch round headlight housing. There’s one part number, not separate versions for each configuration. Fitment is identical.
Frequently Asked Questions: LED Headlights on the Jeep JK
{{IMAGE:jeep-jk-adaptive-led-headlight-faq-qa-technical-guide.jpg|Close-up of Jeep Wrangler JK LED headlight with projected beam pattern and focus lens visible}}
Do Jeep Wrangler JK headlights have automatic beam adjustment?
No. Not a single 2007–2018 JK came from the factory with factory adaptive or automatic beam adjustment. Aftermarket LED headlights described as “adaptive” for the JK are using that word to mean improved optical quality and light output—not motorized beam steering. Once you aim them after installation, they stay aimed. There’s no motor, no sensor input, no steering wheel linkage. Full stop.
Will LED headlights cause CANBUS error codes on my JK?
They can, yes. The JK’s Body Control Module monitors the headlight circuit for the current draw of traditional halogen bulbs. LED bulbs and housings draw significantly less current, which the BCM can flag as an electrical fault. You’ll see flicker on and off, and potentially get error codes. The fix is either picking an LED housing with built-in CANBUS load resistance (like the Super7 2.0) or adding a relay harness that bypasses the factory circuit entirely. Don’t ignore this. A relay harness is a $24 insurance policy against a weekend of troubleshooting.
Are aftermarket 7-inch LED headlights legal on public roads?
Only if they’re DOT-approved. Not all aftermarket LED headlights sold for the JK carry DOT compliance—some are marketed strictly for off-road use. Always check the product listing for DOT marking and look for the actual DOT stamp on the lens itself before using any aftermarket headlight on public roads. Running non-approved lighting can get you cited.
Do I need an adapter pigtail to install LED headlights on my 2007–2011 JK?
It depends on the housing’s connector. 2007–2011 JKs come with an H13 (9008) factory connector. If your new LED housing is also wired for H13, no adapter is needed—just plug it in. If the housing uses an H4 connector, you’ll need an H13-to-H4 adapter pigtail to bridge the gap. Never cut the factory harness. Always use an adapter and preserve your OEM wiring. Check the product description before you order—it should specify exactly which connector the housing uses.
How do I aim LED headlights after install on my Jeep JK?
Park on level ground exactly 25 feet from a flat wall. Mark the wall at the height of your headlight centers. Turn on low beams and adjust the aim screws on each housing so the top of the beam’s brightest area (the hot spot) sits at or just below that height—roughly 2 inches below center is the standard target. This creates a proper cutoff that illuminates the road without blinding oncoming traffic. Take time with this step. It matters.
What’s the difference between H13 and H4 connectors on a Jeep JK?
The H13 (also called 9008) is a single connector plug that carries both high-beam and low-beam circuits in one unit. It’s the OEM standard for 2007–2018 JKs. The H4 is a different pinout that’s more common in some aftermarket LED housings designed for universal fitment across multiple vehicle platforms. They’re not compatible without an adapter. Always verify your JK’s factory connector type before ordering any LED housing.
Real Talk: Making the LED Headlight Upgrade Worth Your Time
The Super7 2.0 full LED housing is the right move for most 2007–2018 JK owners. It handles CANBUS compatibility, DOT compliance, connector fitment, and optical design all in one package. Install it, aim it properly, and move on. No adapters, no extra harnesses, no guessing.
If you’re targeting a lower price point and your JK is a 2007–2011 model, the Termitor H13 LED bulbs are a legitimate starting point at $39.99. Just commit to buying the $23.99 True Mods relay harness at the same time and do the install right the first time. A relay harness isn’t optional if your LEDs don’t specify CANBUS compatibility—it’s the difference between a clean install and a flickering headache.
Two rules for success, regardless of which product you choose:
-
Use a relay harness (or verify built-in CANBUS circuitry). CANBUS flicker is the JK owner’s nemesis, and a $24 harness solves it completely.
-
Aim your beams properly. A poorly aimed LED headlight is worse than a stock halogen because the optical cutoff is sharp enough to blind people. Use the 25-foot wall method. Give it the time it deserves.
From here, natural next steps are filling out the rest of your lighting picture. Check out the LED tail light upgrade guide to light up the back, add some auxiliary beams with the LED fog light options, and bookmark your JK maintenance schedule for regular checks on all your electrical upgrades.
Aim your beams right, install a proper harness, and your JK will see the trail the way it deserves to. It’s that straightforward.
Get the Free JK Build Planner
Complete PDF with mod checklists, gear ratios, tire sizing charts, and budget worksheets. Everything you need to plan your JK build.
No spam. Unsubscribe anytime. By subscribing, you agree to our Privacy Policy.
Allan
I'm Allan. I bought a 2014 Jeep Wrangler JKU and I research the hell out of every mod before I touch it. Everything here is tested or deeply researched on my own rig - no sponsored fluff, just honest findings.
Learn more about me →Get the JK Build Planner
Free PDF with complete build checklists, gear ratios, and tire fitment guides.
By subscribing, you agree to our Privacy Policy.
Related Articles

Jeep JK Rock Sliders Installation Guide: Steel vs Aluminum
Disclosure: JeepJK Guide earns a commission on qualifying Amazon purchases at no extra cost to you. We only recommend products we'd bolt onto our own rigs.
Power Door Mirror Upgrade Jeep JK: Heated Towing Mirrors (2007–2018 Guide)
If you've ever towed anything wider than your Jeep JK with stock mirrors, you already know the problem. Those factory units stick out maybe 3–4 inches...

Best Half Doors for Jeep Jk Summer Off-Roading
Affiliate Disclosure: JeepJK Guide earns a commission from qualifying Amazon purchases at no extra cost to you. All recommendations are based on...