Best Axle Back Exhaust For Jeep JK: Expert Picks & Buying Guide
Best Axle Back Exhaust For Jeep JK: Expert Picks & Buying Guide
An axle back exhaust for your Jeep JK replaces the factory muffler and tailpipe sections, offering a deeper exhaust note and improved looks without major modifications. It’s the most affordable and straightforward exhaust upgrade you can make, typically taking under an hour to install with basic hand tools.
When I started researching exhaust options for my own JK, I quickly realized that spec sheets only tell half the story. Real-world community knowledge from other Jeep owners—their experiences with drone on highway drives, how different systems sound with the top off, and which brands hold up to trail abuse—proved far more valuable than manufacturer claims. That approach has guided every exhaust decision I’ve made since.
This guide cuts through the marketing noise to help you choose the right axle back system for your specific JK. We’ll cover what makes an axe back different from other exhaust upgrades, how to match sound and performance to your driving style, what to expect during installation, and which systems deliver the best value. Whether you’re daily driving a 2-door Sport or trail-running a lifted Rubicon, you’ll find practical advice to make an informed decision. Let’s also address model year differences between 2007-2018 JKs that affect exhaust fitment.
What Is an Axle Back Exhaust System?
An axle back exhaust system is a bolt-on upgrade that replaces only the rear section of your Jeep’s exhaust—from the rear axle to the tailpipe tips. This is the most basic level of exhaust modification, affecting sound and appearance while leaving the catalytic converters, mid-pipes, and front exhaust components completely stock.
The Jeep JK exhaust has three main upgrade levels, each with increasing complexity and cost:
- Axle back: Replaces muffler and tailpipe only (easiest, least expensive, minimal performance gain)
- Cat-back: Replaces everything from catalytic converters rearward (moderate difficulty, noticeable sound and slight performance improvement)
- Headers/full system: Replaces manifolds and entire exhaust (most complex, maximum performance, requires tuning)
Axle back systems bolt directly to your factory mid-pipe using the existing clamps or hangers. Most quality kits include new stainless steel clamps and sometimes upgraded rubber hangers. You’re not cutting, welding, or permanently modifying anything—the installation is completely reversible if you ever want to return to stock or try a different system.
The primary benefit is sound enhancement. Factory JK mufflers are designed for maximum noise suppression, which means a very quiet, muted exhaust note. An axle back opens up that sound without the droning or harshness that can come from more aggressive exhaust modifications.
Why Upgrade to an Axle Back Exhaust?
An axle back exhaust transforms your Jeep’s sound profile and visual appearance, but it’s important to set realistic expectations about what this modification actually delivers.
Sound Improvement
This is the main reason most JK owners choose an axle back. You’ll get a noticeably deeper, more aggressive tone during acceleration and a satisfying rumble at idle. The stock 3.6L Pentastar and 3.8L V6 engines are known for being relatively quiet—almost sedan-like in some cases. A quality axle back brings out the character these engines should have had from the factory.
Sound level varies significantly between brands and muffler designs. Straight-through designs offer maximum volume and aggressive tone, while chambered mufflers provide a deep rumble without being obnoxious. If you daily drive your JK or frequently run highway speeds, pay close attention to drone characteristics in reviews.
Performance Gains
Let’s be honest: you won’t feel a significant horsepower increase from an axle back alone. Independent dyno tests typically show 2-5 horsepower gains at best, which is imperceptible during normal driving. The factory exhaust on JKs isn’t particularly restrictive, so replacing just the rear section doesn’t free up enough flow to make a measurable difference in acceleration or fuel economy.
If you’re chasing performance, you’ll need a cat-back system or headers combined with a tune. An axle back is primarily a sound and appearance upgrade—treat any performance claims with skepticism.
Visual Appeal
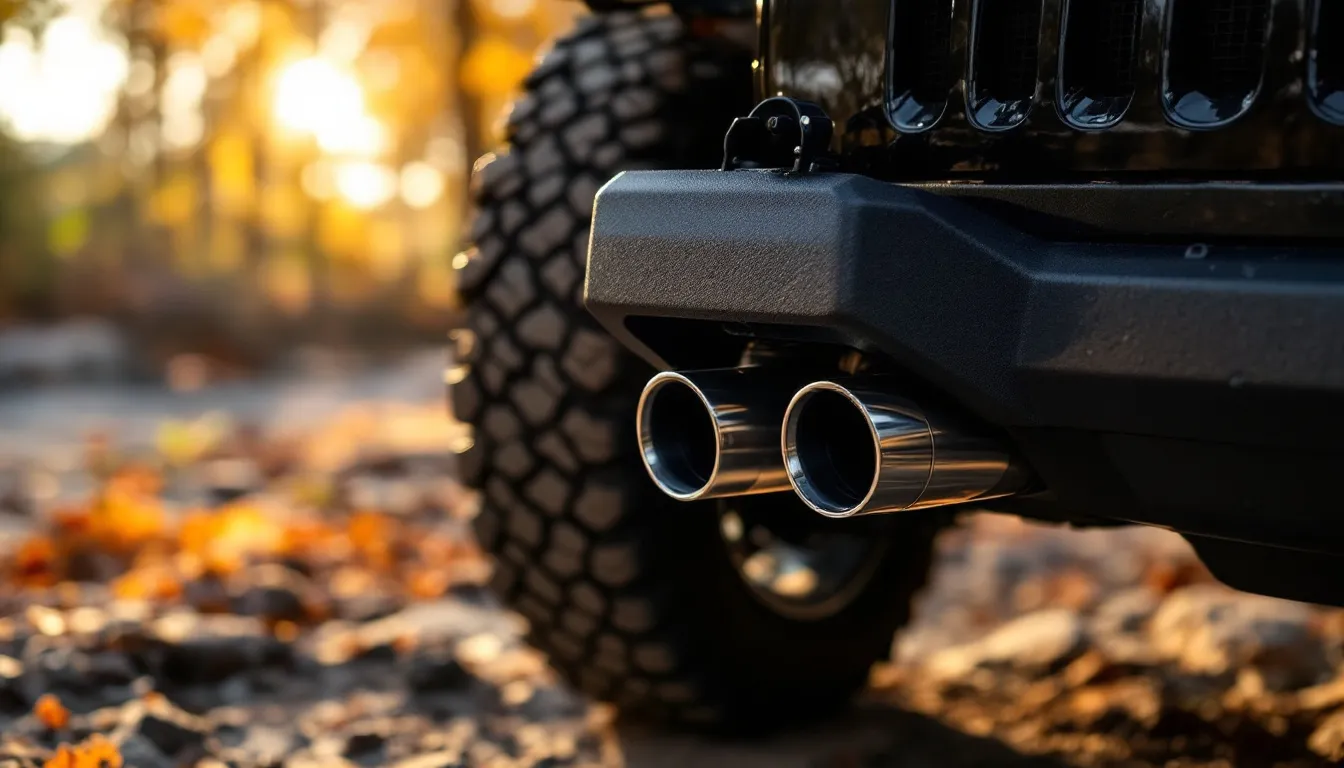
Most axle back kits feature polished stainless steel or black-coated tips that significantly improve the look of your rear bumper area. Factory exhaust tips are often small, dull, and hidden. Upgraded tips—especially dual-exit configurations—give your JK a more finished, aggressive appearance.
Cost and Simplicity
Axle back systems typically cost $200-$600, making them one of the most affordable ways to modify your Jeep’s exhaust note. Installation rarely requires professional help, saving you another $100-$200 in labor costs compared to cat-back or header installations.
Considerations
Some Rubicon models with different exhaust routing may have slight fitment variations, particularly 2012+ models with the revised rear diff breather system. Always verify model year and trim compatibility before purchasing. Also consider that louder isn’t always better—what sounds great on a Saturday morning cruise might become fatiguing during a 4-hour highway drive to the trail.
Pros:
- Affordable upgrade ($200-$600 range)
- Significantly improves exhaust tone
- Easy DIY installation (under 1 hour)
- Completely reversible
- Better visual appearance
Cons:
- Minimal performance gains (2-5 HP)
- Some systems produce highway drone
- Sound may be too loud for some daily drivers
- No fuel economy improvement
How to Choose the Right Axle Back Exhaust for Your JK
Selecting an axle back exhaust comes down to matching sound characteristics, material quality, and design features to your specific driving style and priorities. Here’s how to make an informed decision.
Material Construction
Exhaust material directly impacts longevity, especially if you encounter trail obstacles or drive in areas with winter road salt:
- Aluminized steel: Budget-friendly but prone to surface rust after 3-5 years. Fine for garage-kept JKs in dry climates.
- 304 stainless steel: Excellent corrosion resistance, good value, common in mid-range systems ($300-$450).
- 409 stainless steel: Slightly less corrosion-resistant than 304, but still significantly better than aluminized steel.
- T304 or T409 stainless with ceramic coating: Premium option offering maximum heat management and corrosion protection.
If you off-road regularly or live where roads are salted in winter, invest in 304 stainless minimum. The extra $100-$150 pays for itself in longevity.
Sound Profile and Drone
This is where personal preference matters most. Sound is subjective, but here’s a practical framework:
- Straight-through design (minimal internal baffling): Maximum volume, aggressive tone, higher likelihood of drone at highway cruising speeds (65-75 MPH). Best for weekend warriors who prioritize sound over daily drivability.
- Chambered muffler design: Deep rumble with better drone control. Louder during acceleration, quieter during cruise. Better choice for daily drivers.
- Resonator-equipped systems: Smoothest sound with minimal drone, but less aggressive tone overall.
If you daily drive your JK on the highway, prioritize systems with drone-reducing technology over maximum sound volume. A system that sounds amazing in the parking lot but causes ear fatigue at 70 MPH becomes regrettable quickly.
Watch video reviews with the JK at highway speeds, not just revving in park. Sound clips shot inside the cab during cruising reveal drone issues that glamour shots never show.
Tip Style and Exit Configuration
Visual preference plays a role here:
- Single side exit: Most common, mimics factory routing, clean look
- Dual tips (side exit): More aggressive appearance, popular upgrade
- Rear exit: Uncommon on JKs, better clearance for aftermarket bumpers
- Polished stainless vs. black coated: Choose based on other exterior trim (match your bumpers, sliders, etc.)
Tip diameter typically ranges from 3” to 4”. Larger tips look more aggressive but don’t affect performance on an axle back system.
Model Year and Trim Compatibility
JKs from 2007-2011 (3.8L engine) and 2012-2018 (3.6L Pentastar) have different exhaust routing in some areas. Most quality axle back systems are designed to fit all years, but always verify before purchasing. Two-door and four-door (JKU) models use the same axle back components in most cases, but confirm fitment if you have a 2-door.
Some systems require minor trimming of the factory heat shield. This isn’t a dealbreaker, but if you want a true bolt-on installation with zero modifications, read the installation instructions before buying.
Warranty and Brand Reputation
Reputable exhaust manufacturers offer lifetime warranties against defects and corrosion. This matters for stainless systems that should last 10+ years. Cheap eBay or unbranded systems might save you $150 upfront but often lack proper fitment, use inferior materials, and offer no recourse if welds crack or flanges don’t align.
Stick with established brands known in the Jeep community. You’re not just buying metal tubes—you’re buying engineered fitment and proven durability.
Clearance for Lifted JKs
If you’re running a 3”+ lift with aftermarket bumpers or sliders, confirm that the tip placement won’t interfere with tire clearance during articulation. Some side-exit systems position tips where they can contact 35”+ tires at full compression.
For heavily modified trail rigs, consider whether you need rock damage protection or quick-disconnect features for obstacle clearance. Most axle back systems don’t include armor, but some offer tuck-up designs that minimize ground clearance loss.
Before committing to any system, check if it’s been identified in common JK problems by year for compatibility issues with certain model years.
Installing an Axle Back Exhaust: What to Expect
Installing an axle back exhaust on a Jeep JK is one of the most straightforward modifications you can tackle. Most owners complete the job in 45-90 minutes with basic hand tools. Here’s what the process involves and what you’ll need.
Tools and Supplies Required
You don’t need a full mechanic’s shop to install an axle back, but quality tools make the job significantly easier:
{{PRODUCT_CARD:3e877af0-914d-4a5f-acb0-dbecd99b421d}}
{{PRODUCT_CARD:89fb537d-e6b5-4397-ba73-b732e42204fd}}
{{PRODUCT_CARD:c3456b0b-a34d-41b6-ab77-054135bc55bf}}
{{PRODUCT_CARD:54c7b06d-8330-41e2-9784-77ee4dff6417}}
Additional basic tools include a socket set (13mm and 15mm most common), a ratchet, and safety glasses. Work gloves protect your hands from sharp exhaust edges and hot components.
Installation Process Overview
The installation follows a straightforward sequence:
- Park on level ground and let the exhaust cool completely (wait at least 2 hours after driving). Never work under a hot exhaust system.
- Lift and support the rear of the Jeep safely using jack stands rated for the weight. Never work under a vehicle supported only by a jack.
- Spray all exhaust clamp bolts with penetrant and let it soak for 10-15 minutes. Exhaust bolts are notorious for seizing, especially on older JKs driven in salt-belt states.
- Locate the connection point at the rear axle where the factory axle back section meets the mid-pipe. This is typically held by a band clamp or flange bolts.
- Remove the clamp or flange bolts using a socket or wrench. If the factory clamp is severely rusted, cutting it off with a reciprocating saw or angle grinder may be necessary (wear eye protection).
- Support the factory muffler with one hand while removing the last mounting point. The assembly is heavier than it looks—around 20-30 lbs depending on the system.
- Remove the factory exhaust hangers from the rubber isolators by twisting and pulling. A little WD-40 or soapy water helps slide them out.
- Test-fit the new axle back system before final installation to confirm alignment and clearances.
- Install rubber hangers first, then slide the inlet pipe onto the factory mid-pipe connection point. Leave clamps loose initially.
- Align the tips for visual appearance and ensure adequate clearance from the bumper, frame, and body panels.
- Tighten all clamps and hardware to manufacturer specs using a torque wrench. Over-tightening crushes pipes; under-tightening causes exhaust leaks.
- Start the engine and check for leaks at the connection point. A small puff of smoke from residual oil burning off is normal; a steady stream of exhaust indicates a leak.
Common Installation Challenges
Seized hardware: Rusted clamp bolts are the most common frustration. If penetrant doesn’t work after 15 minutes, apply heat with a propane torch (carefully—avoid fuel lines and brake components). As a last resort, cut the old clamp off.
Hanger alignment: Some systems require wrestling rubber hangers into place. Use a lubricant and don’t be afraid to apply significant force—they’re tougher than they look.
Tip positioning: Getting tips perfectly aligned takes patience. Loosen all clamps, adjust by hand, then progressively tighten clamps while rechecking alignment after each adjustment.
Before You Upgrade
Here’s a lesson I learned the expensive way: fix what’s broken before adding upgrades. I spent months chasing down what I thought were minor issues—a radiator leak, an AC compressor on its last legs, and a persistent coolant seep from the cylinder head. I kept putting off the repairs, thinking they could wait while I focused on the fun stuff like exhaust and suspension.
That approach cost me far more in the long run—both in money and downtime. The radiator finally failed on a summer trail run, leaving me stranded. The cylinder head leak turned into a full head gasket job that could have been a simple seal replacement if I’d addressed it early. Address maintenance and repair issues first, then reward yourself with upgrades. Your Jeep will be more reliable, and you’ll actually get to enjoy those modifications instead of worrying about the next breakdown.
Inspect your factory exhaust hangers, clamps, and rubber isolators before installation. If they’re cracked or severely corroded, replace them. A new $400 exhaust hanging on deteriorated 15-year-old hangers defeats the purpose.
Safety Notes
Always use jack stands rated for your JK’s weight. Factory jack points are clearly marked on the frame rails. Never rely solely on a hydraulic jack—they can fail.
Work in a well-ventilated area if running the engine to check for leaks. Exhaust fumes are dangerous in enclosed spaces.
Wear eye protection when working underneath the vehicle, especially when using penetrating spray or removing rusty hardware.
Maintaining Your Axle Back Exhaust
Quality axle back systems require minimal maintenance, but a few simple practices extend their lifespan and keep them looking good.
Check clamps every 6-12 months for tightness, especially after the first month of installation. Thermal cycling causes initial settling, and clamps may need a slight re-torque. Loose clamps allow exhaust leaks that create annoying ticking sounds and reduce performance.
Inspect welds, flanges, and tip condition during routine oil changes. Look for surface rust, cracks in welds, or separation at seams. Stainless steel should maintain its appearance with minimal surface oxidation. If you notice rust blooming on supposedly stainless components, contact the manufacturer—that indicates either poor material quality or a defect covered under warranty.
For JKs driven in winter climates with road salt, rinse the underside of the vehicle periodically to prevent salt buildup on exhaust components. Even stainless steel can develop corrosion when constantly exposed to salt brine.
Heat Management
If you notice heat transfer to the cabin floor or rear cargo area after installing your new exhaust, you may need supplemental heat shielding:
{{PRODUCT_CARD:ece12048-e3e6-4412-a332-1187b01205d1}}
{{PRODUCT_CARD:dae7c24a-3d75-455f-abdc-7af653b05a65}}
Heat wrap is particularly useful if your axle back system routes closer to body panels than the factory exhaust. Apply it according to manufacturer directions, ensuring complete coverage of exposed pipe sections near heat-sensitive components.
Long-Term Durability
Quality stainless steel axle back systems typically last 10-15 years or more with minimal care. Aluminized steel systems might show surface corrosion after 3-5 years, especially in harsh climates, but still remain functional.
The most common failure point is rubber hangers deteriorating from age and heat exposure. These cost $5-$15 each and take minutes to replace—consider them a wear item like wiper blades.
Tips and external surfaces benefit from occasional cleaning with stainless steel polish or simple soap and water. Avoid abrasive cleaners that scratch the finish.
If you’re running an aggressive off-road setup and frequently articulate suspension to the limit, periodically check that exhaust components aren’t contacting the frame, axle housing, or other hard points during compression. Contact points create wear spots that can eventually develop into holes.
Frequently Asked Questions
Q: Will an axle back exhaust add horsepower?
A: Realistically, expect 2-5 horsepower gains at most from an axle back system alone. The factory JK exhaust isn’t particularly restrictive in the rear section, so replacing just the muffler and tailpipe provides minimal flow improvement. You won’t feel this small increase during normal driving. If you want noticeable performance gains, you’ll need a full cat-back system or headers combined with a tune.
Q: Do I need a tune after installing an axle back exhaust?
A: No, a tune is not required for an axle back exhaust. You’re not changing anything upstream of the catalytic converters, so oxygen sensors and fuel mapping remain unaffected. The ECU doesn’t need recalibration. This is one of the key advantages of an axle back system—it’s a true bolt-on modification with no additional tuning costs or complexity.
Q: Will an axle back system cause drone?
A: It depends on the specific system design and your driving conditions. Straight-through mufflers with minimal baffling tend to produce more drone at highway cruising speeds (typically 65-75 MPH). Chambered muffler designs generally reduce drone while still providing an aggressive sound during acceleration. If you frequently drive highway speeds, prioritize systems specifically marketed as “drone-free” or read detailed owner reviews focusing on highway cruising experience, not just parking lot sound clips.
Q: How long does an axle back exhaust last?
A: A quality stainless steel axle back system typically lasts 10-15+ years with minimal maintenance. Aluminized steel systems may show surface corrosion after 3-5 years, particularly in salt-belt states, but often remain functional for 7-10 years. Most reputable manufacturers offer lifetime warranties covering defects and corrosion, so longevity shouldn’t be a concern if you choose an established brand. The only wear items are rubber hangers, which cost under $15 and take minutes to replace.
Q: Can I install an axle back exhaust on a lifted Jeep with larger tires?
A: Yes, axle back systems work fine on lifted JKs. However, verify tip placement and clearance if you’re running 35”+ tires. Some side-exit configurations position tips where they can contact tires during full suspension compression or articulation. Check fitment notes and owner photos of similar builds before purchasing. If clearance is tight, consider a tucked design or rear-exit configuration.
Q: Are axle back exhausts legal in my state?
A: Axle back systems don’t modify emissions equipment, so they’re generally legal in all 50 states. You’re not removing catalytic converters or oxygen sensors—just changing the muffler and tailpipe design. However, some states and municipalities have noise ordinances that limit maximum exhaust sound levels. Extremely loud straight-through systems could potentially violate these ordinances. Check your local regulations if you’re concerned, but most chambered axle back systems stay well within legal sound limits.
If you’re considering broader modifications, review the differences between JK and JL Wranglers to understand how exhaust systems differ between generations.
Final Thoughts on Choosing an Axle Back Exhaust for Your JK
An axle back exhaust delivers noticeable sound improvement and visual appeal without the complexity or cost of more extensive exhaust modifications. The key is matching the system to your driving style—daily drivers benefit from drone-reducing chambered designs, while weekend trail rigs can embrace more aggressive straight-through systems.
Focus on quality materials, particularly 304 stainless steel if you off-road or encounter road salt. The difference between a $250 aluminized system and a $400 stainless system is measured in years of service life and corrosion resistance. Installation is straightforward enough for most DIYers with basic tools and an afternoon.
This reminds me of my regearing experience. I ran stock 3.21 gears with 35” tires for four months, constantly struggling with sluggish acceleration and lugging the engine on trails. Everyone told me to regear, but I kept putting it off, thinking I could live with it. When I finally bit the bullet and installed 4.56 gears, the transformation was immediate—throttle response, highway drivability, and trail performance all improved dramatically. The lesson: sometimes the right upgrade, done correctly for your specific setup, makes all the difference.
For a complete overview of exhaust upgrade options beyond axle back systems, explore our guide to other exhaust system options for the JK. And if you’re just beginning your JK modification journey, our complete JK buyer’s guide covers everything from model year selection to must-have upgrades.
Choose a system that matches your sound preference, invest in quality materials, and install it properly. Your ears—and your Jeep—will thank you every time you turn the key.
Get the Free JK Build Planner
Complete PDF with mod checklists, gear ratios, tire sizing charts, and budget worksheets. Everything you need to plan your JK build.
No spam. Unsubscribe anytime. By subscribing, you agree to our Privacy Policy.
Jeep JK Guide
We're JK owners who've been building, breaking, and fixing Wranglers for years. Everything here is tested on our own rigs - no sponsored fluff, just honest recommendations.
Learn more about us →Get the JK Build Planner
Free PDF with complete build checklists, gear ratios, and tire fitment guides.
By subscribing, you agree to our Privacy Policy.
Related Articles
Best Diff Breathers for Jeep JK: Extended Vent Kits & Water Fording Protection
Best Winch For Jeep JK Unlimited: Complete 2024 Guide
Expert guide to choosing the best winch for your JK Unlimited. Learn capacity sizing, synthetic vs steel rope, installation tips, and essential accessories for trail recovery.
Best All Terrain Tires For Jeep Wrangler JK
Find the perfect all-terrain tires for your JK Wrangler. Expert guide covering fitment, sizing, performance, and real-world testing from the JK community.