Jeep JK Control Arm Upgrades: When OEM Arms Fail & Which Aftermarket Arms Last
Jeep JK Control Arm Upgrades: When OEM Arms Fail & Which Aftermarket Arms Last
Your JK’s control arms are doing something critical right now: they’re holding your axle in the exact position your suspension geometry depends on. They’re not glamorous. Nobody shows them off at the trail head. But the moment they start to wear, or the moment you lift that Jeep, they become impossible to ignore.
A Jeep JK control arm upgrade means replacing the factory stamped-steel or cast control arms with stronger, usually adjustable aftermarket units that correct geometry, restore caster angle, and survive the stress that lifted rigs and serious off-road use demand. The question isn’t whether they’re stronger — it’s whether you actually need them, and if you do, which ones won’t fail on you six months into a build.
At stock ride height? Probably not. The factory arms work fine on a bone-stock JK. The moment you add lift — anything 2.5 inches or more — the factory arms can’t hold the axle where it needs to be. Caster goes wrong. Driveline angle shifts. Handling gets sloppy. And if your JK has significant mileage on those OEM bushings, worn-out arms can trigger death wobble even before you add a lift kit.
This guide covers the failure signs that tell you it’s time to replace, the lift-height thresholds where upgrades stop being optional, the real differences between bushing materials based on how you actually drive, and the specific brands and specs worth your money.
Affiliate Disclosure: JeepJK Guide earns a small commission on qualifying purchases made through links on this page, at no extra cost to you. This does not influence our recommendations.
What JK Control Arms Actually Do (And Why Factory Ones Work at Stock Height)
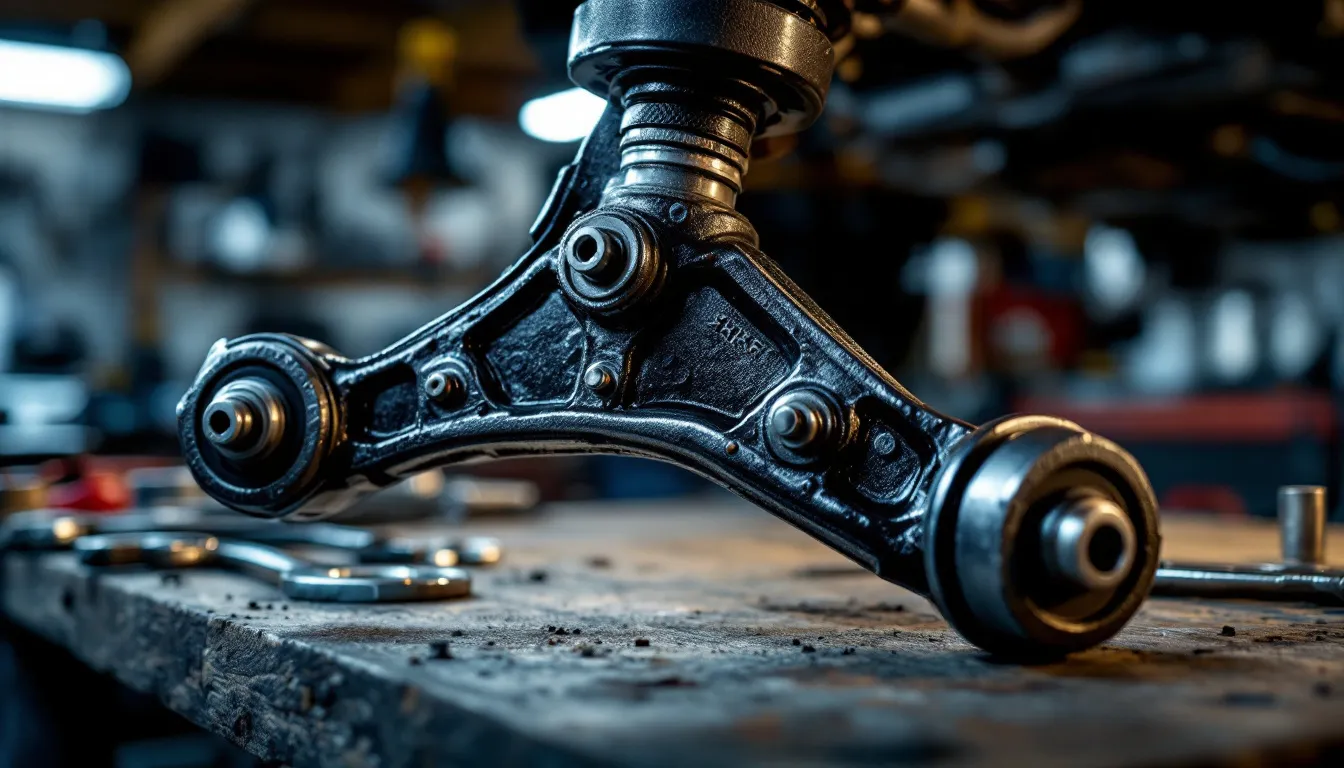
Control arms are the pivoting links that connect your JK’s axle to its frame. They do three critical jobs: control fore-aft axle position, limit axle travel, and maintain the correct caster angle as your suspension compresses and extends through its full range of motion.
The stock JK runs a four-link front suspension and a triangulated four-link rear. At factory ride height, caster typically sits somewhere in the 4–7 degree range — the exact number varies by model year and trim level. That angle matters because caster is what gives your steering that self-centering feel and makes the Jeep track straight at highway speed. When caster drops significantly below spec, the JK wanders, the steering feels vague and disconnected, and death wobble becomes far more likely.
Lifting changes everything. A 2.5-inch lift can pull caster down to 2–3 degrees if you don’t compensate. The factory arms can’t correct for this because they’re fixed-length. Chrysler designed them for one ride height and one ride height only — which is fine when that’s the only height the JK will ever sit at.
Why are they “good enough” at stock height? Because they were engineered for exactly that use case. The rubber bushings are soft enough to keep the ride smooth on pavement. The stamped steel is adequate for the loads a stock suspension sees. The geometry is dialed in at the factory. It’s not fancy, but it works. You’re not paying for sophistication — you’re paying for a suspension that does its job without drama.
The moment you start modifying, you need something different. See the Rubicon vs Sport vs Sahara suspension differences guide to understand how factory arms vary across trim levels before you commit to replacements.
When Your JK’s Control Arms Start to Fail: What to Listen and Feel For
Your JK will tell you when the factory control arms are struggling — if you know what signals to watch for. The most common early warning is a clunking or knocking noise from the front axle over bumps or during tight turns. That sound is almost always a worn bushing allowing metal parts to contact when they shouldn’t.
Listen and look for these five symptoms:
- Clunking or popping over bumps — A deteriorating rubber bushing (front or rear arm) allows the arm to move where it should be locked. You’ll usually hear this first on the driver’s side front arm, and it gets worse as the bushing wears.
- Steering wander or vague on-center feel — Excessive play in the bushings lets the axle shift longitudinally unpredictably. The steering wheel won’t stay centered, and the JK feels like it’s searching for a lane on smooth highway sections.
- Death wobble — The JK’s infamous violent shimmy is rarely caused by one thing alone, but worn control arm bushings are a frequent contributor. If your Jeep shakes violently at highway speed after hitting a bump, the control arms are on your inspection list along with the track bar and ball joints.
- Uneven or accelerated tire wear — If the axle can’t hold its position consistently, your tires wear in patterns that no alignment shop can fix.
- Visual cracking, tearing, or separation at the bushing — Jack the JK up and grab each arm by hand. Look at where the bushing sleeves sit. Any visible rubber tearing, bulging, or bushings that have walked out of the bore mean it’s replacement time.
The biggest diagnostic mistake: assuming death wobble is a tire balance problem until you’ve physically inspected every bushing on the front suspension. Check the used JK pre-purchase inspection checklist if you’re evaluating a used rig, and refer to the Jeep JK maintenance schedule for inspection intervals.
OEM rubber bushings on higher-mileage JKs begin showing wear naturally. Off-road use, deep water crossings, and heavy trail use accelerate this dramatically compared to pavement-only driving.
The Lift Height Threshold: When Do Control Arm Upgrades Actually Become Necessary?
Here’s the clearest rule I’ve found after digging through forums, build logs, and real-world JK setups: at lifts under 2 inches, OEM arms with an alignment correction usually hold; at 2.5 inches and above, adjustable control arms become strongly recommended; at 3.5 inches or more, they’re essentially mandatory.
Breaking it down by lift height:
- 0–2 inches: Factory arms manage geometry reasonably well. A solid alignment and possibly a cam bolt or adjustable track bar is enough for most owners. Your OEM bushings need to be in decent shape, though.
- 2–2.5 inches: This is the grey zone where things get uncertain. Fixed-length OEM arms start struggling here, especially if you’ve added heavier tires or plan to spend serious time on trails. Many owners run into vague steering and mild death wobble risk in this range.
- 2.5–3.5 inches: Adjustable control arms move from recommended to strongly recommended. You need active caster correction, and the longer suspension droop at this height stresses OEM bushings harder than they’re built to handle.
- 3.5 inches and above: Aftermarket adjustable arms are not optional. The geometry deviation from stock is too large for factory arms to manage, alignment shops literally can’t dial things in without adjustable ends to work with, and bushing failure under trail stress becomes a real likelihood.
I spent three months researching lift heights before committing to my own build, reading every forum thread and owner review I could find. The JK community is passionate about this topic — and divided on what works. The 4-inch lift crowd insisted I’d regret anything smaller. The stock-height guys said anything over 2 inches was overkill. I landed on 2.5 inches with adjustable control arms, and it’s been the smartest suspension decision I’ve made.
Here’s why: 2.5 inches clears 35-inch tires without cutting fenders. The ride quality with good shocks is actually better than stock — the factory JK suspension is notoriously bouncy and dive-heavy on bumpy pavement. Critically, 2.5 inches doesn’t murder highway stability the way taller lifts do. I’m still cruising at 65+ mph without the steering feeling disconnected or vague.
The adjustable control arms were the upgrade I almost skipped. I’m genuinely glad I didn’t. Being able to dial in the exact caster angle after the lift made alignment straightforward, and three years in, the geometry still feels locked in. That precision is what separates a well-executed build from one you’re constantly chasing problems with.
For the full decision tree on lift heights, the JK lift kit guide walks through every tier in detail.
Upper vs Lower Control Arms: They’re Not Interchangeable, and They Don’t Do the Same Job
Your JK has both upper and lower control arms at the front axle — and another pair at the rear. They look similar, but they work very differently. Don’t assume one can substitute for the other.
Lower control arms carry the majority of the axle’s longitudinal load, resist braking forces, and largely determine pinion angle at the differential. They’re longer, heavier, and absorb more of the trail abuse.
Upper arms primarily control axle rotation and handle geometry correction when you lift. They’re shorter, sit at sharper angles, and the adjustable ends on quality kits let you dial caster back into spec after adding height.
For a JK running a 2.5-inch lift or more:
- Jeep Wrangler JK upper control arms are where you make your caster corrections happen. Most adjustable kits let you dial the upper arm length to bring caster back into factory spec after lifting. The uppers work through a larger range of angularity during suspension travel, which is why they’re more sensitive to geometry.
- Jeep JK lower control arms handle the heavier loads and affect pinion angle — the angle at which your driveshaft meets the differential. Get pinion angle wrong after a lift and you’ll feel vibration in the floorboards at highway speed (typically 55–65 mph). It’s not dangerous, but it’s annoying and it tells you the geometry isn’t dialed in.
One detail that catches people: the 4-door JK Unlimited uses longer rear control arms than the 2-door JK because of the longer wheelbase. Rear lower arms on a JKU are meaningfully longer than those on a standard JK — don’t assume arms sold as “JK-compatible” fit both body styles without verifying the specific part listing against your model.
For how arm choices interact with regearing and driveshaft geometry, the JK regearing guide connects all those pieces.
Adjustable vs Fixed Aftermarket Arms: Which One Do You Actually Need?
The answer is simple if you’re lifting: if you’re going 2.5 inches or more, buy adjustable arms. Fixed aftermarket arms are stronger than OEM but they still lock you into a single geometry, just like factory arms — only with better bushing material.
Fixed arms make sense in two specific scenarios: you’re replacing worn OEM arms on a stock-height or mildly lifted JK and your budget is tight, or you’re building a dedicated trail rig where caster perfection matters less than outright strength and durability.
Adjustable arms — typically with threaded tube ends or a tie-rod-style adjuster — let you dial exact arm length after installation, which translates directly into caster angle correction. You set the length, lock the jam nut, drive to an alignment shop, and have them dial in a four-wheel alignment. The result is a JK that tracks straight, steers naturally, and doesn’t fight you on the highway.
But here’s where the real-world divergence happens: bushing material. This is where owner experience outpaces any manufacturer catalog. After digging through build threads and talking to owners across multiple JK communities, the consensus on bushing materials looks like this:
- Rubber: Quiet, OEM-like ride quality, but wears faster under trail abuse and water exposure. Best for mostly-street rigs or owners who don’t wade water regularly.
- Polyurethane (poly): More resistant to wear than rubber, holds up better on trails, but transmits more NVH (noise, vibration, harshness) into the cab. Requires periodic greasing or it’ll start squeaking.
- Johnny Joints / Heim joints: Metal-on-metal ball-and-socket articulation, zero compliance, maximum adjustability and durability. The right call for serious off-road builds, but you’ll feel every ripple in the road and hear every articulation cycle on technical terrain.
The best guidance on bushing choice comes from owners who’ve run multiple sets through multiple seasons — not from a price list. Reach out to your local trail club, ask what people are running, and ask what they’d change. That real-world feedback is worth more than any spec sheet.
For how arm choice affects your drivetrain geometry after a lift, see dialing in your JK’s drivetrain after a lift.
Control Arm Options: The Quick Comparison
Here’s how the main control arm categories stack up. All prices are approximate per-arm retail — full kit pricing (all four corners) will be higher and varies by brand.
| Arm Type | Best For (Lift Range) | Bushing Material | Adjustable? | Approx. Price Range (per arm) | Key Trade-off |
|---|---|---|---|---|---|
| OEM Replacement (rubber) | 0–1.5 inches | Rubber | No | $40–$80 | Quiet ride; limited lifespan under trail use |
| Fixed Aftermarket (poly) | 0–2 inches | Polyurethane | No | $80–$150 | Stronger than OEM; still no geometry adjustment |
| Adjustable (poly bushing) | 2–3.5 inches | Polyurethane | Yes | $120–$200 | Caster-correctable; some NVH increase |
| Adjustable (Johnny Joint) | 2.5–6 inches | Metal/Heim | Yes | $180–$350 | Maximum articulation; harsh on-road feel |
| Heavy-duty Adjustable (DOM tube) | 3.5 inches+ | Johnny Joint / Heim | Yes | $250–$450 | Strongest option; unnecessary for street builds |
What Actually Matters When You’re Comparing Control Arms
When you’re narrowing down which control arms to buy, a few specifications separate arms that last from arms that fail on the trail.
Bushing type and adjustability range are the two most important criteria. An arm with a generous adjustment range (typically ±1 to 2 inches of length adjustment from center) gives your alignment shop real room to work, especially if your lift height is at the edge of a manufacturer’s designed range.
Wall thickness on the arm tube itself matters too. DOM (Drawn Over Mandrel) steel tubing with a 0.25-inch or greater wall is the standard on quality arms. Thinner-wall arms can flex under load, which defeats the entire purpose of spending money on an upgrade.
On the brand side, these companies have solid track records in the JK community:
- Currie Enterprises — Known for precision-engineered Johnny Joint ends and fitment that works first time. A top-tier choice for serious builds.
- TeraFlex — Wide product range covering everything from entry-level adjustable arms to heavy-duty trail-specific kits. Strong fitment history across JK and JKU model years.
- Rubicon Express — Competitive pricing on adjustable kits without cutting corners on engineering. A solid mid-range option.
- Synergy Manufacturing — Highly regarded in the JK community for engineering depth and rigorous fitment verification before products hit the market.
- Rock Krawler — Premium arms with maximum articulation focus. Popular with owners building dedicated trail rigs.
- JKS Manufacturing — Particularly strong on adjustable quick-disconnect and geometry correction products.
Before you finalize your purchase, confirm whether the kit is sold as front-only, rear-only, or all-four-corners — and verify fitment for your exact model year. Early 2007–2011 JKs and later 2012–2018 JKs can have minor mounting differences that matter. The complete JK lift kit guide cross-references arm compatibility by year. If you’re also shopping tires, best 37-inch tires for the JK covers what suspension geometry you’ll need to run that size cleanly.
Installing JK Control Arms: The Critical Steps You Can’t Skip
Yes, you can install JK control arms yourself if you have mechanical ability and the right tools. You’ll need a floor jack, quality jack stands, a torque wrench, and honest access to an alignment shop after the install. Here’s the single most critical rule: torque all control arm fasteners with the suspension at ride height, not while the axle is hanging.
Why does this matter? Torquing at full droop locks the bushings in a preloaded position. When the suspension returns to ride height, those bushings fight against the arm’s natural rotation — which accelerates bushing wear dramatically and can cause premature failure even with new arms. Always lower the JK onto the ground (or simulate ride height with jackstands under the axle) before doing final torque.
Here’s the installation sequence:
- Lift the JK and support the frame on jack stands. Leave the axle supported on a separate jack so you can control its vertical position.
- Loosen and remove the OEM arm bolts — typically a single bolt at the frame bracket and one at the axle bracket. Write down the factory arm length before removal.
- Set your new arm’s adjustment to match the factory arm length as your starting baseline, then thread the jam nut to hold position.
- Install the new arm loosely — both bolts in place but not fully torqued. Don’t tighten anything yet.
- Repeat for all arms being replaced before you torque any of them.
- Lower the JK to ride height (or raise the axle jack to simulate laden ride height).
- Torque all fasteners to manufacturer spec — consult your arm manufacturer’s spec sheet for exact values, as they vary by bolt diameter and joint type.
- Schedule an alignment within the first 50 miles. Have them set caster, camber, and toe to spec using your new adjustable arm length.
For reference torque values on other suspension fasteners, the JK torque spec reference is a useful cross-check.
Frequently Asked Questions: JK Control Arm Upgrades
Do I need to upgrade control arms with a 2-inch lift on my JK?
At 2 inches, you’re in a grey zone. Many owners run stock arms successfully at this height with a quality alignment, especially if the OEM bushings are in good condition. If you’re adding heavier tires (33s or larger) or planning to trail the JK regularly, stepping up to adjustable arms at 2 inches gives you more geometry tuning room and better long-term durability. The investment pays for itself in suspension confidence.
What exactly is death wobble and are control arms the cause?
Death wobble is a violent, high-frequency shimmy that typically triggers after hitting a bump at highway speed (45–70 mph). It’s almost never caused by one worn component — it’s usually a combination of worn track bar bushings, loose control arm bushings, ball joint play, and tire imbalance all contributing together. Worn control arm bushings are a frequent contributor, but replacing arms alone won’t cure it if other components are also worn. Inspect the entire front suspension as a system. For deeper dive, see JK wheel and suspension upgrades.
How long do quality aftermarket JK control arms actually last?
Quality aftermarket arms with Johnny Joint or heim joint ends can outlast the Jeep itself under normal off-road use, though the joints themselves may need rebuilding or replacing every 3–5 years depending on how hard you push them. Polyurethane-bushed arms typically outlast OEM rubber by a significant margin but need periodic greasing (annual or every 10,000 miles) to prevent squeaking and premature wear. Exact lifespan varies widely based on trail use frequency, water crossing depth, and how diligent you are with maintenance.
Can I run a JK with just rear control arm upgrades and leave the fronts stock?
You can do it, but it’s not ideal if you’re managing geometry after a lift. The front control arms handle most of the caster correction and do more work on steering feel and highway stability. Rear arm upgrades alone won’t address front-end wander or death wobble risk. That said, if your front arms are in good shape and you’re specifically chasing rear driveshaft vibration, upgrading the rear arms first is a reasonable starting point for troubleshooting.
Do adjustable control arms affect ride quality on the road?
They can, depending on bushing material. Adjustable arms with rubber or soft poly bushings ride very similarly to OEM. Arms with hard poly or Johnny Joint ends transmit more road noise and vibration into the cabin. For a dual-purpose street-and-trail JK, poly bushing adjustable arms offer the best compromise between comfort and durability. Johnny Joints feel harsh on pavement but give you maximum articulation on rocks.
Do I need a full four-corner kit or can I do front/rear separately?
You can do it in stages. Many owners replace the front first (where caster issues show up most obviously after a lift), then address the rear if vibration or wander persists. That said, doing all four corners at once gives you the opportunity to set the entire suspension geometry in one alignment visit, which is cleaner. If budget is the limiting factor, front-first is the smart sequence.
Final Thoughts: Making the Control Arm Decision
The core takeaway: control arm upgrades aren’t optional at lifts of 2.5 inches or more — they’re the difference between a JK that tracks straight and one that shakes, wanders, and eats tires.
Here’s the decision framework:
- Stock height or under 2 inches: OEM arms with a quality alignment usually work fine. Monitor bushing condition closely.
- 2–2.5 inches: Adjustable arms are strongly recommended, especially if you’re running larger tires or planning regular trail use.
- 2.5 inches and above: Aftermarket adjustable arms are effectively mandatory. You won’t dial in proper geometry without them.
- Any height with visibly worn bushings: Replace now. Don’t wait for death wobble.
Choose bushing material based on your actual driving patterns: rubber or soft poly for street-focused builds, Johnny Joint or heim for dedicated trail rigs where articulation matters more than ride smoothness.
Your next moves: work through the best JK lift kits guide to pair the right suspension kit with your control arm choice. And if you’re stepping up to larger tires, the how to regear your JK after a lift guide connects the drivetrain side of the equation.
The three months of research I did before committing to my own build felt excessive at the time. Looking back three years in, with a suspension that still feels right and arms that haven’t moved, it was time well spent.
Get the Free JK Build Planner
Complete PDF with mod checklists, gear ratios, tire sizing charts, and budget worksheets. Everything you need to plan your JK build.
No spam. Unsubscribe anytime. By subscribing, you agree to our Privacy Policy.
Allan
I'm Allan. I bought a 2014 Jeep Wrangler JKU and I research the hell out of every mod before I touch it. Everything here is tested or deeply researched on my own rig - no sponsored fluff, just honest findings.
Learn more about me →Get the JK Build Planner
Free PDF with complete build checklists, gear ratios, and tire fitment guides.
By subscribing, you agree to our Privacy Policy.
Related Articles
Coilover Suspension vs Traditional Lift Kit Jeep Jk Comparison
A coilover suspension is a single-unit shock absorber and coil spring assembly that replaces your JK's factory suspension components, offering height...
Best Steering Stabilizers for Jeep JK: Fix Death Wobble & Improve Handling
Affiliate Disclosure: JeepJK Guide earns a commission from qualifying Amazon purchases at no extra cost to you. We only recommend products we've...
JK Lift Kit vs Leveling Kit: Which Is Right for Your Jeep Wrangler?
A leveling kit corrects the JK's factory front-to-rear rake with low-cost spacers, while a lift kit raises the entire vehicle with new springs, shocks,...